The marvels of mulch – and other water-saving tips

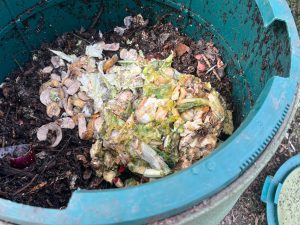
Mature compost laid as layers of mulch will benefit your garden all year round, but never more than in dry spells.  

 Every summer, hosepipe bans and water use restrictions across the south of England are seasonal reminders of the need to conserve water.  This year, the UK experienced its driest February in 30 years.

 If you have a dry garden you’ll be glad of the protection that mulch offers plants in retaining water and cutting down on evaporation. This means you don’t have to water as frequently.

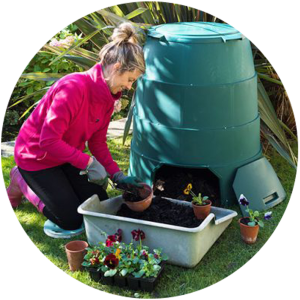
Mulch the soil after a spell of rain with mature compost to retain moisture. Lay the layers at least 5cms thick after first removing weeds. As it decomposes and is taken into the soil by worms and other organisms, the compost feeds plants and micro-organisms in the soil. Gardeners also appreciate the neat weed-free appearance that mulch creates.

 As well as retaining moisture in summer, mulch also helps rain to penetrate the soil in winter as well as protecting the roots of plants. It also prevents weeds and deters pests.  

 Mulch can be applied at any time around established plants or new plantings. At the beginning of the growing season mulches serve to warm the soil by helping it to retain heat which would be lost at night.

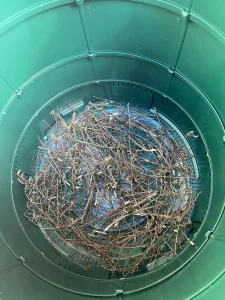
Apart from compost, other popular organic mulches are shredded wood or bark, leaf mould and pine needles. For drought-tolerant plants, non-organic mulch such as crushed stone, slate or gravel is ideal.  

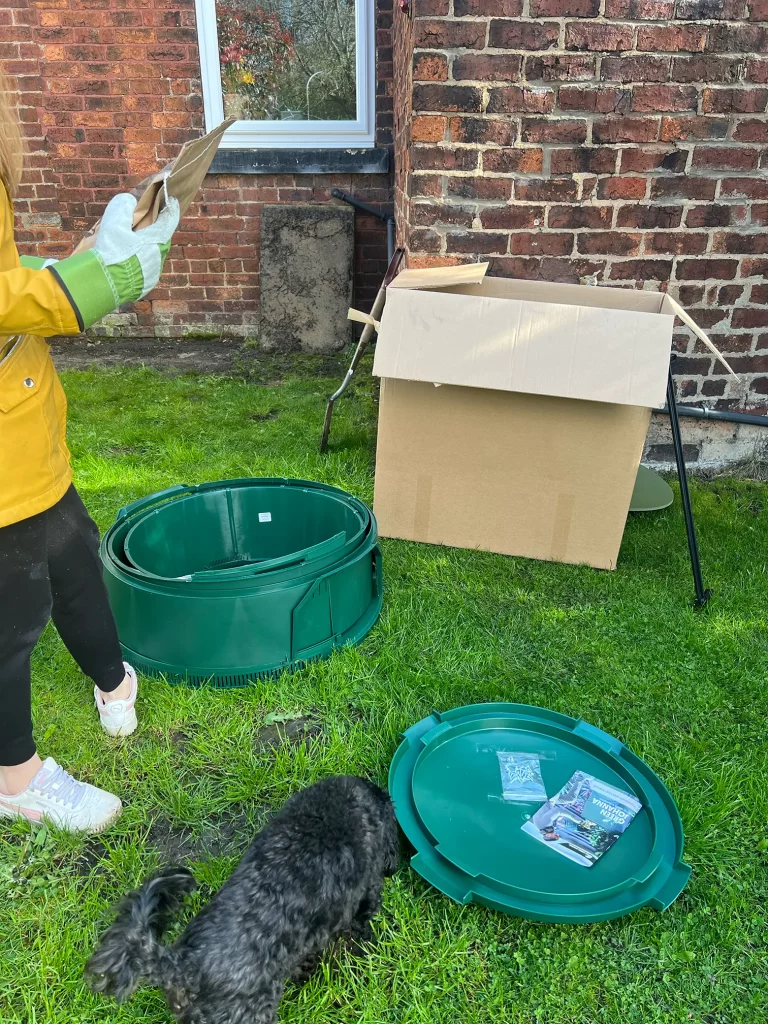
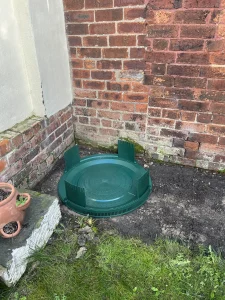
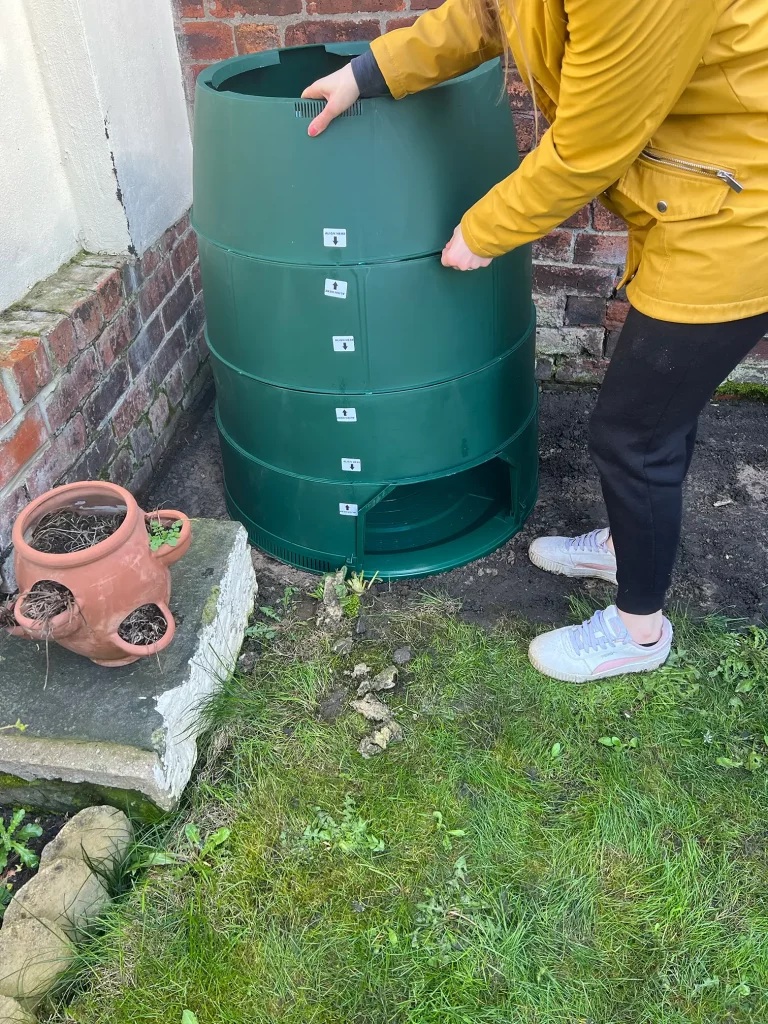
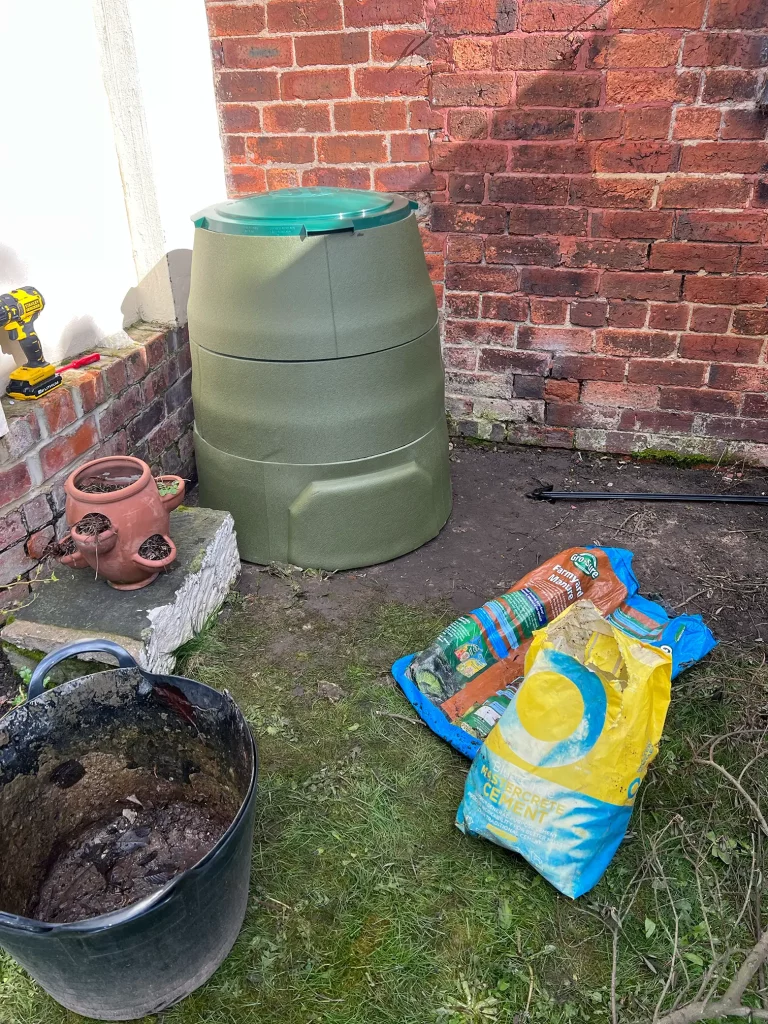
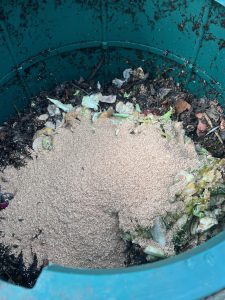
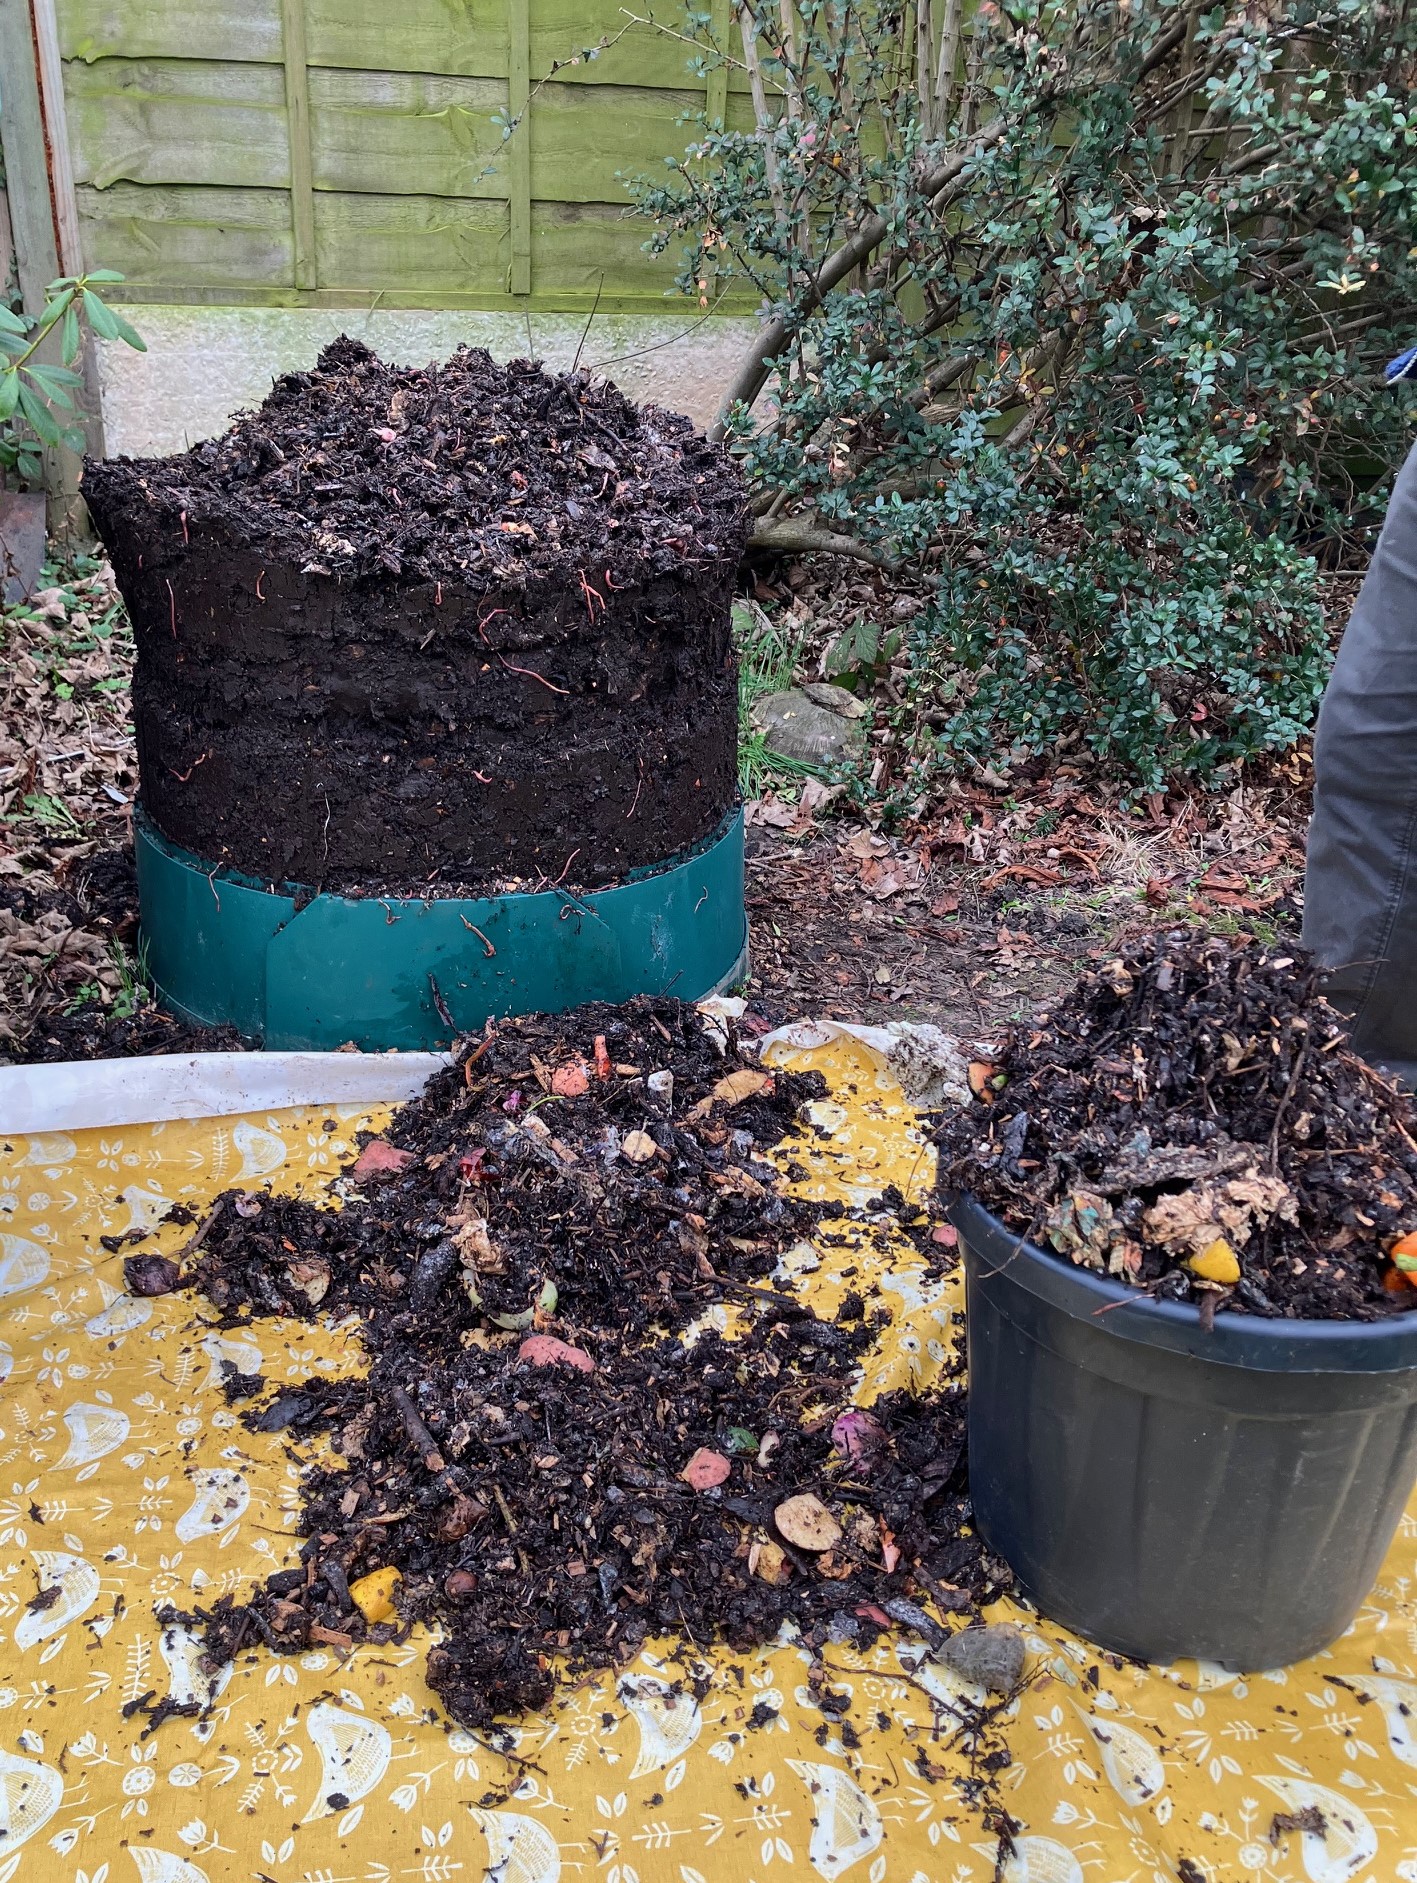
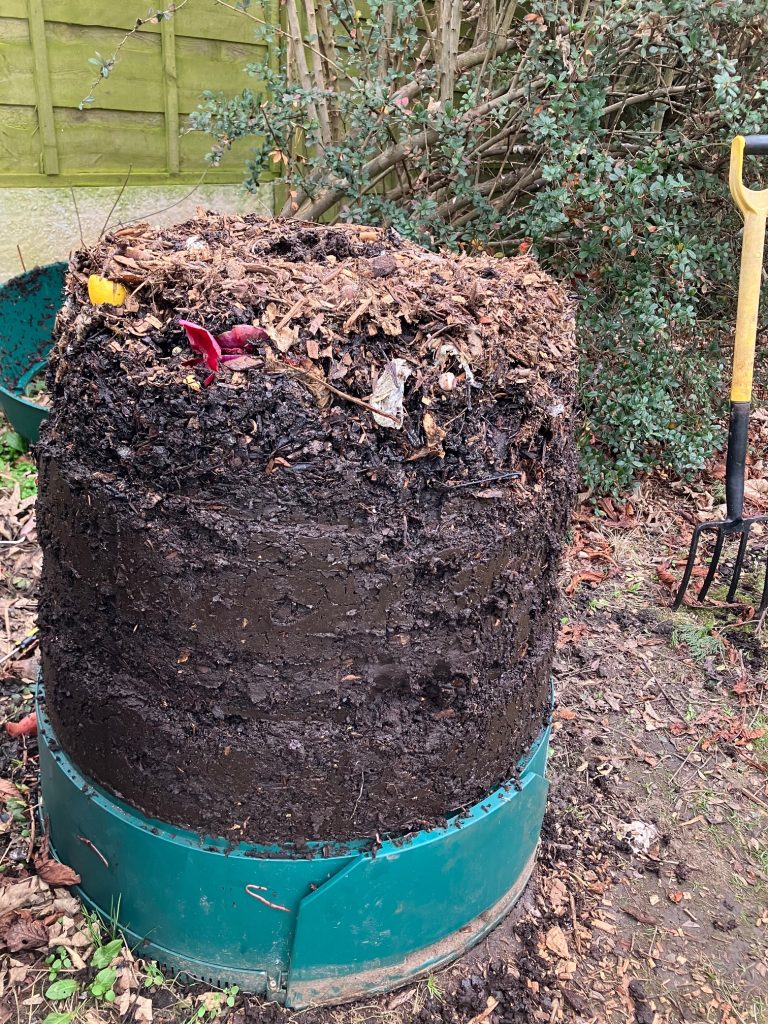
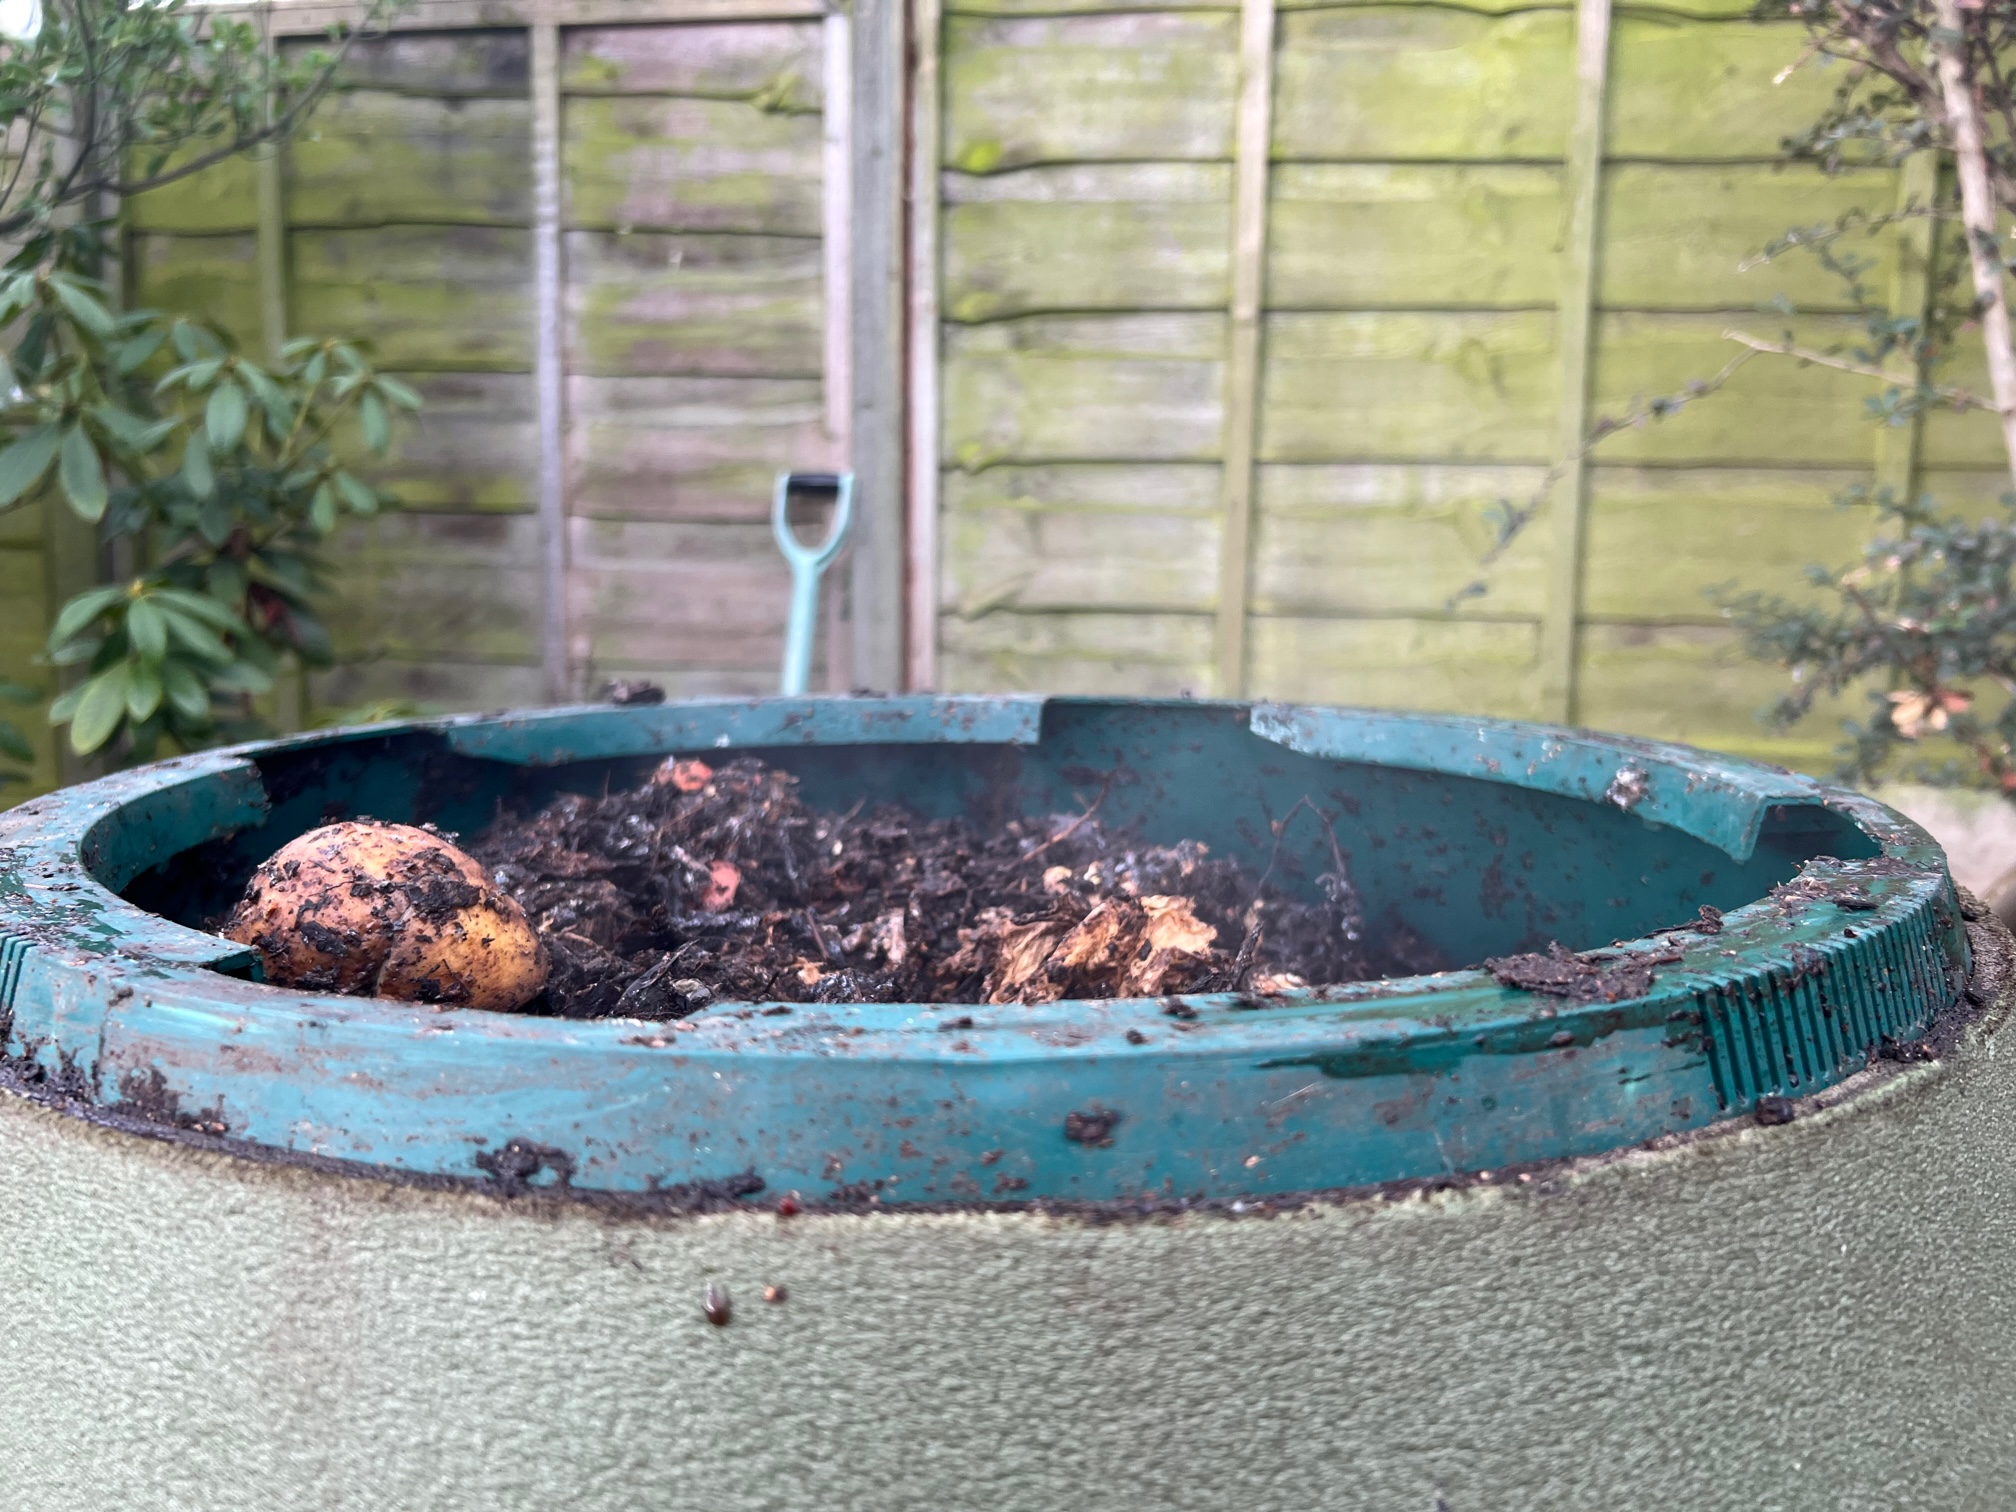
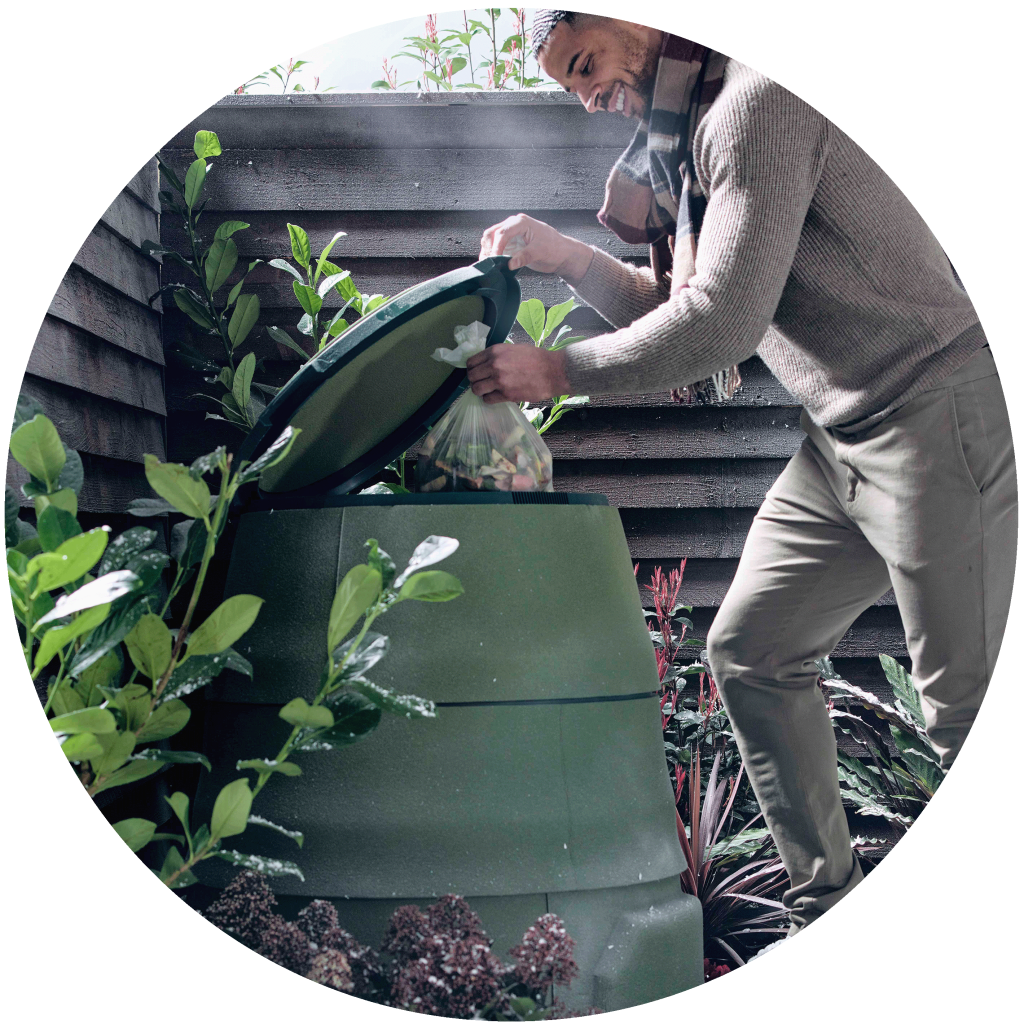
Many of our customers tell us they plan their composting year so they’ll have plenty of ready compost in the spring. Some have two (or even three) Green Johannas so that one can be left for its contents to mature for longer, turning into nutrient-rich humus, while the other Johanna is kept active receiving fresh waste.    

The difference between compost and humus is that compost is still actively decomposing, whereas humus has almost completely decomposed.  Humus is rich in nutrients essential for plant growth and also improves compacted soils by making them looser.

Other drought-proofing steps in the garden:

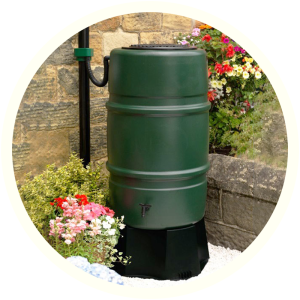
  • When it does rain make sure you catch every drop with a water butt coupled up to a drainpipe on the house, shed, garage and/or greenhouse.
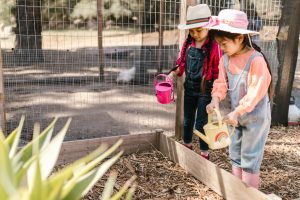
  • Create water collection points around your garden by digging buckets or bowls into the ground to collect rainwater. You can then fill up your watering can on the spot.
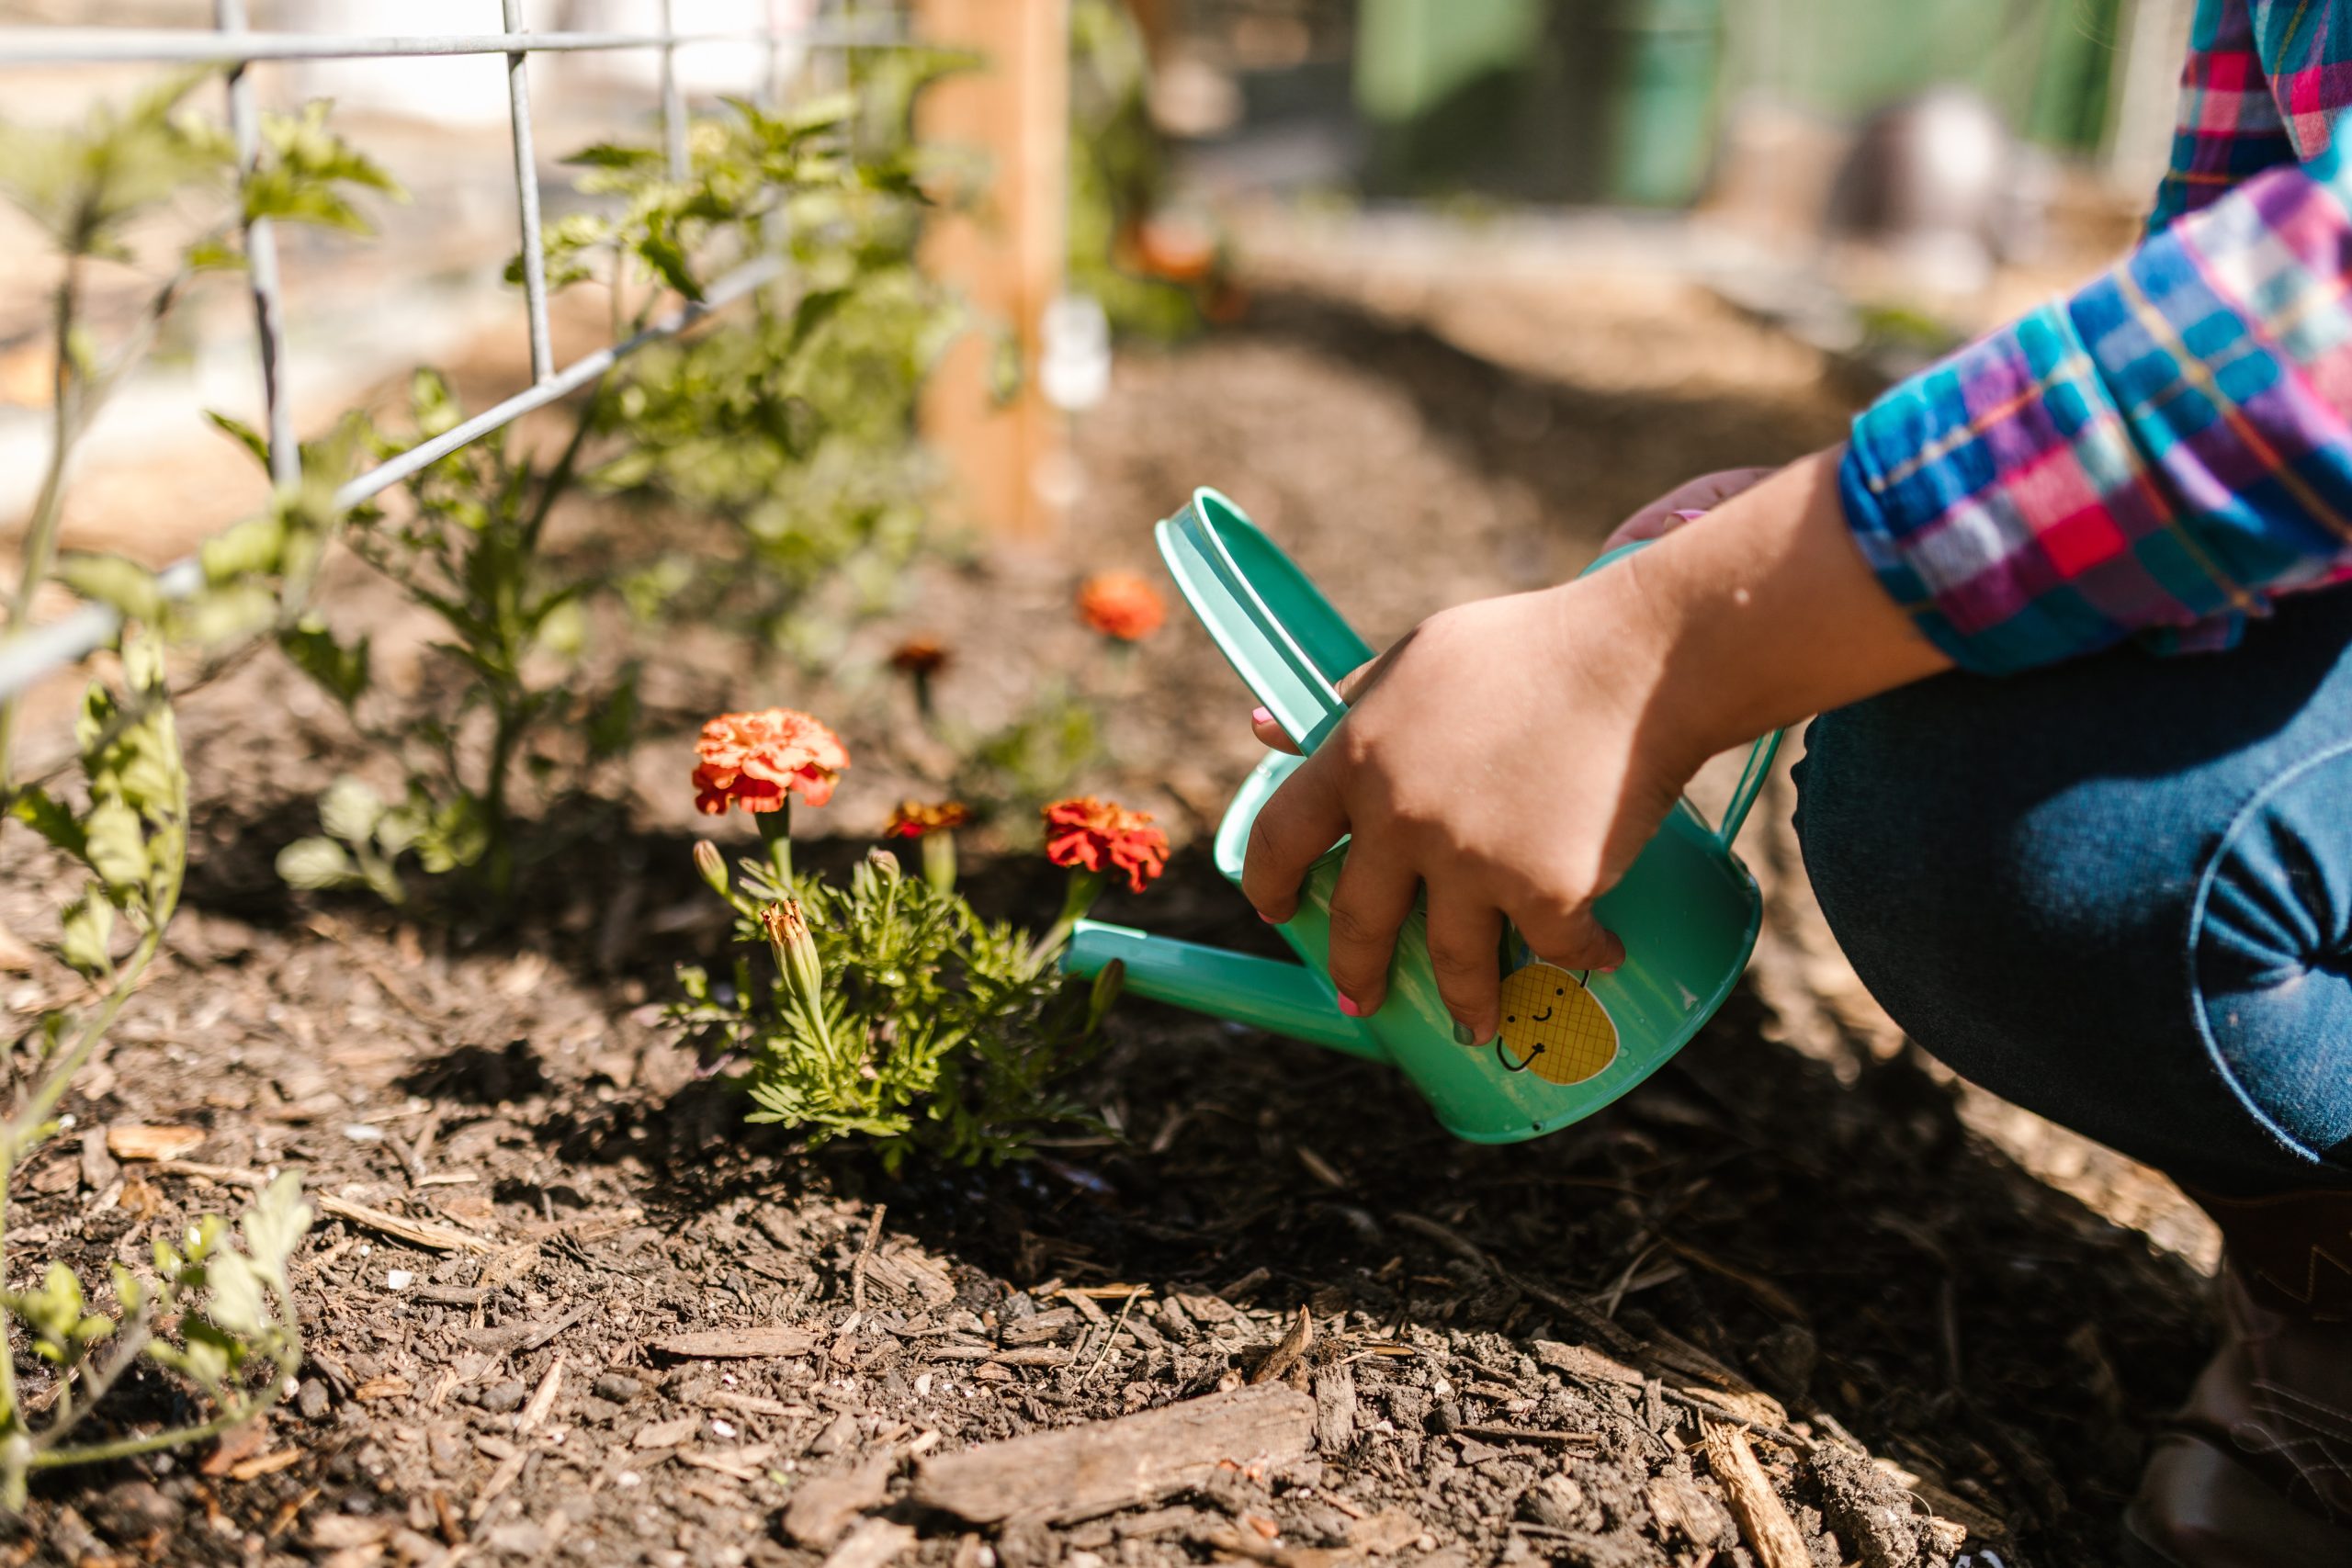
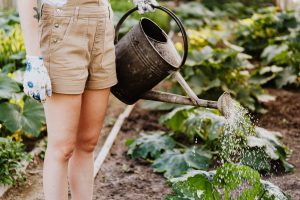
  • Don’t waste precious water by sprinkling it on foliage – focus instead on the roots so you get water right to the base of the plant. Use a watering can rather than a hose or sprinkler.
  • Allow plants to go some days without water so they become resilient and able to weather dry spells. They will send their roots deeper into the soil, tapping into moisture underground. *
  • Giving plants a good soak once a week is better than a light watering every day and also saves time.
  • Always water in the cool of the early morning or just as the sun goes down, giving it chance to soak into the soil without it evaporating in the sun.
  • Don’t fertilise when it’s hot and dry as this can make conditions worse. Plants will need even more water to be able to absorb and process the fertiliser. An influx of nutrients also makes the plants want to grow, putting them under more stress.
  • Keep plants in hanging baskets and containers alive by moving them to shaded areas temporarily.  
  • If plants are scorched don’t over-water as this can drown a struggling plant from the roots up. Move struggling plants to a cool sheltered spot, watering gently and mulching. Cut off heat-damaged parts as these can encourage pests.
  • Remember to remove weeds from planted areas as they will compete for soil moisture. Weeds thrive in hostile environments, such as drought. When you’re planting, plant thickly – this helps to reduce moisture evaporating from the soil and creates ground cover so there are fewer opportunities for weeds to root.
  • Cultivate drought-proof areas with plants such as orange and yellow Californian poppies, salvias, lavenders, pelargoniums and grasses. If it doesn’t rain after the first months of planting, most drought-tolerant plants will need watering so that they settle in.
  • Create areas of shade by adding walling, fences and hedges. These will offer shelter from the sun but also in winter protect plants from frost and snowfall.
  • Focus on watering the plants that need it most – such as edible crops, anything you’ve planted recently and plants in containers.
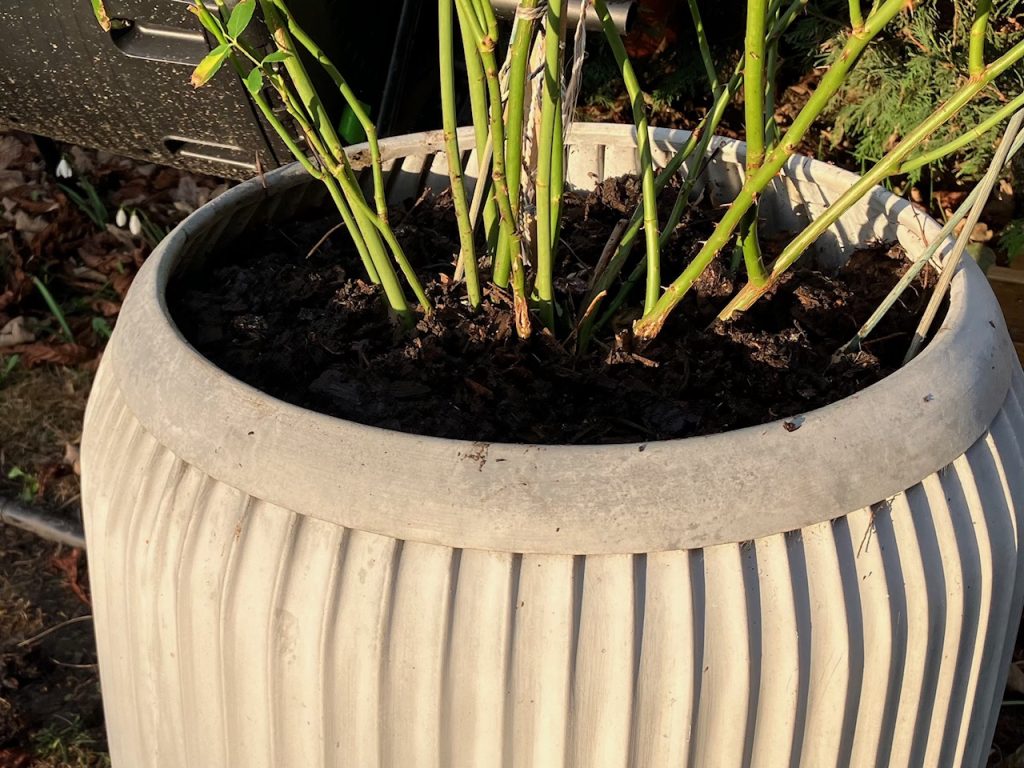
  • Terracotta pots will dry out more quickly than ceramic, metal and plastic, so line the sides with old compost bags before planting.
  • Place drip-trays beneath pots to collect drainage (remove in winter to avoid water logging).
  • Use self-watering pots or baskets.
  • Swap paving for plants – de-pave an area and fill it with plants and mulch to slow down runoff and encourage water infiltration into the soil.

How many gardeners compost?

Of the 27 million gardeners in the UK, how many do you think compost?

It could be as few as a third, according to a study by the Royal Horticultural Society, the UK’s largest gardening charity. But there is hope for the future with younger people showing more interest than the older generation in learning how to start composting.

The study found that those who compost tend to be older – over 55 – but that age group also showed the most resistance to starting if they didn’t already. The age group most likely to start composting was in the 18-24 age range. Social media is thought to be the reason why more and more young people are getting interested in gardening, or even just cultivating house plants which are especially popular with those living in flats.

Among all ages who took part in the study, a third of those who don’t currently compost said subsidised bins from local councils would get them composting.

We believe there’s a home composting solution for everyone. For example, older people, or those pressed for time, might prefer a Green Cone, which only accepts food waste and requires no aeration or maintenance. It doesn’t actually produce compost but a nutrient-rich liquid that seeps from its underground basket nourishing the surrounding soil. Read about some of our customers’ experiences of using a Green Cone: The long, long life of Green Cone food waste composters (greatgreensystems.com)

Young people with no access to a garden could consider a wormery, which can be kept indoors, and is a great way to turn kitchen waste into food for house plants.

Bokashi bins can also suit those in flats, especially if they can donate the fermented pre-compost that is produced to a friend or neighbour with a composter or to a community or allotment composting project.  Bokashi bins take all food waste along with the addition of beneficial microbes in the form of a spray or bran. The full bin is left to ferment anaerobically (without air) for around two weeks while the contents become a pre-compost mixture which can then be added to a composter or buried in soil. Bokashi juice that is drained from the bin is full of nutrients and can be diluted for use as a feed for house or garden plants. It can also be used undiluted as a drain cleaner. Read our blog about how one family work as a team using a bokashi system: Helping the planet by switching to bokashi composting (greatgreensystems.com)

Studies have shown that the reason why many people don’t compost is fear of getting it wrong.

That is such a shame because really there is no wrong; there is only an imperfect situation in need of a helping hand (as the PR department at Compost HQ might say).

The big thing to realise is that if there’s an issue, there’s a remedy.

Composting is so beneficial for the environment, as well as your garden, that it’s well worth learning the few basic rules to ensure success.

Compost, when added to soil, helps to capture carbon in the atmosphere, improves plant growth, conserves water, reduces reliance on chemical pesticides and fertilisers, and helps prevent nutrient runoff and soil erosion. What’s not to like? It’s estimated that the average amount of compost made by home composting is 280 litres, enough to improve the soil structure of 5 square metres of garden.

There are a few basics to learn with composting but once you know, you know. The facts of nature don’t change. We invest time learning how to use the latest gadget, how much more important to learn how to feed the earth?

Here’s the thing; if things aren’t going great your bin will let you know – usually by starting to smell or looking a bit slimy. If that’s the case we need to go back to basics.

Composting essentials

The basics of composting are about providing good conditions for the insects, micro-organisms and worms that will be digesting the waste. They need three essentials:

  • Waste materials
  •  Water
  • Oxygen

MATERIALS

 The composting creatures in your bin grow thanks to protein in waste materials that are high in nitrogen and they get energy from sugar in waste that is rich in carbon. Your aim is to find the right balance between the amount of nitrogen and carbon.  In composting circles, nitrogen-rich materials are often referred to as Greens and carbon-rich materials as Browns.

Greens (nitrogen-rich) include: food waste, fresh grass, soft leafy plants, fresh leaves and hedge clippings, wilting flowers, tea leaves, plastic-free tea bags, coffee grounds. These items break down quickly and contain moisture so they keep the bin’s contents moist.

Browns (carbon-rich)include: shredded twigs, branches, dead leaves, paper, cardboard, straw, wood chips, sawdust. These contents are drier and slower to break down. They also provide fibre and allow air pockets to form for aeration.

 A mixture that contains half Greens and half Browns is a great place to start for composting. Often people find they have a lot more nitrogen (food waste) than carbon (woody items, dry leaves, paper, cardboard) so it’s a good idea to stockpile these carbon inputs so you have them ready to add with food waste. You can keep them in lidded containers or tied bags close to your composter so that when you add a container of food waste you can add a container of carbon-rich Browns at the same time.

Chopping or shredding woody garden waste (no larger than 5cms) increases the surface area in contact with microbes in the pile.  The finer the compost materials are shredded, the faster the pile heats up. 

If the nitrogen/carbon ratio isn’t ideal the micro-organisms won’t decompose the organic material as quickly. Getting the ratio right can be a case of trial and error but you will learn quickly through paying attention to conditions in the bin. 

Everything has its own carbon/nitrogen ratio but you don’t need a calculator and spreadsheet to work it out. If you plan to balance the amount of carbon and nitrogen in a 50/50 ratio you won’t go far wrong. Adding bokashi bran will also help to speed up decomposition by adding more microbes to the mix.

Your composting ratio might not be something that you get right immediately. Knowing how much carbon to add to your pile is something that compost-makers are constantly figuring out.

WATER

You want your compost pile to be moist, rather than wet or dry. The materials should feel damp like a wrung-out sponge.  The ideal water content is around 50 per cent. You can check this by using a moisture monitor or by doing the ‘squeeze test’:  take a large handful of compost and squeeze – only one or two drops of liquid should be produced.

Microbes struggle if their environment is too wet or too dry. They need water to live, yet too much moisture can limit the amount of oxygen they receive. If compost is too wet, it will start to smell. If this happens you need to add shredded paper and cardboard and mix well to absorb moisture and make the contents drier. 

If you need to add water to compost that is becoming dry, use rainwater from a water butt if you can rather than tap water.

OXYGEN

The fastest form of composting is done by aerobic organisms that need oxygen.  To give microbes air to breathe we need to add air to the mixture by aerating regularly to make sure there’s oxygen throughout the bin.

Wood chips are useful materials to add as they provide pathways for air and you may be able to get them for free from a local tree surgeon if you are able to accept large amounts. You can create air pockets by adding some cardboard tubes from toilet or kitchen rolls whole and keeping cardboard egg boxes whole. Scrap paper can be added scrunched up, as well as shredded, so that it provides pockets of air. You can also create air spaces by pushing a couple of sticks down into the compost and leaving them there – remove them when you aerate and replace them.  

The most common rectifiable issue (we won’t say ‘mistake’ for the sake of those mentioned above who are afraid of getting things wrong) is slimy compost that may start to smell. This is caused by too much nitrogen-rich content (which makes the pile wet) and lack of aeration. A smell is a sign that the compost has become anaerobic (without oxygen) so you need to aerate the whole pile so that aerobic microbes dominate once again. Using a garden fork will enable you to dig down and get air into the whole pile. Also add plenty of chopped or shredded carbon-rich inputs (branches, twigs, autumn leaves, paper, cardboard, wood chips) as described above. Sawdust is also useful in absorbing excess moisture. Make sure to add it in thin layers and mix in well to avoid it forming clumps.

Sometimes the problem is caused by the addition of large amounts of grass clippings in one go. Grass mowings should be added in thin layers balanced with carbon inputs or they might clump together and form a soggy mess. Again, adding dry carbon-rich inputs and aerating will help to bring moisture levels back to the ideal consistency of a wrung-out sponge.

Learning to ‘speak compost

One of our customers teaches groups of people of all ages and backgrounds how to compost using the Green Johanna and she reckons that within a few months anyone can ‘speak compost’.

 In fact, she says that most people she works with go from knowing nothing whatsoever about composting to becoming ‘compost evangelists’.

You have been warned.

Turning to Green Johanna after composting flops


One bad experience can put people off composting for life.

Something we hear a lot is – we had a composter for years but it just sat there doing nothing.

This was the experience of Adam and Hayley. After a few attempts, despite their best efforts, they kept encountering the same problem – very slow breakdown of waste materials with hardly any compost produced.  

But they were still keen to have another go, this time using a Green Johanna for the first time.

We’ll follow Adam and Hayley’s progress and answer any questions as they arise.

Setting up

Getting their Green Johanna up and running, Adam and Hayley found:

  • Instructions were easy to follow.
  • They were able to assemble and set up the composter in an hour.
  • The instruction manual was handy for answering questions.
  • They were able to get started without any issues.
  • Assembling the Johanna in sections meant it was easy to move around to choose a spot in the garden compared to the pre-built composters they had tried in the past.

Handily, a tree in their garden had fallen down in the wind so they had a ready store of twigs and branches to use as the foundation base in the bottom of the bin to provide airflow and drainage. This stage only took about 10 minutes to sort out.

Despite their earlier disappointing composting experiences, the couple are keen to try again because of the many benefits home composting brings – both to the environment and to the user.

Adam said: ‘I’m really excited to continue to use the Johanna and get some compost.’

We’ll report back on Adam and Hayley’s progress.

Outside the box: Setting up, helped – or rather watched – by Archie the amazing Shihpoo.

Choosing the spot – base in place.

Getting the sections in line.

Adding twigs to create a foundation for drainage and airflow.

Jacket on and good to go!

Taking tea with milk, sugar – and plastic?

Every day 165 million cups of tea are drunk in Britain – and that’s just in our house.

Since today is National Tea Day (April 21), I expect a lot more facts will be shared and the ones I’ll be paying close attention to are those concerning plastic.

Like millions of other tea drinkers, I was alarmed a few years ago to learn that most tea bags contained plastic – polypropylene – used to heat-seal the edges of the bags.

This news sparked health concerns among tea drinkers as well as raising questions about the effect on the soil and wildlife when these tea bags were composted.

  Of those millions of cups of tea drunk every day, 96 per cent are made with tea bags. So if you were home-composting your share of those tea bags you might have been unwittingly leaving bits of microplastic (tiny pieces of plastic less than 5mm in size) in the soil.

As a result of the controversy, manufacturers started to remove polypropylene from their teabags. Naively, I thought that was the end of it and that now in 2023 we would all be taking our tea with milk and sugar but no plastic, thanks.  

While talking to a customer recently, the topic turned to composting tea bags. We both remembered early attempts at plastic-free teabags that led to the bags dissolving in the cup, but we didn’t know the current state of play. I resolved to find out more – more of which later.

 Like many Brits, I feel there are few situations in life that can’t be improved by a nice cup of tea. My day can’t start before a pint of Earl Grey has entered my system and the rest of the day is propped up at regular intervals by yet more tea. Is this a psychological thing? The very words, ‘I’ll put the kettle on’ appear to have a soothing Pavlovian effect on my nervous system. So why, on any given day, are there half-cups of cold tea littered around the house and office? It’s as though the thought of having a cup of tea always seems like a good idea even if I’m not that bothered about actually drinking it.

 I’ve realised I have a blind spot when it comes to wasting tea. I take great care not to waste food but don’t give the same consideration to drinks; it’s as if because they’re liquid they don’t count. So many problems with waste are caused through us being creatures of habit.

Of course, I’m using energy every time I put the kettle on, not to mention wasting the tea, the water and soya milk that’s used if I don’t drink the whole cup. So this is one robotic, wasteful habit that I’m in the process of breaking. From now on I will be mindful not mindless about putting the kettle on.

I stopped drinking my regular brand a few years ago because of concerns about plastic and switched to Hampstead Tea. I was particularly interested to learn about this brand’s commitment to biodynamic farming – an organic, ecological approach, employing the use of manures and compost.

Researching the subject has made me switch to loose leaf tea.  Then I don’t have to think about plastic particles, bag materials or questions of compostability.

Tea bags only became freely available in the 1950s, meaning that many generations before me had to contend with tea leaves and old-fashioned teapots. And they all seemed to cope just fine, along with other challenges such as having to slice their own bread. When I think of family members talking about how hard life used to be, there were memories of poverty, short life expectancy, outside toilets and tin baths, but I don’t recall anyone ever saying, ‘And on top of all that, we didn’t have tea bags!’

Other advantages of being a loose (leaf) woman:

  • Less package waste
  •  The tea itself tends to be less processed and retains more of the original flavour
  • You can adjust the strength and even blend your own.

Modern teapots have built-in infusers, meaning it’s easy to get the tea leaves into the compost and wash out the pot.

If you’re reading this, I’m assuming that you want to home compost your tea bags.  Tea leaves are ideal compost material, providing high levels of nitrogen (even higher than manures) and small particles so compost bacteria have more surface area to work on.

On my internet trawl to find out more about plastic in tea bags, I found confusing and conflicting information, with experts arguing about the merits of bioplastics.  And that’s before you start reading comments underneath articles. The word biodegradable is also bandied about by many interested parties as though it’s an ecological holy grail when all it means is that material will break down eventually, but you won’t know how long that will take and under what conditions.

Online information also quickly goes out of date because some tea brands are still working towards their plastic-free goals, which might have been achieved after articles have been published.

 I’ve spent several hours that I’ll never get back reading through studies and articles; my advice to a home-composting tea drinker would be to contact your favourite brand and find out where they are on the plastic-free/compostable journey.

Points to consider:

  • Many tea brands are still using polypropylene. If tea bags contain plastic, you can compost the leaves but throw the bag in general waste. Plastic in tea bags sent to landfill will still enter the soil.
  • Be aware there may also be hidden plastics in sachets or string-and-tag bags.
  • Many brands that don’t use polypropylene use polylactic acid (PLA). This is a plant-based polymer (sometimes referred to as a bioplastic). It can also be called Soilon.
  •  Plant material sources include corn starch, which can come from genetically modified (GM) maize – but this cannot be used in organic teabags.
  • While PLA is biodegradable, it requires industrial composting to break down because most ordinary garden composters might not get hot enough (44 – 60 degrees Celsius) to break down the bags.  It is thought teabags containing PLA could take several years to degrade, and it is not known exactly how harmful it might be to organisms in the meantime. If your council has a separate food waste collection, teabags made with PLA can be placed into your food waste bin to be industrially composted.
  • Like oil-based plastics, if bioplastics end up in the ocean they can present a danger to marine life.
  • The origins of the tea bag might have been accidental – in 1908 an American tea importer who shipped silk tea bags around the world found that customers, instead of removing the leaves from the bags as he intended, found it easier to brew the tea with the tea leaves still enclosed in the porous bags.

Among comments following an online BBC report from 2019 are some from people who had been putting tea bags in home compost for years until they realised they were having to pick plastic remnants out of the soil – even 15 years later. One reader commented he had stopped composting tea bags for use as garden mulch when he saw birds picking up the bag remnants and using them in their nest building.

At home, our Green Johanna’s contents reach regular temperatures of between 40 – 60+ degrees Celsius; we measure the temperature every day. According to the Carry on Composting website, Composting – www.carryoncomposting.com, the corn starch Soilon can hot compost in 6-8 weeks. The site recommends cutting a couple of holes in tea bags so composting bacteria can easily access the leaves, accelerating the rate of decomposition.

The Ethical Consumer website Is there Plastic in my Tea? | Ethical Consumer features a chart based on information from Feb/March 2022 that lists the following as ‘best brands’: Clearspring, Essential, Hambledon Herbs, Hampstead tea, Heath and Heather, Higher Living and Dr Stuart’s, Pukka, Qi, Postcard, Teapigs, Yogi Tea.

The site also lists middle companies ‘who are using some PLA, or are in the process of switching’, as well as the worst. But bear in mind that the situation might have changed since then.

I’ll end with some ideas for homegrown tea that I read in the Comments section of one article.

 Easily sourced throughout the year from your garden:  
(dried) rosehip tea
(dried) chamomile tea
Fresh peppermint/spearmint tea
Fresh nettle tea

For winter (all easily sourced from one’s larder)

dried/root ginger tea
fennel seed tea
liquorice root tea
cardamom tea

Also recommended: cinnamon stick/star anise/vanilla pod tea.

I’m tempted to try some of these. Maybe my Earl Grey will meet competition.

Julie

Bokashi bins boost hot compost

When it comes to boosting the composting process, we have found a Bokashi bin to be the perfect partner for the Green Johanna.

We recently carried out trials involving additions of fermented food waste from a Maze Bokashi bin to a Green Johanna and found that temperatures in the Johanna rapidly increased as a result.  

For our trials, we re-started a Johanna more or less from scratch, having previously removed large amounts of compost.  Using a permanently installed insulation jacket and large amounts of Bokashi bran and carbon-rich materials, compost temperatures were around 30 degrees Celsius. 

 We added the contents of a Bokashi bin that had been fermenting for 21 days, followed by a full 1kg bag of Bokashi bran.   We then added some mulch and stirred well with a garden fork, before completing the process with a thin layer of mulch. 

 The Johanna was then left for 48 hours.  Temperatures rose to 66 degrees Celsius whilst outdoor temperatures were in the 0-10 degree range.   After 48 hours we re-stirred to spread heat more widely through the Johanna.    Using two Bokashi bins in rotation we repeated this cycle roughly every three weeks and got the same results.

We used the Green Johanna in combination with a regular kitchen caddy (as the Johanna needs regular feeding to maintain the hot composting process), twin-bin Bokashi system, Insulating Jacket, Bokashi Bran as an accelerant and plenty of mulch.

Photos show starting temperature at 30 degrees Celsius/adding fermented waste from a Bokashi bin/ adding Bokashi bran/temperature at 66 degrees Celsius.

The Bokashi process was developed in Japan in the 1980s; the term means ‘fermented organic matter’ in Japanese.  It involves adding all your food waste, cooked and uncooked, to a specially designed airtight Bokashi bin, with the addition of Bokashi in the form of a fermented bran or spray. The food waste is compressed with a compactor to eliminate as much air as possible as this is an anaerobic process.  Once the bin is full, you close the airtight lid and leave for 2-3 weeks.  Many people use two or three bins to keep the process going.

The bacteria (lactobacilli) in the bran or spray will create lactic acid which will effectively pickle the food waste rather than letting it decompose as it would in a regular food waste caddy.  After a week or so, liquid should start to form in the Bokashi bin which should be drained using the tap.   This ‘Bokashi tea’ can be used as a drain cleaner or diluted for use as plant food.

 At the end of the fermentation period the waste food is a pre-compost mixture that can be added to a composter or buried in soil to become a soil enhancer. Its composition is such that virtually all its original nutrients, carbon and energy enter rapidly into the soil.   No greenhouse gases are released to the atmosphere as they are during regular food waste decomposition in landfill.

Bokashi composting has traditionally proven particularly popular in urban environments where traditional garden composting is difficult. 

Mark

A journey to becoming a green gardener

With compost again in the spotlight (Compost Week UK runs from March 13-19) it’s timely that Nancy Birtwhistle’s green gardening book has just been published.

Nancy first came to national attention when she won The Great British Bake-Off in 2014 and she is now a best-selling author on green issues.

She’s also an inspiration to anyone wanting to live a more sustainable life; the tips in her books and on her Instagram feed are simple but effective, with something for everyone.

We had pre-ordered a copy of her latest book, The Green Gardening Handbook, and we’ve been busy this week reading and learning.

Here’s how Nancy sums up her life’s green journey:

‘Several years ago I began my green journey and this way of thinking has permeated every part of my life, from the way I clean my house to the way I resist single-use items, recycle and upcycle where possible, am mindful about the use of valuable energy and utilities, and also how I have been able to apply this way of thinking to my garden. I became more informed through researching and reading while considering the plight of our natural world and am now converted to methods that, once the penny drops, actually make utter and complete sense, and are logical and sensible. Once we learn how to work with Mother Nature and understand how the seasons work, how plants behave and how we can harness the wonder of it all, the reliance on any destructive chemical, synthetic or harmful methods for home growing are utterly superfluous.’  

 She also talks about her respect for the tiny creatures that make this soil food: ‘I found that once I embraced a greener approach to living – in the garden and in relation to my food – I was ever more appreciative and amazed by the wonder of nature, especially the creepy crawlies, and because of this will continue to do my very best to cherish and preserve it wherever and whenever I can.’

Summing up how all compost enthusiasts feel, she says, ‘I take huge satisfaction each time I add something to my compost bin, knowing that it is one less item going to landfill.’

We’re still reading the book – and noting down our favourite tips – but here are a few quick points Nancy makes about her journey in composting.

  • Finding the traditional Browns and Greens compost terminology confusing, because not all green items are Greens (i.e. nitrogen-rich) and not all brown items are Browns (i.e. carbon-rich), Nancy prefers to think in terms of Wet and Dry contents. (Michael Kennard, of Compost Club, makes the same point in his booklet Hot Compost – The Basics. He encourages beginners to think in terms of nitrogen and carbon content to help get the ratios right.)
  • When gardening, use biodegradable jute twine and wooden plant labels so that any oddments that fail to be removed before composting will decompose along with everything else.
  • Invest a few pounds in a compost thermometer – it will keep you entertained for hours and is a great talking point with enthusiastic gardening friends.
  • Use your compost to fill planters, top dress rose bushes and fruit trees, lay a good thick layer over veggie plots in the autumn and early winter and the worms will do the job of taking it below the surface – no need for digging it in.
  • Make your own compost scoop out of a plastic milk container:  Cut the bottle in half – the top half to be used as a compost scoop or planting funnel and the bottom half to be used as a simple seed pot or planter. Make a starting hole in the centre of the bottle using a hot skewer and use this as an entry hole for the scissors, making it possible to make a neat cut. To use one half as a compost scoop – leave the cap in place and use the handle with the bottle neck in the upside-down position to scoop your compost to take to your pots or tubs. With a scoop there is less spillage than using your hands or a trowel.
  • If you buy compost make sure it is a peat-free variety – peatlands are hugely important for plants, wildlife and humanity. They also store vast amounts of carbon which must be kept in the ground to avoid contributing further to climate change.

(Sales of peat to amateur gardeners in England will be banned by 2024.)

Taking compost from the Green Johanna


At Great Green Systems we’re always keen to share our and our customers’ experiences of composting with the Green Johanna. This weekend we opened up a Green Johanna that we have been trialling with great results.

This Green Johanna was used from mid-September 2022 to mid-February 2023 with the insulating jacket permanently installed.
100% of the cooked and uncooked food waste from this household was recycled in the Johanna. There were between 2 and 4 people in the household during this time, with up to four more visiting through the Christmas and New Year period. The amount of waste diverted to the residual (grey/black) wheeled bin fell to less than 50% of the bin capacity (ie less than 120 litres) per fortnight compared to previous usage. Over the Christmas period, when bin collections were suspended for a week, the residual bin comfortably coped with three weeks’ worth of general waste.
The fermented contents of several 14-litre Bokashi bins that were accepted from relatives who don’t have their own compost bin were also decanted into the Green Johanna.
The food waste was liberally mixed with carbon-based materials, mainly autumn leaves and wood chips, and treated once per month with Bokashi bran to accelerate the composting process.
Using this method, we consistently achieved compost temperatures of 30-60 degrees Celsius even through the coldest winter temperatures. All the food waste generated from the household was comfortably accommodated by the composting system.

Saving the top section to go back into the compost bin

Compost can be accessed by unscrewing the hatches at the bottom or, since the Green Johanna is a modular unit made up of circular rings, the upper sections can be removed leaving an impressive tower of compost. As you can see from the photos, we chose the second route as we wanted to take a lot of compost out at once.
We removed the top sections of compost that are currently decomposing (taking care not to squash any worms) and placed these on an old wipe-clean tablecloth kept for this purpose until we were ready to put them back in the bin to continue the breakdown process.
More than half of the composter contents were removed for soil replenishment and other garden uses, with the remainder being returned to the Johanna for further composting.

Topping up planters with compost

To purchase a Green Johanna Complete Bundle, including Insulating Jacket, click here:
Green Johanna Complete Bundle – Great Green Systems
To upgrade your existing Green Johanna with an Insulating Jacket or Complete Accessory Set, click here:
Green Johanna Insulating Jacket – Great Green Systems
Green Johanna Accessory SetGreen Johanna Accessory Set – Great Green Systems
To combine your Green Johanna with indoor Bokashi Bins, click here: Bokashi Bin By Maze – Great Green Systems
To improve and accelerate your Green Johanna composting with Bokashi Bran, click here: Bokashi Bran 1kg – Great Green Systems

Tips to send the rat pack packing

Some of our customers claim the Green Johanna is rat-proof as they have never had any problems with these unwelcome visitors.

That is the experience of most people, but since rats have been known to chew through concrete, glass and even some metals nothing can really be called rat-proof.

However, there are steps you can take to deter rodents by making your compost bin and garden so unattractive to them that they will move on to a more accommodating environment.

If there’s a problem with rats locally it’s worth checking whether a neighbour is exacerbating the issue by leaving food out for wildlife. This was the experience of one of our customers, who discovered that his next-door neighbour was getting animal bones from a butcher and leaving them in his garden overnight to feed foxes. The neighbour even thoughtfully left his garden gate open at night to encourage visiting wildlife. But foxes weren’t the only ones coming round for a feast.

 Such issues obviously need to be addressed first. If there is a persistent problem in your neighbourhood consider professional help to sort it out.   

The Johanna has been designed to be as unwelcoming to rats as possible – the integrated base features small holes of 4.5 mm diameter so worms can easily come and go but rats are deterred.

Additionally, both the base and doors are secured to the bin with screws to make it difficult for rodents to dislodge them. The Johanna also has thicker wall sections than most other garden composters and is around two to three times heavier, making it more robust.

Using the Johanna’s Insulating Jacket also provides another layer of material, as well as providing insulation to keep temperatures high enough to discourage rats.   

As part of the Green Johanna’s and the Green Cone’s five-year guarantee, Great Green Systems will replace any parts that suffer rodent damage.

Recommended deterrents:

  • Discourage rats from making a home in your garden by sealing access under chicken houses, sheds or decking that can provide shelter for them.
  • Keep your garden tidy and well maintained – check for anywhere that rats could burrow under or through.
  • If you store bird feed or chicken food in the garden, make sure it is in lidded containers and kept off the ground. Sweep up any fallen birdseed as birds are messy feeders. Put paving slabs under a bird feeder so any fallen seed can be easily swept up.
  • If you can, site your compost bin in an open, uncluttered area as rats hate being exposed. Open space makes them nervous. If you know there is a rodent problem locally, try to avoid siting the bin along fence lines or near log/brick piles and shrubbery or thick vegetation that provide protection for them. Rats have poor eyesight and use fences and walls to run alongside for direction.
  • Protect the composter’s base – place paving slabs or bricks around the base. Placing thorny prunings around the composter will also make access difficult.  
  • Rats hate noise and being disturbed, so bang on the bin with sticks every time you go past so they get the message this is not a peaceful place.
  • One customer recommends creating a stockade fence of bamboo sticks around composters. Push each stick into the ground as closely as possible (easier to do after rain).
  • Keep the bin active. If you’re going away ask someone to keep your composting activity going for you so the bin is not left undisturbed for weeks.  
  • Make sure bins are not overflowing and food caddies are locked tight.
  • Maintain drains – rats can come up through poorly maintained drains.
  • Keep an eye out during bad weather and flooding as rats are likely to be on the move looking for shelter.
  • Place builders’ mesh (available at DIY stores) underneath the composter.  The Johanna already has an integrated base but mesh would provide an added deterrent.
  • Rats hate strong smells so try planting mint around the bin. Put a few drops of peppermint oil in water and spray it around the garden.
  • Also sprinkle chilli powder and cayenne pepper around as well as spreading lavender and bay tree cuttings around the base. The fermented contents of a bokashi bin are said to be a deterrent as rats dislike the sour smell. Other smells they dislike are cinnamon and citronella.
  • An obvious point but sometimes overlooked – be vigilant that you never drop any food waste around a composter, bin or food caddy.

With the Green Johanna:

  •  Keep temperatures in the bin high by adding the Insulating Jacket, regularly adding bokashi bran, and keeping the bin filled and aerated. Hot composting generally discourages rodents because of the heat and the fact that food scraps are quickly broken down.
  • Ensure food waste is well chopped to provide more surface area for microbes and accelerate the breakdown process. Smaller pieces are also easier to stir and mix with garden and paper waste.
  • When setting up the composter, wait until the composting process is well under way (after four weeks) before adding cooked food scraps.
  • Cover additions of food waste with plenty of chopped-up woody garden waste, cardboard or dead leaves and aerate well. Cover with fresh compost or soil.
  • Aerate composter contents regularly.
  • Keep compost contents moist. Moisture levels should be around 50 per cent. You can use a moisture meter to check or do the sponge test – take a large handful of compost  and squeeze. If one or two drops of liquid come out that is likely to be right – the compost should be the consistency of a wrung-out sponge. Add water if needed in summer months, preferably rainwater from a water butt.

With the Green Cone:

  • Ensure that the top of the black basket and the bottom lip of the green outer cone are below ground level, so that any odours are filtered out into the surrounding soil.
  • Never allow food waste to come higher than the top of the underground basket. Food waste should never reach as high as the Cone itself.
  • Press builder’s mesh (available at DIY stores) into the soil of the hole you have dug for the black basket to provide an additional deterrent.
  • Add accelerator powder regularly to boost the breakdown process.
  • Ensure the Cone is in a sunny spot as the digester relies on solar energy to enable efficient digestion.

Tips to deal with fruit fly nuisance

Good composting management usually keeps flies away.   

A few flies can be beneficial since in the compost food web they are considered physical decomposers, helping to break down compost material. Their eggs are also a source of food for other compost creatures. But flies breed fast and if there are a lot of them it’s both a nuisance and a sign that something has gone wrong. 

Their presence is likely due to the following issues in the bin:

  • Lack of oxygen – when there is not enough air, composting is slow and the temperature drops – conditions which attract flies. So add oxygen by aerating with an aerator stick. You can also poke holes in the compost with an iron bar. Deep aeration also disturbs the fly reproductive cycle; some types breed every five days. Raise the temperature by fitting the Insulating Jacket on the Green Johanna and adding bokashi bran, which will introduce more beneficial microbes and speed up decomposition.
  • Too much moisture – the water content should be about 50 per cent. If there is more water than this, it can force air out, which leads to anaerobic conditions (without air) causing slow decomposition and bad smells, which attract flies. You can monitor compost moisture levels by testing with a moisture meter or by squeezing it in your hands. If it feels like a wrung-out sponge, it has the right consistency. There should only be one or two drops of liquid visible. If it’s wetter than this, add some absorbent material such as shredded paper or sawdust and aerate.
  • Imbalance of materials – a mixture of materials high in carbon (Browns) and nitrogen (Greens) is essential for active composting. Aim for roughly half and half of both.  
  • Poorly-covered nitrogen-rich materials (Greens) – bury smelly foods in the compost, wrapped in newspaper if possible. Create a covering layer over the top to capture smells. This can include straw, sawdust, wood chips or mature compost.  A fly-proof mesh over the top of the contents will keep flies out while allowing air in.  

As the compost becomes active, with raised temperature and faster decomposition, the fly infestation should end.

Fruit flies in particular are one of the most common nuisances in the UK, affecting more than 60% of households.  

 Fruit flies, also known as vinegar flies, are not your common or garden (or house) fly; they do not usually enter the home through the door or window, they come in with the fruit that you buy or get from the garden.

Adult fruit flies lay eggs on the fruit’s skin and these hatch later when the temperature is right. Fruit flies have a strong sense of smell and are attracted by the smell of overripe or rotting organic matter.

The eggs are microscopic, so they’re invisible, until suddenly – they’re not. Obviously, if the eggs are already in fruit skins when added to a composter there’s a chance they might hatch inside it.

There are several steps you can take to minimise the risk.

In the home

  • Because fruit flies lay eggs on exposed food, take care to keep food stored in a fridge or lidded containers, not out in the open in fruit bowls.
  • Use up ripe fruit and vegetables as soon as possible.
  • Compost organic matter quickly as fruit flies are attracted by the smell of decomposing food.
  • Keep stored waste in a lidded kitchen caddy. Always keep the lid on your caddy, even between new additions of waste as you are preparing food.

In the compost bin

Follow the steps mentioned above regarding composting management and also:

  • Add more carbon-rich materials (woody garden waste/shredded paper/cardboard/wood chips), and mix in well so that any food waste is covered.
  • Top the contents with a layer of fresh soil.
  • Try putting the composter in sunlight – flies like a warm but not hot environment.
  • Make sure that you always lock the lid securely.
  • Take care not to spill any food around the composter.
  • Monitor acidity – if you have added a lot of fermented content from a bokashi bin to your composter, add a handful of crushed baked eggshells to neutralise excessive acidic conditions as flies prefer a low (acidic) pH.
  • Flies don’t like the smell of certain plants – peppermint in particular – so you could add sprigs of peppermint to your waste and wipe round the compost bin with lavender, lemongrass, eucalyptus and peppermint essential oils.
  • Leave the lid off the bin for a while to allow predators such as ground beetles, rove beetles and earwigs easy access to the flies.
  • Use nematodes – microscopic worms that feed on fly larvae in soil.  

In the Green Cone

 In the case of the Green Cone Food Waste Digester, no garden waste can be added as the Cone only accepts food waste, so covering with garden and paper waste is not an option.

Because the Cone’s basket is underground, smells are filtered out by the surrounding soil, meaning there is no obvious attraction for ordinary flies. But if fruit fly eggs are already in fruit skins when added to the Cone, they might hatch inside it. Avoid this by following the advice above on preventing infestations in the home.

Also:

  •  Freeze your fruit and veg scraps in a plastic bag or container overnight to kill any eggs or larvae before adding them to the Cone.
  • Flies don’t like the smell of certain plants – peppermint in particular – so you could add sprigs of peppermint to your waste and wipe round the Cone with lavender, lemongrass, eucalyptus and peppermint essential oils.
  • Add accelerator powder to add more beneficial bacteria to speed up decomposition.
  • Remember food waste should never come higher than the top of the Cone’s underground basket; waste should never be above ground level.

 Get trap happy

You could also try a home-made trap that will act as a magnet.

Add an inch of apple cider vinegar to a glass jar with two drops of washing up liquid. Put a plastic wrap cover over the top of the jar and poke small holes through with a toothpick. Flies are attracted by the smell and can get in but can’t get out. Remember to change the liquid regularly to keep the fly trap working.

If all else fails, consider disposable fly traps which come pre-filled with bait or attractant and can be placed in the bin. Be aware that these may also kill other beneficial decomposers in the compost.                                                            

Keep food covered to discourage fruit flies.

Top tips to boost hot composting temperatures

Using the Green Johanna in its classic specification is a great way to turn your food and garden waste into soil-enriching, high quality compost. 

  Independent studies (Which?/Gardeners’ World magazine) praise the Johanna for its ability to take a wider range of inputs than most regular composters and for the temperatures it is able to reach.    This is largely due to its ventilation system, with a patented base that allows air inflow past the mass of compost already in the composter and a twist lid that allows the upper vents to be opened or closed depending on conditions.    Heat is retained in the composter due to its enclosed design (most garden composters feature an open or loose-fitting base) and wall thickness (at 10kg, the Johanna weighs in at 2-3 times the weight of many other composters).

According to the Which? trial, the Green Johanna outperformed all but one composter on the market in terms of compost temperature, with temperatures into the 40 degree Celsius range.   This form of composting is largely traditional, relying on worms and insects to finish the job that the heat-generating microbal activity has got underway.

Using this method, the use of an Insulating Jacket has usually been advised when temperatures drop below 5 degrees Celsius in the winter months.   This is because microbal activity ceases at these temperatures, meaning compost temperatures decrease and the compost pile may stall until it is heated up again.

Trials

Throughout last year, however, the team at GGS wondered what would happen if we took a different approach and left the Insulating Jacket on all year.  We had received positive feedback from a number of customers who had done just that, and so we undertook a number of individual trials.   The results were dramatic.    Our main finding was that leaving the jacket on raised compost temperatures into the 30 to 60 degree Celsius range on a permanent basis, even in the coldest winter periods.   The insulated Johanna has proven to be the perfect vessel for domestic thermophilic composting, which is microbial in nature, accepts a wider range of waste and makes for much faster composting.

Here are our quick tips for getting started:

  1. Insulating Jacket.   Add it to the Green Johanna and leave it on.   If you are retro-fitting to an existing Johanna you should see a significant increase in compost temperature within days.
  2. Carbon.  By which we mean autumn leaves, shredded paper, cardboard, twigs, branches and mulch.   The latter can be bought from your local DIY store.   Add these carbon-rich materials generously, no less than in equal amounts to the amount of nitrogen-rich materials (green garden waste, food waste) you have added.  Mix well after adding new inputs.
  3. Aeration.   This form of composting requires more effort than classic composting.   Use your Green Johanna aerator stick regularly as normal, but also aerate deeper into the pile on a weekly basis with a garden fork.
  4. Bokashi.   Adding half a bag or a full 1kg bag of Bokashi bran monthly raises composting temperatures in the short term and accelerates the composting process.   For those who want to try using a Bokashi bin; adding food waste to the Johanna that has been allowed to ferment for two to three weeks in a Bokashi bin will dramatically increase compost temperature and accelerate the process.   Be sure to add plenty of carbon and a bag of Bokashi Bran at the same time as the pre-compost mixture that has fermented in the Bokashi bin.
  5. Chop your waste into small pieces to increase surface area and optimise the process.   This will also make turning the compost much easier.   Use a chipper-shredder for your garden waste if you have one; these can also be hired on a daily basis.
  6. Take the compost temperature.   Compost thermometers are widely available at garden centres and online. Place the thermometer inside the composter and check temperatures regularly.   The microbal processes die off when compost temperatures reach 72 degrees Celsius – this is the opposite problem to the traditional low temperature issue in winter, with the same outcome of a stalled compost heap.    If temperatures near this threshold – and we have seen this several times during the trials – remove the jacket to allow the contents to cool down before adding the jacket again.

This approach is for the more committed or interested composter, but for those looking to compost all of their organic waste quickly and efficiently it is a project well worth embarking on.

Spare Parts