Top 10 tips for composting in schools

Composting is a fantastic opportunity for communities to get together to create a greener environment.

Nowhere is this more valuable than in schools, where children can be taught skills that will last them a lifetime.

Composting enables people to take responsibility for their own waste and deal with it in the most environmentally-friendly way – onsite where it is produced – reducing the energy and cost required to transport it further afield for treatment.

 When people compost they become aware of how much waste they produce; as a result they tend to waste less and recycle more.

What is composting?

Composting is the natural process that occurs when insects, worms and micro-organisms break down organic waste (food scraps, garden waste, paper waste) into a nutritious substance – compost – that can be used to feed soil and plants.

By managing the composting process, we help the micro-organisms to thrive and produce compost faster.    

What are the benefits of composting?

Composting is one of the most worthwhile things you can learn. There are only a few rules, and you only have to learn them once – the laws of nature don’t change. This knowledge will serve you well through life.

Composting:

 * creates free nutrient-rich soil food for your own use

* retains moisture in the soil, so reduces the need for watering

* helps plants to grow stronger and healthier

* cuts the amount of waste sent to landfill or incineration

* reduces your carbon footprint

* has a positive impact on the environment

*  inspires children to become composters of the future

How to make it work

Compost bins are not ordinary bins; some degree of management is needed and there are a few golden rules to follow.

Experience has taught us to give composting communities the following advice:

  • At least one person/member of staff should have overall responsibility and check in on the composter every couple of days to prevent issues developing.
  • Ensure as many people as possible have access to an instruction manual so they get to know the three golden rules: the balance needed between materials; aeration; moisture levels.
  • In a school, composting should ideally be a whole-school project. For example, a lot of carbon-rich materials will be needed and it’s much easier if this can be stored in lidded containers so it’s ready for use. This can prompt fun activities such as cardboard tearing sessions. Children could also bring cardboard from home to get parents involved too.
  • To educate the whole school – staff as well as pupils – put up posters giving basic composting information for everyone who will be adding organic waste to the bin. We have A3 posters available for schools and groups, or children could design their own.  
  • Help everyone to understand that every time a caddy of food waste is added to a compost bin (adding nitrogen-rich materials) this should be followed by an equal amount of carbon-rich materials.
  • Many schools produce a lot of fruit waste, especially in the younger classes, and this needs particular attention as it has a high water content which can create a soggy mess if it’s not balanced with appropriate materials and aerated well.  Sawdust works well as a biofilter to absorb unpleasant smells. Fruit waste and sawdust should be added in thin layers and mixed well.
  • It’s a good idea if someone can keep the composting going during holidays by taking waste from home every couple of days so the bin continues to be fed.
  • Teach children that micro-organisms are living creatures, and the composting process is all about nurturing them.
  • Our blog – Compost School – a guide for absolute beginners – is a useful aid for lesson planning. It’s written simply for children to understand but is also aimed at anyone who may not have composted before.
  • Master composters are people who are passionate about composting and have trained as volunteers to share their composting knowledge. They visit schools and groups to offer advice. Check with your local authority to see if there are any in your area.

If all goes well, your composting project can expand to compost even more waste by using several compost bins or a Ridan giant tumbler, which has a cog and gear system that makes the handle easier to turn.

 Get a ‘compost chief’!

Projects involving a lot of people can hit problems if composting methods are not followed by everyone.

Occasionally, Green Johannas have been used in schools as general wastebins for food waste, without the necessary balance with carbon-rich materials, and this has inevitably led to problems. This has usually been the result of there not being a nominated ‘compost chief’ in charge.

Disappointing experiences give the impression that composting doesn’t work, which isn’t the case, so we are keen to help where we can.

What about the Green Cone?  

If you think a Green Cone Food Waste Digester might suit your aims, consider the following points:

  • You need a sunny spot in well-draining soil (not clay or chalk) where you can dig the hole required for the Cone’s underground basket.
  • One Green Cone can accept the food waste of the average family of four – about 1kg per day.
  •  Food waste lands in the underground basket; once the underground basket is full, you should stop adding waste until there is space in the basket for more.
  • Regular additions of accelerator powder are recommended – aim to use one sachet per month. Accelerator powder contains beneficial bacteria which digest the waste and boost the breakdown process.
  • As this is a food waste digester rather than a composter, no compost is produced. Instead, a nutrient-rich liquid seeps from the Cone’s underground basket and feeds surrounding soil.
  • The Green Cone doesn’t accept garden waste or paper waste.

Helpful advice

Some people are put off composting because of a fear of pests, but there are steps you can take to make a compost bin and the surrounding area so unattractive to unwanted visitors that they will go somewhere else instead. Read our blogs about how to deter pests and flies.  

How we can help

We are keen to support community composting projects. We can send you several copies of the instruction manuals for the Green Johanna and Green Cone so they can be shared out, as well as colourful A3-size posters about the Green Johanna.   Contact us at [email protected].

Benefits of the Green Johanna’s jacket

  As the temperature outside plummets so the compost in your bin might cool down, but by maintaining good composting techniques you can keep your compost ‘cooking’ even in the coldest winter periods.

In the case of the Green Johanna, adding the insulating jacket also helps.

The Johanna pictured below in January in Leeds kept its compost warm at 40 degrees Celsius while the ground temperature was at zero.

This particular Johanna received all food waste from a family of four, rising to 10 people over the Christmas period. Carbon sources include stored shredded leaves from several trees in the vicinity, as well as Christmas paper waste such as cardboard packaging, compostable wrapping paper and Christmas cards.

The Great Green Systems team tend to keep the jackets on our Green Johannas for most of the year, not just in winter, as we’re based in the chilly north of England.      

Don’t worry that using the jacket will make the Johanna too hot for worms, as one customer suggested. This is not a problem because worms can easily enter and leave the composter through the small holes in the base plate. At temperatures approaching 30 degrees Celsius they will move where it is cooler, usually the bottom of the bin where the compost is maturing, or they can leave the bin entirely.

 The jacket is made from foamed polyethylene – a lightweight, water-resistant material that is tough but flexible and designed to fit snugly to prevent cold air from circulating round the Johanna. It’s made for Great Green Systems by a specialist foam manufacturer in Northamptonshire.

When fitting the jacket, it’s important to ensure that the bottom section doesn’t cover the vents at the sides of the Johanna’s base as these are necessary for airflow.  

The jacket should be installed with the two upper sections pulled down so they overlap the section underneath by about 5 cm. Doing this means the ventilation holes are left clear.

Green Johanna wearing the Insulating Jacket

 Also check throughout autumn and winter that the vents at the bottom of the Johanna are not blocked by leaves or debris or snow. Air is taken in at ground level so keep this area clear so that air can enter freely.

The jacket can easily be removed if the compost gets too hot (above 70 degrees C) in warm weather. Compost thermometers, which have a stem to reach down into the compost, are a useful aid.    

  • TIP: Give the bin’s contents a boost by adding beneficial bacteria in bokashi bran or a layer of soil or mature compost. You can also add coffee grounds or chicken manure to add a hit of nitrogen to your mix.  

Johanna planner for winter:

  • In freezing weather limit ventilation through the Green Johanna lid’s ventilation system – twist the lid towards the minimum setting.
  • Wood chips are a great addition, creating airflow and adding plenty of fungi to the bin.
  • Keep adding to the bin – ideally about three times a week – to maintain the composting process. The Johanna’s generous 330 litre capacity means the compost mass acts as an insulating factor. 
  • Chop items up. Smaller items provide a larger surface area for more microbes to work on. 
  • Aerate regularly – about twice a week – to ensure the aerobic microbes breaking down the waste get enough air.  Without air, the contents will turn anaerobic and start to smell.   
  • Check moisture levels – by doing the squeeze test; grab handfuls of the bin’s contents and squeeze. One or two drops of liquid should appear. The ideal consistency is like a wrung-out bath sponge.

Don’t bin that pumpkin! Feed the earth instead

Remember, remember, come the first of November,

Halloween brought fun and mirth,

But don’t let that pumpkin

Rot in a wastebin

When it could nourish the earth.

Along with all the tricks and treats, every year Halloween brings horror stories about the millions of pumpkins that end up in landfill or incineration contributing to greenhouse gases.  But it doesn’t have to be that way.

Now is a great time to get composting so your pumpkin waste can go in a compost bin, not a waste bin.

In composting terms pumpkins are nitrogen-rich Greens to balance with carbon-rich Browns. If they have been used as lanterns, you should remove all items used as decoration, such as candles, wax, foil etc. Smash the pumpkins or cut them up into pieces – a larger surface area will attract more composting microorganisms, resulting in faster breakdown. Pumpkins can be smashed with a hammer or spade. We also find the cutters in Halloween lantern carving sets to be useful for cutting the pumpkin into pieces.

Master composter Rod Weston prefers to use the back of a spade as it is ‘quicker, easier, and produces more of an easily composted mush’.

Pumpkins are easier to smash if they have been kept in the warm and have started to rot.

For loads of ideas and tips on different methods of using and composting pumpkins, see ‘Composting Pumpkins’ on www.carryoncomposting.com

Smashing pumpkins

Why not make an occasion of pumpkin disposal and go along to a Pumpkin Smash? These are organised events where people are invited to take their used pumpkin lanterns to be smashed up in a variety of fun ways and then composted, putting nutrients back into the soil.

Check to see if there’s a Pumpkin Smash taking place near you. They’re a great way to teach kids about composting.

If you live in the Leicester area you probably know about the popular Pumpkin Smash at the Stokes Wood Allotments site. These events are usually followed by a practical session on composting pumpkins, including using a Green Johanna composter. People are encouraged to also collect pumpkins from friends, schools or pubs to help reduce waste.

 Let’s hope this great idea catches on and we see more Pumpkin Smashes all over the country.

TIP: If you use battery-powered tealights inside a lantern, the insides will be kept fresh enough to eat later.

SO:

Don’t bin that pumpkin –

It’s better to get a Johanna!

For a happy Halloween ending – get children involved in composting by letting them smash the pumpkin with a hammer and add the pieces to the compost bin, stirring in well together with woody garden waste, autumn leaves or scrunched paper and torn cardboard.

If you’d rather eat your pumpkin – yes, the whole pumpkin – this recipe’s for you.

We got it from Chef Dan at Kitche, the food waste fighting app. We tried and tested it and found it totally delicious.

ZERO WASTE PUMPKIN SOUP

Serves – 4

Time – 1 hr 30 mins

Ingredients

1 medium large pumpkin

3 large onions

3-4 garlic cloves,

Olive oil

1 litre vegetable stock

1 can coconut milk (optional)

Sprig of rosemary

2 bay leaves

Salt and pepper

Method

1. Wash, cut in half and gut your pumpkin, making sure to separate the flesh and seeds.

2. Crush garlic and finely chop the onions and add them to the pan, add oil and simmer until slightly golden.

3. Chop remaining pumpkin into large cubes and add them to a large pan with the pulp.

4. Finely chop your rosemary and add to the pan with your bay leaves, which you can leave whole.

5. Add your veg stock, making sure the ingredients are covered.

6. Add coconut milk if using.

7. Put on lid and let the pan come to the boil. Once bubbling, turn the heat down so the soup is simmering. Sort out the seeds while waiting.

8. The soup will take at least an hour to cook. Make sure the pumpkin skin is soft (this can take a little longer depending on the type of pumpkin).

9. Once it is ready, remember to take out the bay leaves and add salt and pepper to taste. Use a hand blender to make the soup smooth and creamy. Add water if required until it is your desired consistency. Can be stored in the fridge or freezer.

What to do with your pumpkin seeds?

The seeds make a great garnish. Lay them out on a baking tray and lightly salt them. They only take 5 – 10 minutes and burn easily. If you don’t want the seeds on soup, save them till spring and plant them in your garden.

***

 We also like this idea for pumpkin seeds from the organic online store Abel and Cole:

Give seeds a rinse, then toss in a little olive oil, salt and paprika and fry them for 5 minutes until golden brown – a great snack to serve at Halloween parties.

Which composter is best for me?

An image of a green johanna

If you’re new to composting it can be difficult to know which bin (or system, if you like to think in systems rather than bins) is best for your home and lifestyle. Our handy guide can help.

Food waste composter/digester

The Green Johanna Hot Composter and Green Cone Food Waste Digester are both designed to accept foods that regular garden composters don’t, such as cooked food, meat, fish and dairy, so all your food waste can go in together. Compare them to see which one best suits your needs.

Green Johanna Hot Composter

  • Produces compost.
  • Also accepts garden waste.
  • Added waste should be a balance of nitrogen-rich content, commonly called Greens, (food waste/fresh grass cuttings/fresh green leaves) and carbon-rich content, commonly called Browns (chopped branches and twigs/wood chips/dead leaves/shredded paper and cardboard).
  • Comes with aerator stick provided to aerate the contents regularly.
  •  Ideally placed on soil or grass
  • One Johanna accepts the average food waste of a household of five and the garden waste from an average-sized garden.
  • With hot composting techniques, higher temperatures are reached than with regular composting.

Green Cone Food Waste Digester

  • Must be dug into a hole in free-draining soil (not clay or chalk).
  • Accepts all food waste, even bones.
  • Doesn’t accept garden waste or paper waste.
  • Doesn’t produce compost – instead it produces nutritious water which drains from its underground basket and feeds surrounding soil.
  • No turning or stirring required.
  • Uses solar energy so requires a sunny spot.
  • Comes with kitchen caddy provided.

Compost Tumbler (by Maze) 180 litre/245 litre

  • Takes kitchen waste and garden waste. Accepts cooked waste if chopped up into small pieces and mixed in well with other waste.
  • Cylindrical rotation design makes turning compost easy. Instead of manually stirring you turn the ratchet handle. The geared ratchet automatically locks rotation in any position.
  • Two compartments mean non-stop composting – when the first compartment is full you start on the second.
  • Can be hardstanding.
  • A cart is available so that finished compost can be removed and wheeled where you want it in the garden.

Traditional Garden Compost Bins

  • Usually used for cold composting at low temperatures.
  • Only take raw fruit and veg scraps, garden waste and paper/cardboard.
  • Require a 50/50 mix of nitrogen-rich Greens and carbon-rich Browns.
  • Available in plastic or wood. Plastic bins tend to be more robust but wood may be preferred for a natural look. 

Lack of space?

Worm farms

Worm farms, also called wormeries, are ideal for small-scale composting and for introducing children to the fascinating world of worms, which is an education in itself.

  • Require a sheltered spot.
  • Worms will digest many kinds of foods cut up into small pieces and other kitchen waste such as shredded paper, egg cartons, scrunched up newspaper.
  • A little management is needed to maintain the ideal environment for your worms, so be sure to read the instruction booklet.
  • Produce excellent worm-made compost – vermicompost – for your garden.
  • Learning fascinating facts about these tiny eco-heroes is sure to turn children into composters of the future.

Bokashi Bins

14 litre Maze Bokashi Bin
  • Kitchen food waste bins that can sit on a worktop or under a sink and accept all chopped-up food waste.
  • Food waste is fermented, resulting in a pre-compost mixture which can be added to a compost bin or wormery, buried in soil in the garden or in large planters in order to break down into compost.
  • Requires the addition of friendly bacteria in a bran or spray to accelerate fermentation.
  • When full of food waste, the container is left sealed for two to three weeks for fermentation to take place anaerobically (without air).
  • Nutritious liquid is drained from a tap at the bottom of the bin and can be used diluted as plant fertiliser or concentrated as organic drain cleaner.
  • Bokashi comes from the Japanese term for ‘fermented organic matter’.

Choosing a compost bin – by the experts

This advice – taken from a webinar by master composters from Garden Organic – provides extra help.

Wooden bins – a sustainable material – cheaper – allows the pile to breathe – looks natural and attractive in the garden – don’t add meat, fish, dairy or cooked food due to lower temperatures – a few bins can be placed together, with one or two left to mature while one keeps working.  

Blackwall compost converter – the most common bin – affordable – long-lasting – made from recycled plastic – useful for getting compost out (the bin can be lifted up and removed like a jelly mould) – a base plate is available but an added deterrent to rodents can also be achieved by digging the composter slightly into the ground and putting a  wire mesh under the base – channels of air can be created by plunging a broom handle into the contents.

Green Johanna – reaches higher temperatures – as an enclosed unit it offers greater rodent protection – the twistable top controls ventilation – the solid perforated base means liquid can drain out and micro-organisms can enter – if adding meat, add small amounts, mixed with lots of greens and browns – aerate the top layer every time you add materials – for speedier composting an insulating jacket is available. An alternative way of taking compost out, rather than accessing through the hatches, is to loosen the screws and lift off one or two sections.  Composting slows down in winter but the Johanna continues well and does better than other composters.

HOTBIN – versatile, takes all food waste and also perennial weeds – produces compost quickly – useful in school gardens – contains air channels – needs woodchips as a bulking agent – has a hard surface to discourage rats nesting underneath – requires more attention – more expensive but versatile.  

Wormery – small and self-contained – ideal for small amounts of waste – year-round composting – can be indoors – worms eat the bacteria on the organic matter – no spicy foods or citrus, only small amounts of meat – food scraps are placed on the top section, casts fall to the bottom. Use the worm-made compost on pot plants or round trees and shrubs. NOTE: If the liquid that is produced smells bad it has gone anaerobic and should be flushed away.

Also:

  • Wormery compost is a great improver to shop-bought compost; you can buy the cheapest of composts but turn it into black gold with the addition of your vermicompost.
  • Sheds are not a good place to house a wormery due to temperature fluctuations – a garage or indoors is better.
  • If you need your worms to move out of way as you harvest casts, add melon or banana – worms love these and will obligingly wriggle over to them.  
  • Don’t forget that with a wormery you are responsible for living creatures.

Bokashi bin – ferments waste instead of composting so the contents need to be transferred to a composter after a couple of weeks – this pre-compost  acts as an activator in your compost bin – Bokashi bran is needed – fermented contents of the bin will still be recognisable (some people expect compost) – produces liquid which can be used as a drain cleaner or diluted as fertiliser – good to use two bins to keep the process going – ongoing bran purchase required.

Tumblers – compost is kept off the ground so rodents are deterred.   

Electric kitchen composters – these grind waste as opposed to composting it.

Ridan – giant tumblers with a cog and gear system that makes the handle easier to turn – popular in schools and businesses.

Tips to deal with fruit fly nuisance

Fruit flies are a common nuisance in the UK, affecting more than 60% of households.    

They’re most common in summer and autumn because they’re attracted to ripe and rotting food, especially bananas, melon, tomatoes, squash and apples. The smell attracts adult flies, which lay their microscopic eggs in the fruit skins. The eggs might already be present in fruit that you buy or get from the garden. If you then put the rotting fruit or peel into your food waste caddy and then into your garden composter you might be unwittingly transferring fruit fly eggs to the compost to hatch out later when the temperature is right.  

Good composting management usually keeps flies away.  A few flies can be beneficial since in the compost food web they are considered physical decomposers, helping to break down compost material. Their eggs are also a source of food for other compost creatures. But flies breed fast and if there are a lot of them it’s both a nuisance and a sign that something has gone wrong. 

Their presence is likely due to the following issues in the bin:

  • Lack of oxygen – when there is not enough air, composting is slow and the temperature drops – conditions which attract flies. So add oxygen by aerating with an aerator stick. You can also poke holes in the compost with an iron bar. Deep aeration also disturbs the fly reproductive cycle; some types breed every five days. 
  • Too much moisture – the water content should be about 50 per cent. If there is more water than this, it can force air out, which leads to anaerobic conditions (without air) causing slow decomposition and bad smells, which attract flies. You can monitor compost moisture levels by testing with a moisture meter or by squeezing it in your hands. If it feels like a wrung-out sponge, it has the right consistency. There should only be one or two drops of liquid visible. If it’s wetter than this, add some absorbent material such as shredded paper or sawdust and aerate.
  • Imbalance of materials – a mixture of materials high in carbon (Browns) and nitrogen (Greens) is recommended for active composting. Aim for roughly half and half of both.  
  • Poorly-covered nitrogen-rich materials (Greens) – bury smelly foods in the compost, wrapped in newspaper if possible. Create a covering layer over the top to capture smells. This can include straw, sawdust, wood chips, soil or mature compost.  A fly-proof mesh over the top of the contents will keep flies out while allowing air in.  

As the compost becomes active, with raised temperature and faster decomposition, the fly infestation should end.

A word about fruit waste

If you add large amounts of fruit waste to your composter be aware that this will be high in water content. To avoid making the compost too wet (which attracts flies) it should be well mixed with equal amounts of dry carbon-rich content, such as woody garden waste, dead leaves, shredded paper/cardboard, wood chips, sawdust. An equal addition of sawdust, for instance, would be an effective way to absorb some of the moisture in fruit waste.

To avoid attracting flies, reduce the smell of fruit by wrapping it in newspaper and burying it in the existing compost, then cover with carbon-rich content and add mature compost or soil over the top. 

 Take these steps to reduce the chance of attracting flies.

In the home

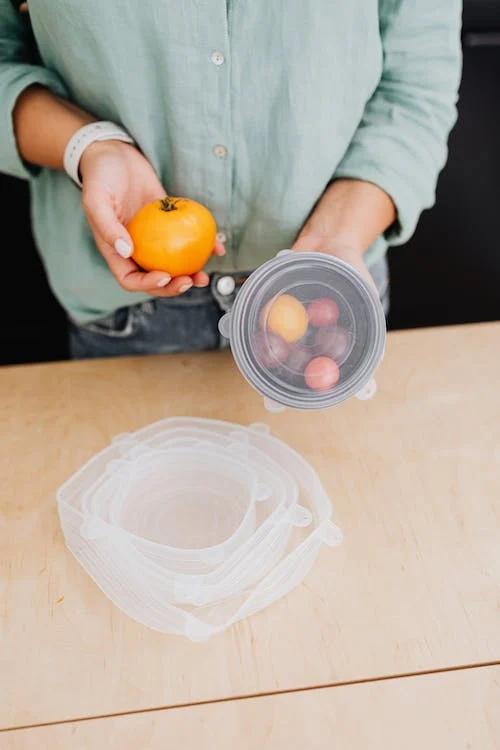
  • Because fruit flies lay eggs on exposed food, take care to keep food stored in a fridge or lidded containers, not out in the open in fruit bowls.
  • Use up ripe fruit and vegetables as soon as possible.
  • Compost organic matter quickly as flies are attracted by the smell of decomposing food.
  • Keep stored waste in a lidded kitchen caddy. Always keep the lid on your caddy, even between new additions of waste as you are preparing food.

In the compost bin

Follow the steps mentioned above regarding composting management and also:

  • Add more carbon-rich materials (woody garden waste/shredded paper/cardboard/wood chips), and mix in well so that any food waste is covered.
  • Top the contents with a layer of fresh soil.
  • Try putting the composter in sunlight – flies like a warm but not hot environment.
  • Make sure that you always lock the lid securely.
  • Take care not to spill any food around the composter.
  • Monitor acidity – if you have added a lot of fermented content from a bokashi bin to your composter, add a handful of crushed baked eggshells to neutralise excessive acidic conditions as flies prefer a low (acidic) pH.
  • Flies don’t like the smell of certain plants – peppermint in particular – so you could add sprigs of peppermint to your waste and wipe round the compost bin with lavender, lemongrass, eucalyptus and peppermint essential oils.
  • Leave the lid off the bin for a while to allow predators such as ground beetles, rove beetles and earwigs easy access to the flies.
  • Use nematodes – microscopic worms that feed on fly larvae in soil.  

In the Green Cone

 In the case of the Green Cone Food Waste Digester, no garden waste can be added as the Cone only accepts food waste, so covering with garden and paper waste is not an option.

Because the Cone’s basket is underground, smells are filtered out by the surrounding soil, meaning there is no obvious attraction for ordinary flies. But if fruit fly eggs are already in fruit skins when added to the Cone, they might hatch inside it. Avoid this by following the advice above on preventing infestations in the home.

Also:

  •  Freeze your fruit and veg scraps in a plastic bag or container overnight to kill any eggs or larvae before adding them to the Cone.
  • Flies don’t like the smell of certain plants – peppermint in particular – so you could add sprigs of peppermint to your waste and wipe round the Cone with lavender, lemongrass, eucalyptus and peppermint essential oils.
  • Add accelerator powder to add more beneficial bacteria to speed up decomposition.
  • Remember food waste should never come higher than the top of the Cone’s underground basket; waste should always be below ground level.

 Get trap happy

You could also try a home-made trap that will act as a magnet.

Add an inch of apple cider vinegar to a glass jar with two drops of washing up liquid. Put a plastic wrap cover over the top of the jar and poke small holes through with a toothpick. Flies are attracted by the smell and can get in but can’t get out. Remember to change the liquid regularly to keep the fly trap working.

If all else fails, consider disposable fly traps which come pre-filled with bait or attractant and can be placed in the bin. Be aware that these may also kill other beneficial decomposers in the compost.                                                            

Keep food covered to discourage fruit flies.

The book that will keep you composting

You might expect anything written about composting to be down to earth (pun intended) but if you read a lot on the subject, as we do, you’ll know that’s not always the case.

Sometimes you come away from an article thinking you must need a PhD to compost. You wonder how Mother Nature manages without the aid of a spreadsheet and calculator for tracking temperatures and working out ratios. If spreadsheets and calculators are your thing, don’t let us stop you (some of the GGS team are guilty as charged).

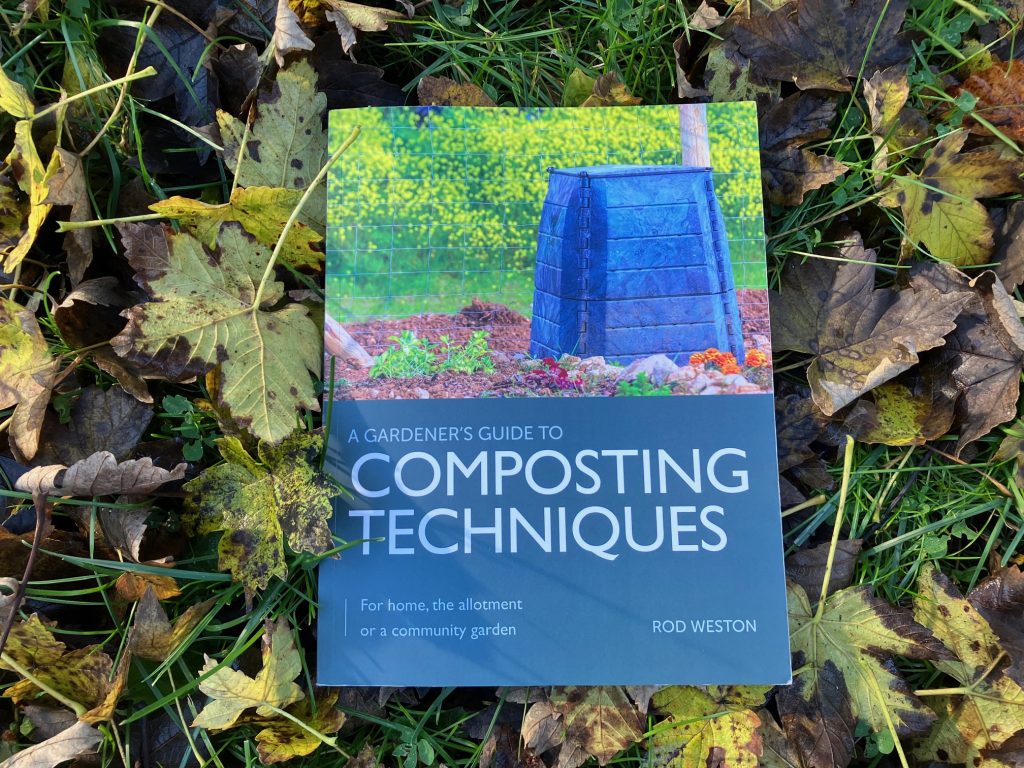
But most of us just want simple advice we can follow. That’s why at Great Green Systems we often point customers towards Master Composter Rod Weston’s website (carryoncomposting.com) because it offers straight-forward, practical guidance. So we were delighted to learn that Rod has turned his knowledge into a book.

The Great Green team love this book and anyone who is into composting, or could be with a little encouragement, will love it too. It gives the lowdown on just about every compost bin going so it helps you to understand your own bin better or to choose one that will work best for you.

Rod hopes the book will encourage householders to compost their organic waste ‘and most importantly, to continue composting.’ He acknowledges that people new to composting may encounter various problems while trying to master the craft, but by showing different techniques to deal with issues he hopes to help new recruits to persevere.

‘The key message is to keep composting, whatever style you adopt,’ he says. ‘All techniques can be modified to suit your own particular circumstances.’

He also hopes to encourage groups to set up small-scale community composting on allotments, at schools, and on community gardens. He points out that if garden and catering waste can be dealt with on site, the environmental costs of transporting it to a central location for processing can be avoided.

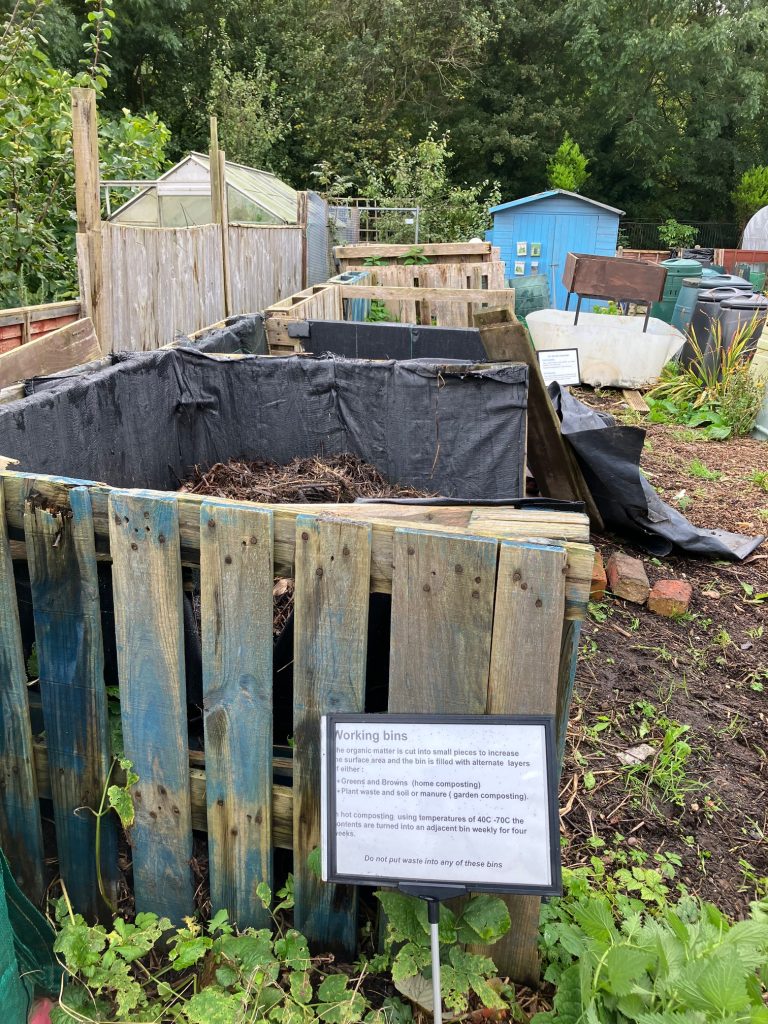
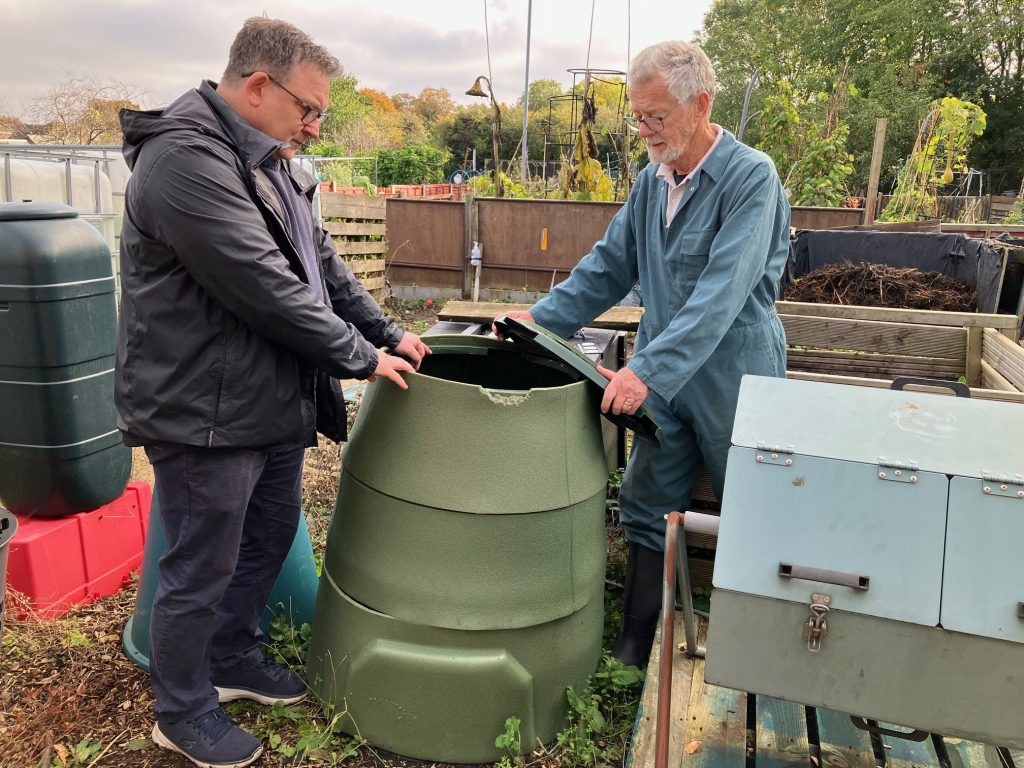
We recently paid Rod a visit at the Stokes Wood Allotment site in Leicester, which includes a demonstration site that is home to every composter you can think of. Rod demonstrates different bins and techniques to the public.  

The site provides a community composting service for allotment plot holders and also takes food waste from the café on site. Plot holders leave their waste for composting in designated spots and can take compost (and liquid feed) for their own use when it’s ready.

Working bays and bins at Stokes Wood Allotments composting demonstration site

Rod’s book also explains the idea behind the Master Composters scheme. In 2004 around 40 per cent of householders who had started home composting gave up because of a lack of knowledge. Almost two decades later, councils and others now produce information and train Master Composters to provide support. This has resulted in a reduction in the dropout rate to between 8 and 14 per cent. In more recent years this has reduced again to 3.9 per cent. Obviously the scheme has been a great success.

Like many of his generation, as a child Rod helped his father on his allotment ‘in the days when allotments were an important piece of ground that played a major role in providing fruit and vegetables for the family’.  

Before becoming interested in the environmental aspects of composting, Rod initially composted on his own allotment in order to dispose of garden waste and to use the compost produced as a soil improver. He says it was his wife who first became interested in becoming a Master Composter ‘but then suggested it to me because she thought it would keep me off the streets!’

On our visit we loved talking to Rod about all aspects of composting. It’s so refreshing in this world of uncompromising opinions to hear his relaxed straight-forward views. Like us he’s pleasantly obsessed but not a purist. Rod’s attitude is that we can all compost – you just have to find a system and bin that works for you.  The more people who compost the better it is for all of us and for the planet.

Anyone living in or around Leicester is lucky to have easy access to his talks and demonstrations.

‘If you are interested and want to get involved with your bin, go for hot composting. If you’re lazy or too busy, just go for a cold system,’ he says.

He goes about the business of promoting composting in a practical, fun way, giving talks to garden clubs, allotment societies and schools.  For school visits, when talking about wormeries he takes along some slugs and snails as well as worms, knowing his audience will approve.

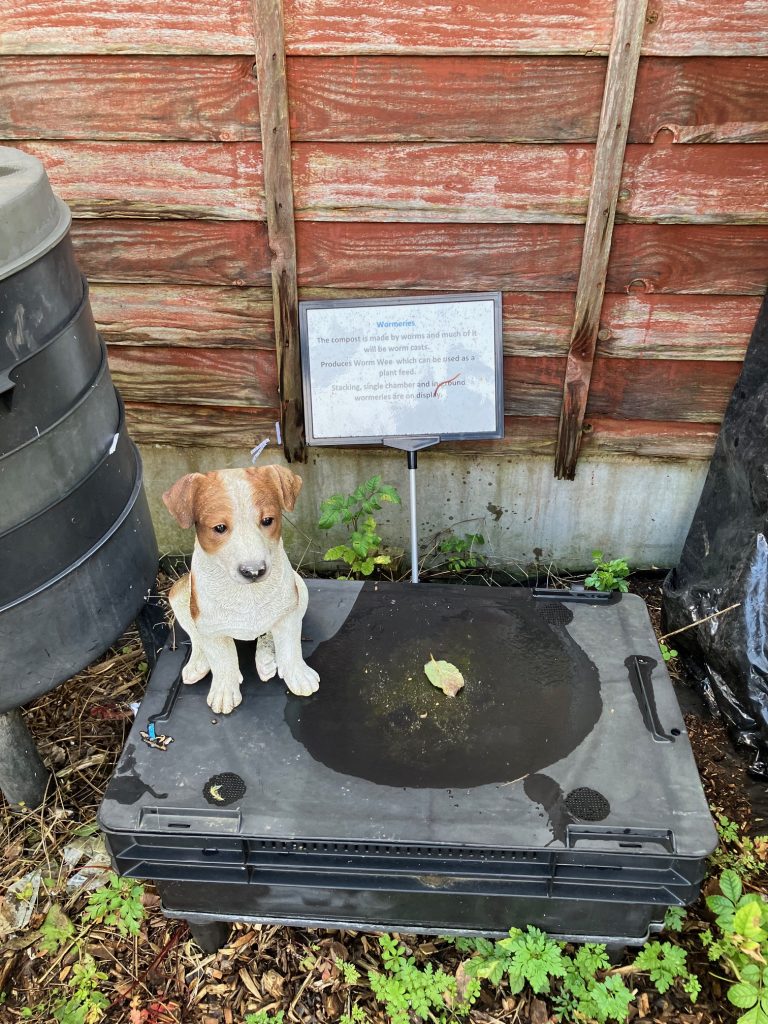
Other props are a soft toy rat and dog poo (spoiler alert – it’s fake) which is used to explain the workings of a wormery used for dog poo.

Sitting pretty – on the dog poo wormery

He thinks composting will become more popular as more local authority food waste collections come into operation, since a lot of people could prefer to compost their food waste in their gardens rather than having it waiting for collection by the council.

Rod is a fan of the Green Johanna and has a couple at home as well as one on the site.

‘It just sits there quietly and gets on with its job, breaking stuff down, with no trouble,’  he says approvingly.

Rod told us that badgers from a nearby wood had recently made a nocturnal visit and tried to get into the site’s Green Johanna, but failed.

We inspected the teeth marks on the Johanna’s lid and Insulating Jacket, proud that the Johanna had stood firm. And this Johanna is 13 years old.

Rod shows Mark evidence of the failed badger attack

The site also demonstrates an old Green Cone, which Rod says has never needed emptying or cleaning.

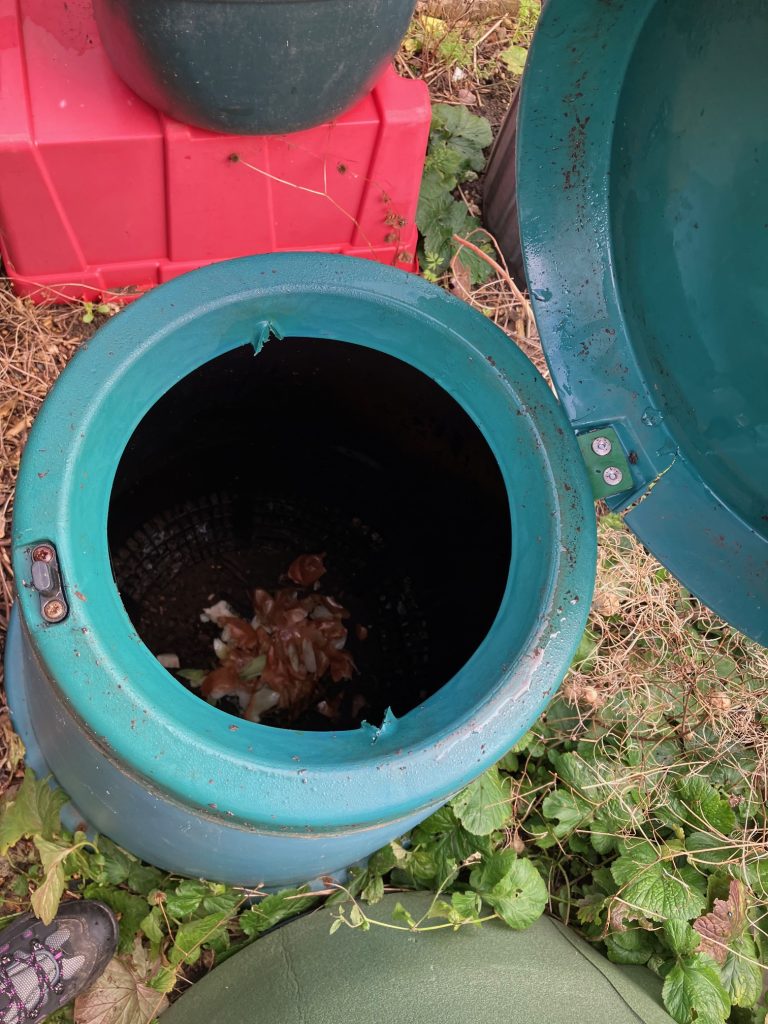
Apparently the number one problem with Green Cones that people ask him about is caused by the owner not having read the instruction manual properly. The manual states that food waste should never come higher than the top of the Cone’s underground basket, so there should never be food waste inside the Cone itself, which is above ground level.  Rod said he has seen Cones that have been filled right to the top like a composter, which would not be a great problem to have to sort out.

How a Green Cone should work – with food waste only in the underground basket

We appreciated this insight and we intend to make this point much clearer in the next edition of the Green Cone manual so that no one can possibly miss it. Although it’s obviously not much good if people don’t read the manual.

In his book, Rod says: ‘There are almost as many ways of composting as there are composters and, despite what might be read online, there is no single right way of doing anything. If what you are doing works, it must be right for you, although, of course, the method may be open to improvement. The main thing is to enjoy your composting in the knowledge that, while you are improving your soil to produce better crops, you are also, in a small way, helping to save the planet. ‘

Wise words from a Master (Composter).

How Bokashi boosts your hot compost

When it comes to boosting the composting process, we have found a Bokashi bin to be the perfect partner for the Green Johanna.

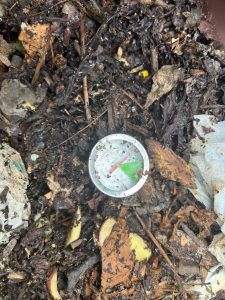
We recently carried out trials involving additions of fermented food waste from a Maze Bokashi bin to a Green Johanna and found that temperatures in the Johanna rapidly increased as a result.  

For our trials, we re-started a Johanna more or less from scratch, having previously removed large amounts of compost.  Using a permanently installed insulation jacket and large amounts of Bokashi bran and carbon-rich materials, compost temperatures were around 30 degrees Celsius. 

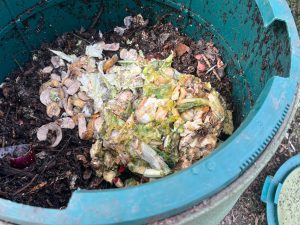
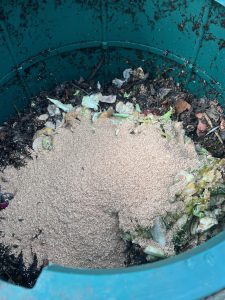
 We added the contents of a Bokashi bin that had been fermenting for 21 days, followed by a full 1kg bag of Bokashi bran.   We then added some mulch and stirred well with a garden fork, before completing the process with a thin layer of mulch. 

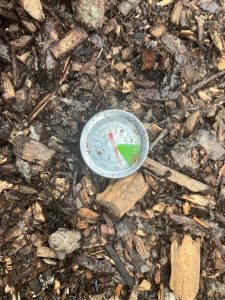
 The Johanna was then left for 48 hours.  Temperatures rose to 66 degrees Celsius whilst outdoor temperatures were in the 0-10 degree range.   After 48 hours we re-stirred to spread heat more widely through the Johanna.    Using two Bokashi bins in rotation we repeated this cycle roughly every three weeks and got the same results.

We used the Green Johanna in combination with a regular kitchen caddy (as the Johanna needs regular feeding to maintain the hot composting process), twin-bin Bokashi system, Insulating Jacket, Bokashi Bran as an accelerant and plenty of mulch.

Photos show starting temperature at 30 degrees Celsius/adding fermented waste from a Bokashi bin/ adding Bokashi bran/temperature at 66 degrees Celsius.

The Bokashi process was developed in Japan in the 1980s; the term means ‘fermented organic matter’ in Japanese.  It involves adding all your food waste, cooked and uncooked, to a specially designed airtight Bokashi bin, with the addition of Bokashi in the form of a fermented bran or spray. The food waste is compressed with a compactor to eliminate as much air as possible as this is an anaerobic process.  Once the bin is full, you close the airtight lid and leave for 2-3 weeks.  Many people use two or three bins to keep the process going.

The bacteria (lactobacilli) in the bran or spray will create lactic acid which will effectively pickle the food waste rather than letting it decompose as it would in a regular food waste caddy.  After a week or so, liquid should start to form in the Bokashi bin which should be drained using the tap.   This ‘Bokashi tea’ can be used as a drain cleaner or diluted for use as plant food.

 At the end of the fermentation period the waste food is a pre-compost mixture that can be added to a composter or buried in soil to become a soil enhancer. Its composition is such that virtually all its original nutrients, carbon and energy enter rapidly into the soil.   No greenhouse gases are released to the atmosphere as they are during regular food waste decomposition in landfill.

Bokashi composting has traditionally proven particularly popular in urban environments where traditional garden composting is difficult. 

Mark

Taking compost from the Green Johanna


At Great Green Systems we’re always keen to share our and our customers’ experiences of composting with the Green Johanna. This weekend we opened up a Green Johanna that we have been trialling with great results.

This Green Johanna was used from mid-September 2022 to mid-February 2023 with the insulating jacket permanently installed.
100% of the cooked and uncooked food waste from this household was recycled in the Johanna. There were between 2 and 4 people in the household during this time, with up to four more visiting through the Christmas and New Year period. The amount of waste diverted to the residual (grey/black) wheeled bin fell to less than 50% of the bin capacity (ie less than 120 litres) per fortnight compared to previous usage. Over the Christmas period, when bin collections were suspended for a week, the residual bin comfortably coped with three weeks’ worth of general waste.
The fermented contents of several 14-litre Bokashi bins that were accepted from relatives who don’t have their own compost bin were also decanted into the Green Johanna.
The food waste was liberally mixed with carbon-based materials, mainly autumn leaves and wood chips, and treated once per month with Bokashi bran to accelerate the composting process.
Using this method, we consistently achieved compost temperatures of 30-60 degrees Celsius even through the coldest winter temperatures. All the food waste generated from the household was comfortably accommodated by the composting system.

Saving the top section to go back into the compost bin

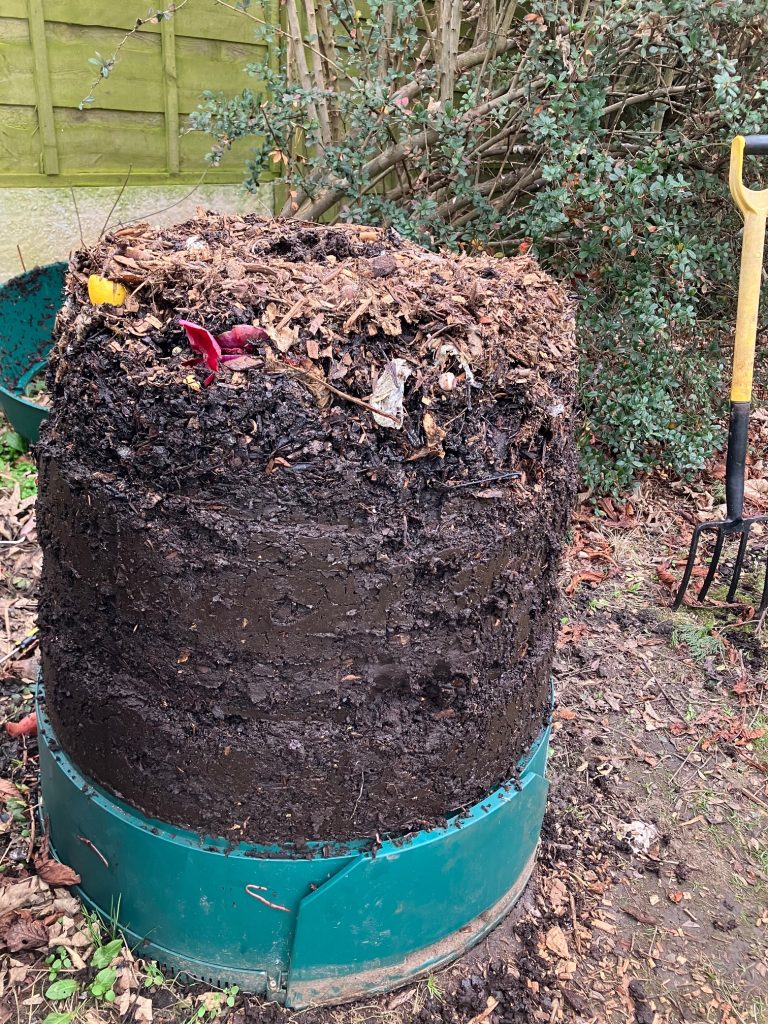
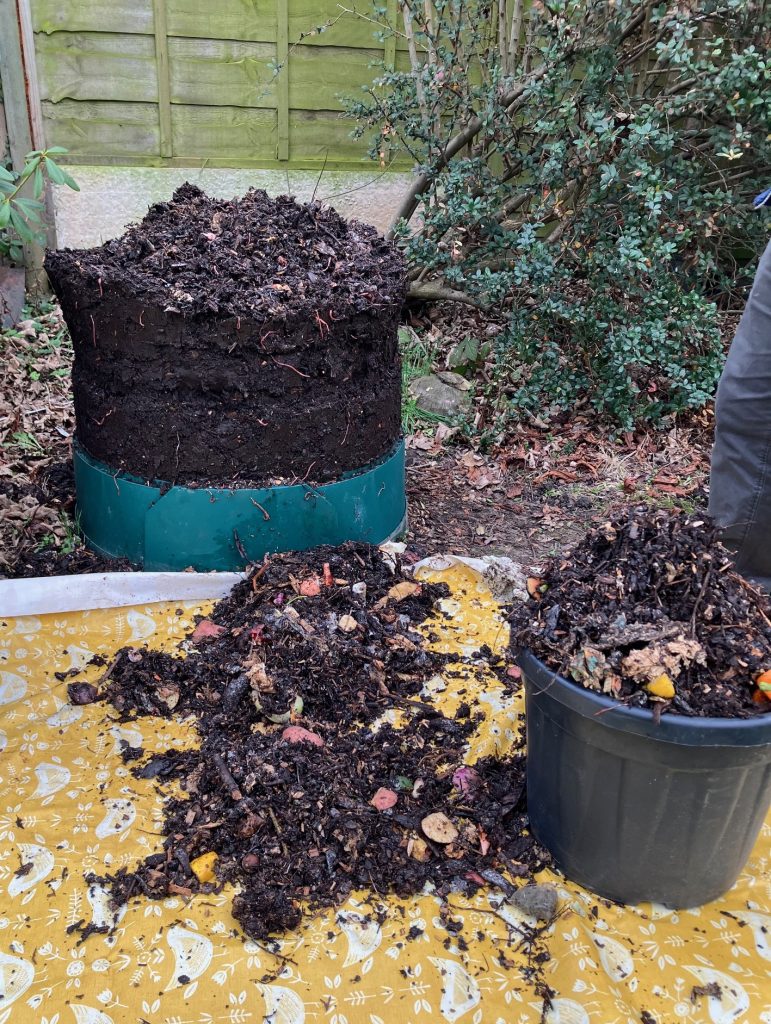
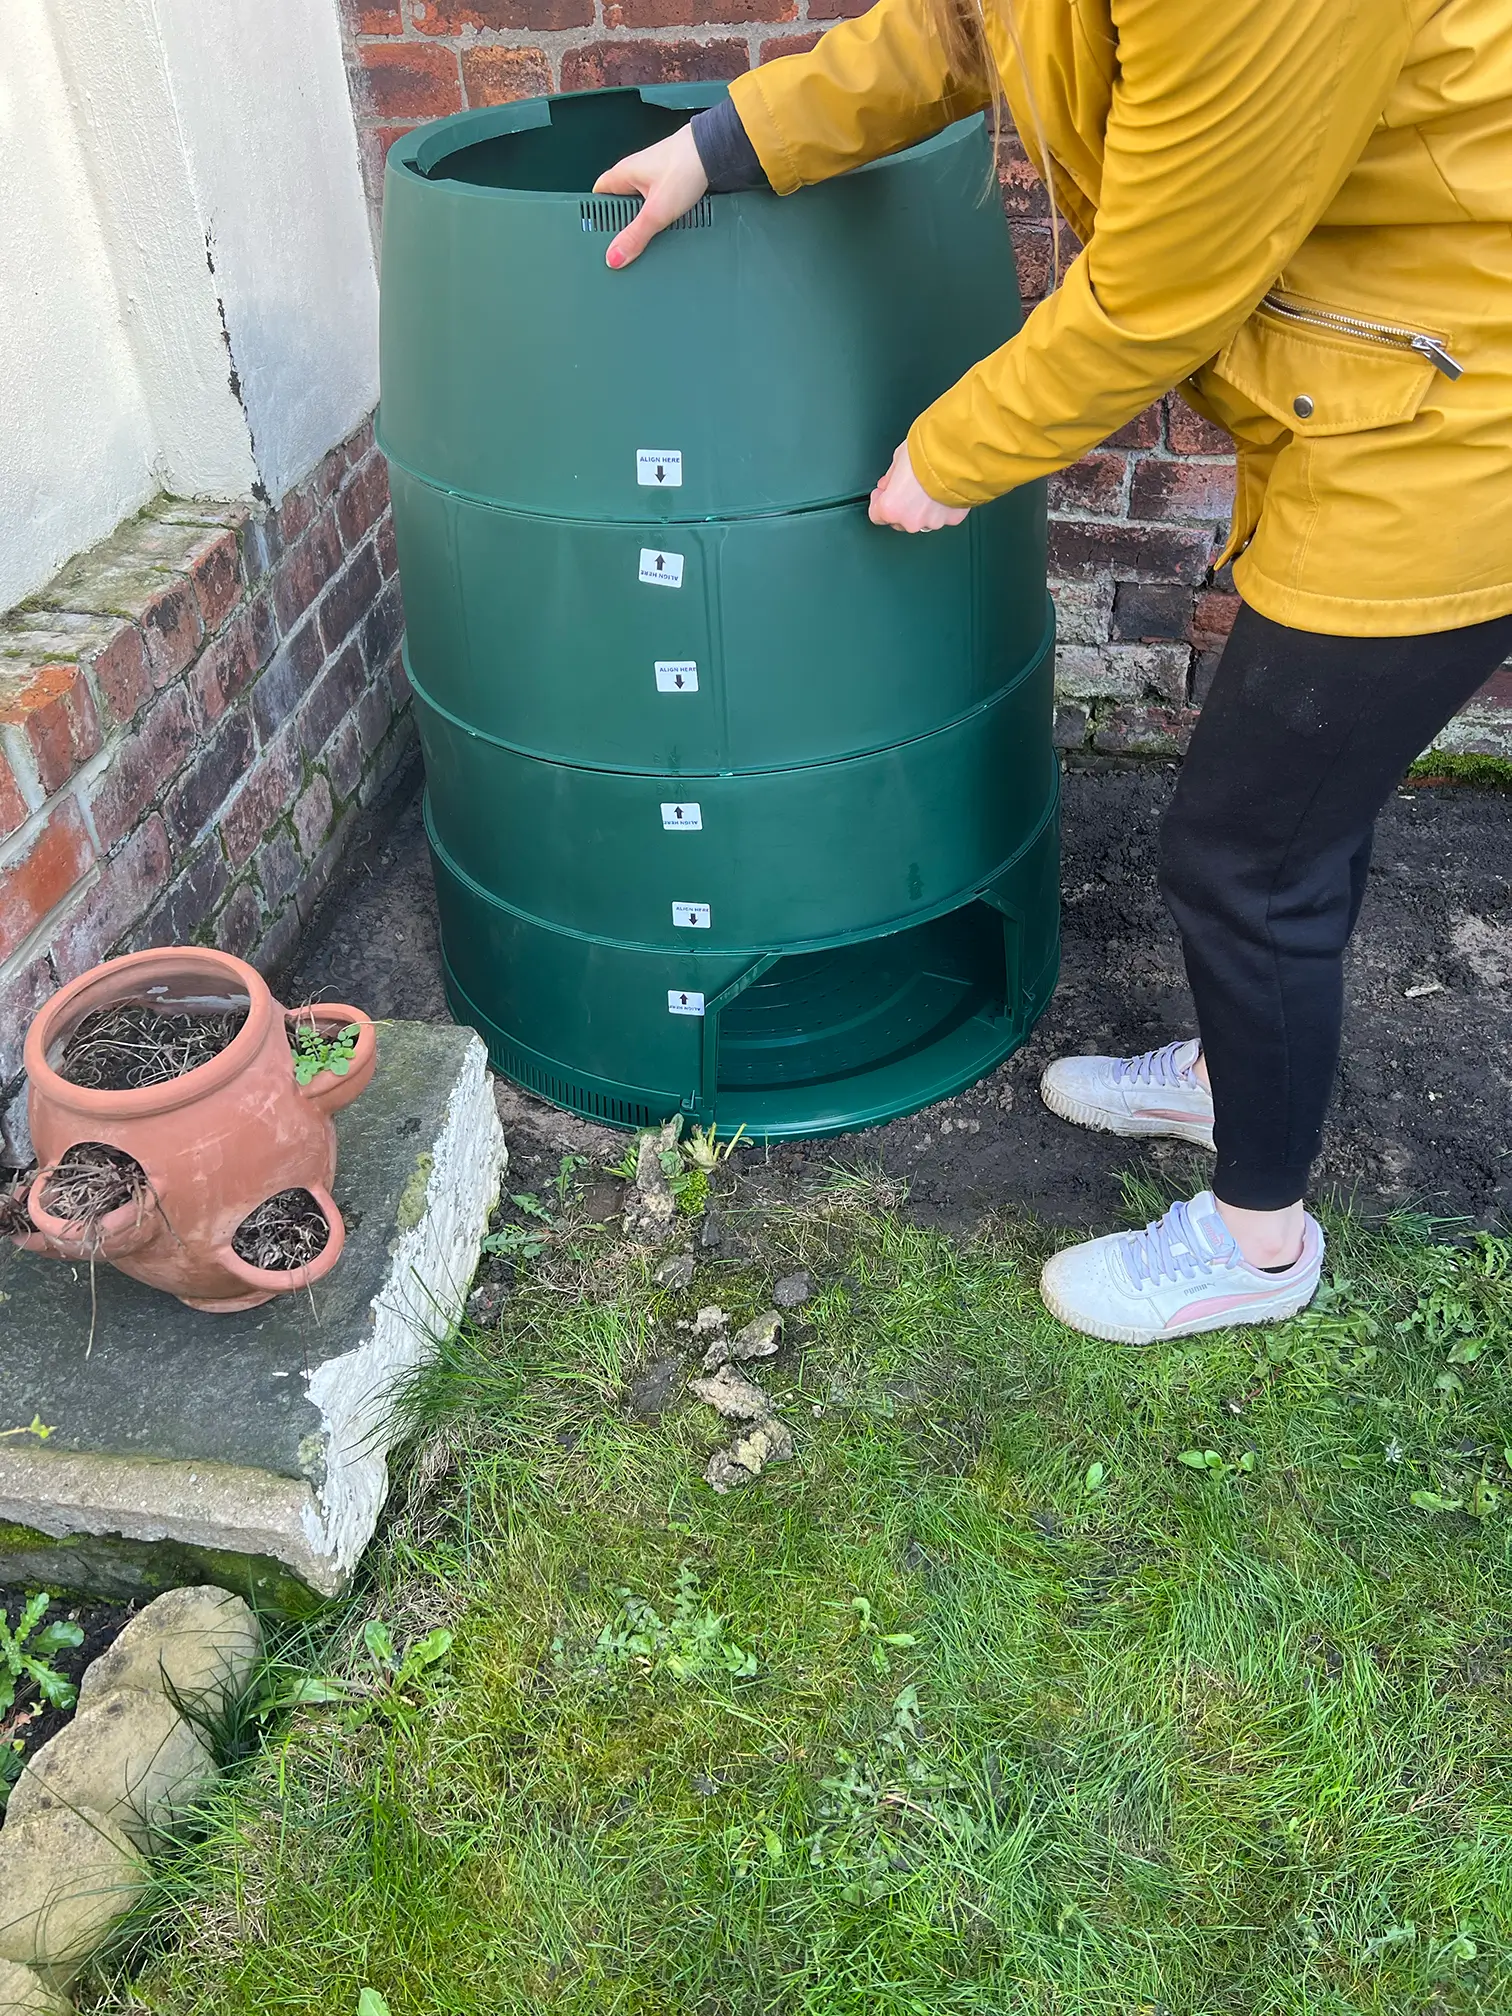
Compost can be accessed by unscrewing the hatches at the bottom or, since the Green Johanna is a modular unit made up of circular rings, the upper sections can be removed leaving an impressive tower of compost. As you can see from the photos, we chose the second route as we wanted to take a lot of compost out at once.
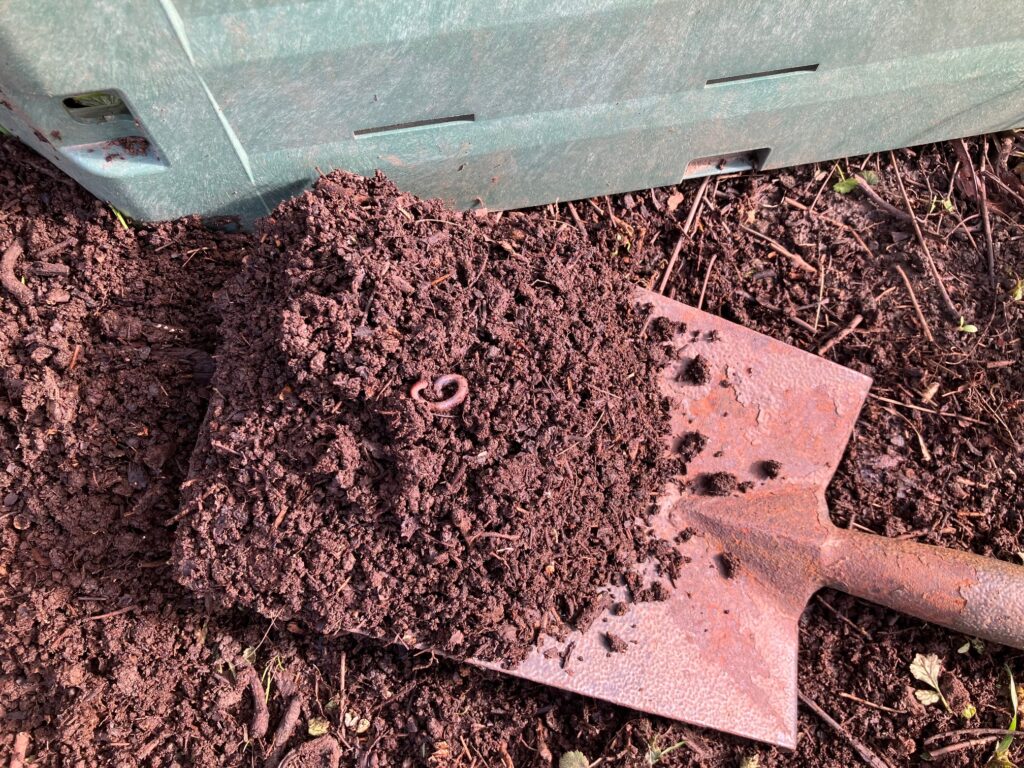
We removed the top sections of compost that are currently decomposing (taking care not to squash any worms) and placed these on an old wipe-clean tablecloth kept for this purpose until we were ready to put them back in the bin to continue the breakdown process.
More than half of the composter contents were removed for soil replenishment and other garden uses, with the remainder being returned to the Johanna for further composting.

Topping up planters with compost

To purchase a Green Johanna Complete Bundle, including Insulating Jacket, click here:
Green Johanna Complete Bundle – Great Green Systems
To upgrade your existing Green Johanna with an Insulating Jacket or Complete Accessory Set, click here:
Green Johanna Insulating Jacket – Great Green Systems
Green Johanna Accessory SetGreen Johanna Accessory Set – Great Green Systems

How to get the most from your Green Johanna

With your Green Johanna assembled, it’s time to choose the ideal location.

Choose a spot that provides a flat surface with free drainage for any liquid produced. Make sure it’s also not too far from the house and easy to get to.

The Johanna has been designed to promote efficient composting. Vents leading in from the base plate allow air to flow upwards into the container. The twistable lid regulates the ventilation system helping you to adjust air circulation and temperature. The container’s round shape ensures there are no cold corners so heat is spread evenly through the compost, and the tapered design means that compost sinks towards the centre of the unit and not to its sides, allowing air to circulate and oxygenate the compost.

If you’re new to composting, a bit of basic knowledge will help you on your way but you will also learn as you go by paying attention to what’s going on in your bin.

Successful composting depends on three essential ingredients: materials, air, moisture.

Composting basics

 MATERIALS – The microbes in your compost bin need a diet that provides a balance between waste materials that are rich in nitrogen and carbon. In composting terms, nitrogen-rich materials are often referred to as Greens and carbon-rich materials as Browns.

Nitrogen-rich materials (Greens) include:

  • Food waste, fresh grass and leaves, plants, flowers, tea leaves, home compostable tea bags, coffee grounds. These items break down quickly and contain moisture so they keep the bin’s contents moist.

Carbon-rich materials (Browns) include:

  • Twigs, branches, dead leaves, paper, cardboard, straw, wood chips, sawdust. These contents are drier and slower to break down.

 A mixture that contains a 50:50 balance of nitrogen (Greens) to carbon (Browns) is a good place to start for composting. You may find that you have a lot more nitrogen-rich inputs (food waste) than carbon so it can be handy to store carbon-rich items such as paper, cardboard and autumn leaves so you have them ready to add with food waste.

 The smaller the waste items are chopped or shredded, the greater the surface area for microbes to work on and the faster the pile will heat up. Items that are added whole, such as apples or carrots etc, will take longer to break down. Egg shells should be crushed or ground. Garden waste should be chopped into pieces no larger than 5cms or shredded.

Getting the nitrogen/carbon ratio right can be a case of trial and error but you will learn quickly through paying attention to conditions in the bin. 

As the micro-organisms break down the waste, they generate heat. As the temperature in the compost fluctuates, the types of micro-organisms present also change.

AIR – The fastest form of composting is done by organisms that need oxygen.  To give microbes air to breathe we need to add air to the mixture by aerating the contents to make sure there’s oxygen throughout the bin.

You can create air pockets by adding the cardboard tubes from toilet or kitchen rolls whole and keeping cardboard egg boxes whole. Waste paper can be added scrunched up so that it provides pockets of air, or shredded. Cardboard should be torn up. Wood chips are useful as they hold structure and create pathways for air.

WATER – You want your compost pile to be moist, rather than wet or dry. The consistency of the bin’s contents should be damp like a wrung-out sponge.  Microbes struggle if their environment is too wet or too dry. They need water to live, yet too much moisture can limit the amount of oxygen they receive. If compost is too wet, it will start to smell bad. If this happens you need to add shredded paper and cardboard and aerate well so that moisture is absorbed.  

Add water to compost that is becoming dry by gently watering with a small watering can, preferably with rainwater collected in a water butt.

Adding food waste

Food waste can be added directly or in home compostable bags, never plastic. If you tie the bags, once you have added them to the Johanna make sure to break them open using the aerator stick to allow oxygen and microbes to reach the waste.

Add food waste and other Greens first, gently stirring these in with the older waste below.
This helps the micro-organisms working below to become part of the newly added materials.
Then cover with an equal amount of carbon materials (Browns) and gently stir again. If you
prefer you can premix these nitrogen/carbon materials before adding them to the bin. Finishing with a layer of carbon, such as dry dead leaves or shredded paper/cardboard, helps to prevent smells from food waste attracting flies and vermin.

The only food-related materials that are not efficiently digested by the Johanna are those that require a very long time to break down, such as bones, large amounts of cooking oil/fat, the hard shells of nuts and seafood (such as oysters and crabs) and avocado stones.

If bones are added to the Johanna they will not break down and it would be
necessary to remove stripped-down bones from the finished compost, which could present
a danger to dogs. For this reason we do not recommend that bones are added.

You can boost the breakdown process by adding bokashi bran (available separately), fermented waste from a bokashi bin, or a bucketful of mature compost.

The Green Johanna Insulating Jacket (available separately) helps to boost temperatures for hot composting and to maintain composting performance in colder weather for regular composting. It should be removed in hot weather or the internal temperature in the bin could become too hot for the composting creatures to survive (above 70 degrees Celsius).

And finally…

To access your finished compost simply unscrew the hatches at the bottom of the Johanna and remove the compost using the aerator stick or a garden hoe.

If you want to access larger amounts of compost that have been left to mature, you can unscrew and remove the Johanna’s top sections. Return any fresh organic waste to the reassembled composter to continue breaking down.

The Johanna was designed and originally manufactured in Sweden, but is now made for Great Green Systems in Droitwich, Worcestershire.

Composting in communities? Anthea shows how

When Anthea Rossouw tried to get people into composting years ago, they thought she was crazy.

‘I just got blank stares,’ she recalls. ‘At the time there weren’t studies that proved what composting could do. People just wanted to throw things in the bin. Composting was a controversial idea.’

But Anthea is passionate about the environment and has a way of bringing people with her. Using workshops to show how to use the Green Johanna, she introduced composting to the housing complex in West Sussex where she was living at the time. This was so successful that it spread to other housing developments and businesses.

Anthea had been a keen recycler for years and pursued her interest by enrolling on the West Sussex County Council Waste Prevention Advisor programme delivered by the University of Brighton. So then when she was living in Walstead Court extra-care housing facility and saw piles of bin bags in the ‘rubbish room’ destined for landfill, she knew something could be done about it.   

With the support of the housing manager, Anthea showed residents and staff how to recycle food, garden and paper waste using three Green Johanna composters.

Her tutor at Brighton, Dr Ryan Woodard, had told her about Green Johannas and she thought they sounded ideal.

‘It was essential to get everyone on board though,’ she says.

 Anthea, front right, with other keen composters and the Green Johanna.

The workshops worked a treat. Waste disposal routines were transformed, as was the rubbish room, now that it was clear of bin bags containing food waste.

 Before long the residents were making their own compost and growing their own food and flowers. ‘We grew the most beautiful tomatoes,’ Anthea remembers.

Anthea approached the task methodically, weighing waste and tracking residual waste.  Waste to landfill was reduced by 55 per cent, black bin bags were reduced from three to one per flat per week. Over a six-month period 280 kg of food waste was diverted from landfill.

The communal gardens were not the only things that blossomed. Residents and staff reported that personal well-being and community spirit also flourished. The projects helped to keep people mentally alert and physically active, through taking waste out to the Johannas, crunching up cardboard containers etc. It also gave neighbours an added reason to chat to each other, acting as a conversational ice-breaker.

Anthea was then asked to introduce similar schemes to other housing associations and businesses. She also ran trials for DEFRA (Department for the Environment, Food and Rural Affairs) and won the Gatwick Diamond Green Champion award for her environmental work.

She then decided to try the same method of community food waste recycling in a very different place – her native South Africa. Here she introduced composting to struggling townships as part of her work with the Dreamcatcher South Africa Foundation that she had set up in 1991 to alleviate poverty by creating employment. In the community, waste was historically burnt at the dumpsite having a devastating impact on the environment and public health.

Anthea, second left next to Sir Trevor McDonald, receiving the Gatwick Diamond Green Champion award.

On a trip back home, she took three Johannas as luggage instead of suitcases, wrapping her clothes around the Johannas’ circular sections. Using the same training methods as in East and West Sussex, she installed three Johannas in a communal garden managed by local women known as Kamammas (a term meaning matriarch, or community leader).

Anthea says the Kamammas quickly took to working with the Johannas.

 ‘They found the composters didn’t attract dogs or vermin and they were delighted when they saw the quality of compost that was produced and the food they could grow with it.’ This trial was then scaled up to introduce another 25 Johannas.

The food that is grown with the Johannas’ compost is used in the women’s work providing tourists with traditional South African cuisine.  

A Kamamma introduces tourists to traditional South African cuisine.

Anthea divides her time between the UK and South Africa, and she is still in contact with the people she got composting back in the South of England. She is delighted – but not surprised – that the schemes she helped to implement are still going strong.

‘Any system must be sustainable, otherwise there’s no point. To bring about real change you have to go truly local. You need the people to make it work.

‘It takes around three months to introduce a composting project. After that people can stand on their own two feet.

‘Once you give people the skills, knowledge and confidence they become compost evangelists!’

After all these years, Anthea is still a big Johanna fan.

‘We used many other composters before settling on the Green Johanna. I underpin everything with baseline research and I knew the Green Johanna was the one.’

She still loves introducing beginners to composting.

 ‘They might know nothing now but you know they soon will. People become fascinated to know about all these little creatures in the composter doing their work.’

She firmly believes that if you pay attention to what’s happening in your composter you will learn  how to ‘speak compost’.

‘You soon learn to tell if you need to do something to bring good conditions back. If you haven’t enough garden waste, you can use paper product waste, such as toilet rolls, cardboard, shredded paper. If the contents look dry sprinkle a little water on top.’

The Johanna may have been designed in Sweden to cope with harsh Scandinavian winters, but it has happily adjusted to the South African climate, often turning ‘psychedelic green’ in the sun.

Whatever the shade, it’s still doing a great green job for the planet, wherever on earth it happens to be.  

Spare Parts