Top 10 tips for composting in schools

Composting is a fantastic opportunity for communities to get together to create a greener environment.

Nowhere is this more valuable than in schools, where children can be taught skills that will last them a lifetime.

Composting enables people to take responsibility for their own waste and deal with it in the most environmentally-friendly way – onsite where it is produced – reducing the energy and cost required to transport it further afield for treatment.

 When people compost they become aware of how much waste they produce; as a result they tend to waste less and recycle more.

What is composting?

Composting is the natural process that occurs when insects, worms and micro-organisms break down organic waste (food scraps, garden waste, paper waste) into a nutritious substance – compost – that can be used to feed soil and plants.

By managing the composting process, we help the micro-organisms to thrive and produce compost faster.    

What are the benefits of composting?

Composting is one of the most worthwhile things you can learn. There are only a few rules, and you only have to learn them once – the laws of nature don’t change. This knowledge will serve you well through life.

Composting:

 * creates free nutrient-rich soil food for your own use

* retains moisture in the soil, so reduces the need for watering

* helps plants to grow stronger and healthier

* cuts the amount of waste sent to landfill or incineration

* reduces your carbon footprint

* has a positive impact on the environment

*  inspires children to become composters of the future

How to make it work

Compost bins are not ordinary bins; some degree of management is needed and there are a few golden rules to follow.

Experience has taught us to give composting communities the following advice:

  • At least one person/member of staff should have overall responsibility and check in on the composter every couple of days to prevent issues developing.
  • Ensure as many people as possible have access to an instruction manual so they get to know the three golden rules: the balance needed between materials; aeration; moisture levels.
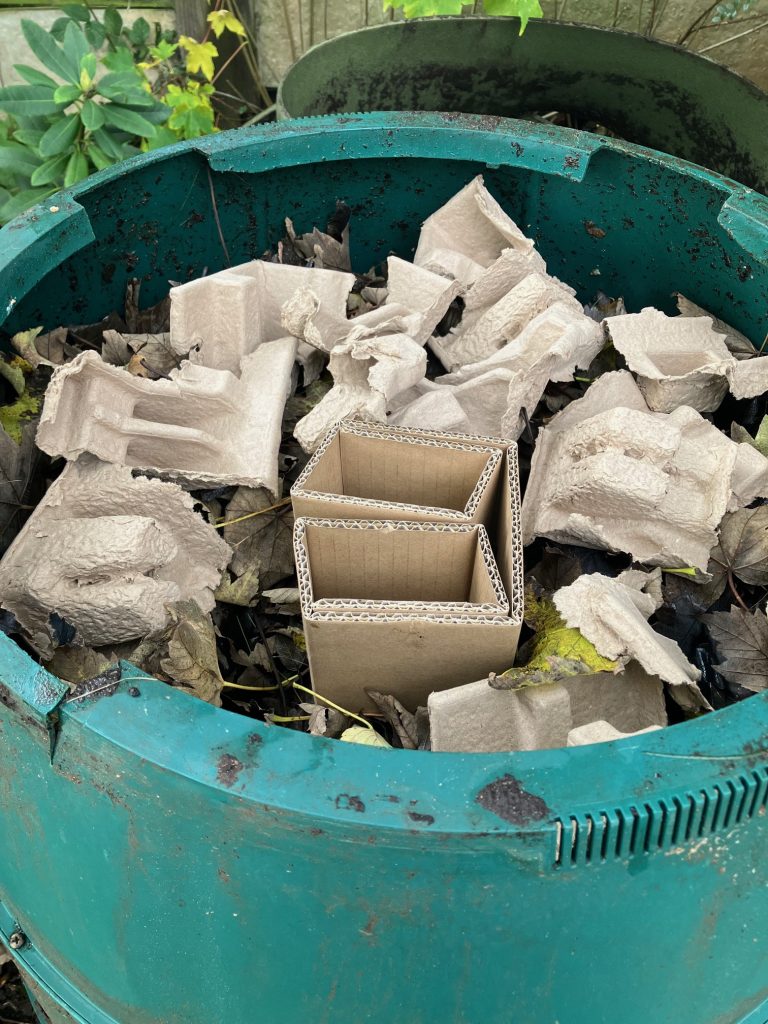
  • In a school, composting should ideally be a whole-school project. For example, a lot of carbon-rich materials will be needed and it’s much easier if this can be stored in lidded containers so it’s ready for use. This can prompt fun activities such as cardboard tearing sessions. Children could also bring cardboard from home to get parents involved too.
  • To educate the whole school – staff as well as pupils – put up posters giving basic composting information for everyone who will be adding organic waste to the bin. We have A3 posters available for schools and groups, or children could design their own.  
  • Help everyone to understand that every time a caddy of food waste is added to a compost bin (adding nitrogen-rich materials) this should be followed by an equal amount of carbon-rich materials.
  • Many schools produce a lot of fruit waste, especially in the younger classes, and this needs particular attention as it has a high water content which can create a soggy mess if it’s not balanced with appropriate materials and aerated well.  Sawdust works well as a biofilter to absorb unpleasant smells. Fruit waste and sawdust should be added in thin layers and mixed well.
  • It’s a good idea if someone can keep the composting going during holidays by taking waste from home every couple of days so the bin continues to be fed.
  • Teach children that micro-organisms are living creatures, and the composting process is all about nurturing them.
  • Our blog – Compost School – a guide for absolute beginners – is a useful aid for lesson planning. It’s written simply for children to understand but is also aimed at anyone who may not have composted before.
  • Master composters are people who are passionate about composting and have trained as volunteers to share their composting knowledge. They visit schools and groups to offer advice. Check with your local authority to see if there are any in your area.

If all goes well, your composting project can expand to compost even more waste by using several compost bins or a Ridan giant tumbler, which has a cog and gear system that makes the handle easier to turn.

 Get a ‘compost chief’!

Projects involving a lot of people can hit problems if composting methods are not followed by everyone.

Occasionally, Green Johannas have been used in schools as general wastebins for food waste, without the necessary balance with carbon-rich materials, and this has inevitably led to problems. This has usually been the result of there not being a nominated ‘compost chief’ in charge.

Disappointing experiences give the impression that composting doesn’t work, which isn’t the case, so we are keen to help where we can.

What about the Green Cone?  

If you think a Green Cone Food Waste Digester might suit your aims, consider the following points:

  • You need a sunny spot in well-draining soil (not clay or chalk) where you can dig the hole required for the Cone’s underground basket.
  • One Green Cone can accept the food waste of the average family of four – about 1kg per day.
  •  Food waste lands in the underground basket; once the underground basket is full, you should stop adding waste until there is space in the basket for more.
  • Regular additions of accelerator powder are recommended – aim to use one sachet per month. Accelerator powder contains beneficial bacteria which digest the waste and boost the breakdown process.
  • As this is a food waste digester rather than a composter, no compost is produced. Instead, a nutrient-rich liquid seeps from the Cone’s underground basket and feeds surrounding soil.
  • The Green Cone doesn’t accept garden waste or paper waste.

Helpful advice

Some people are put off composting because of a fear of pests, but there are steps you can take to make a compost bin and the surrounding area so unattractive to unwanted visitors that they will go somewhere else instead. Read our blogs about how to deter pests and flies.  

How we can help

We are keen to support community composting projects. We can send you several copies of the instruction manuals for the Green Johanna and Green Cone so they can be shared out, as well as colourful A3-size posters about the Green Johanna.   Contact us at [email protected].

Benefits of the Green Johanna’s jacket

  As the temperature outside plummets so the compost in your bin might cool down, but by maintaining good composting techniques you can keep your compost ‘cooking’ even in the coldest winter periods.

In the case of the Green Johanna, adding the insulating jacket also helps.

The Johanna pictured below in January in Leeds kept its compost warm at 40 degrees Celsius while the ground temperature was at zero.

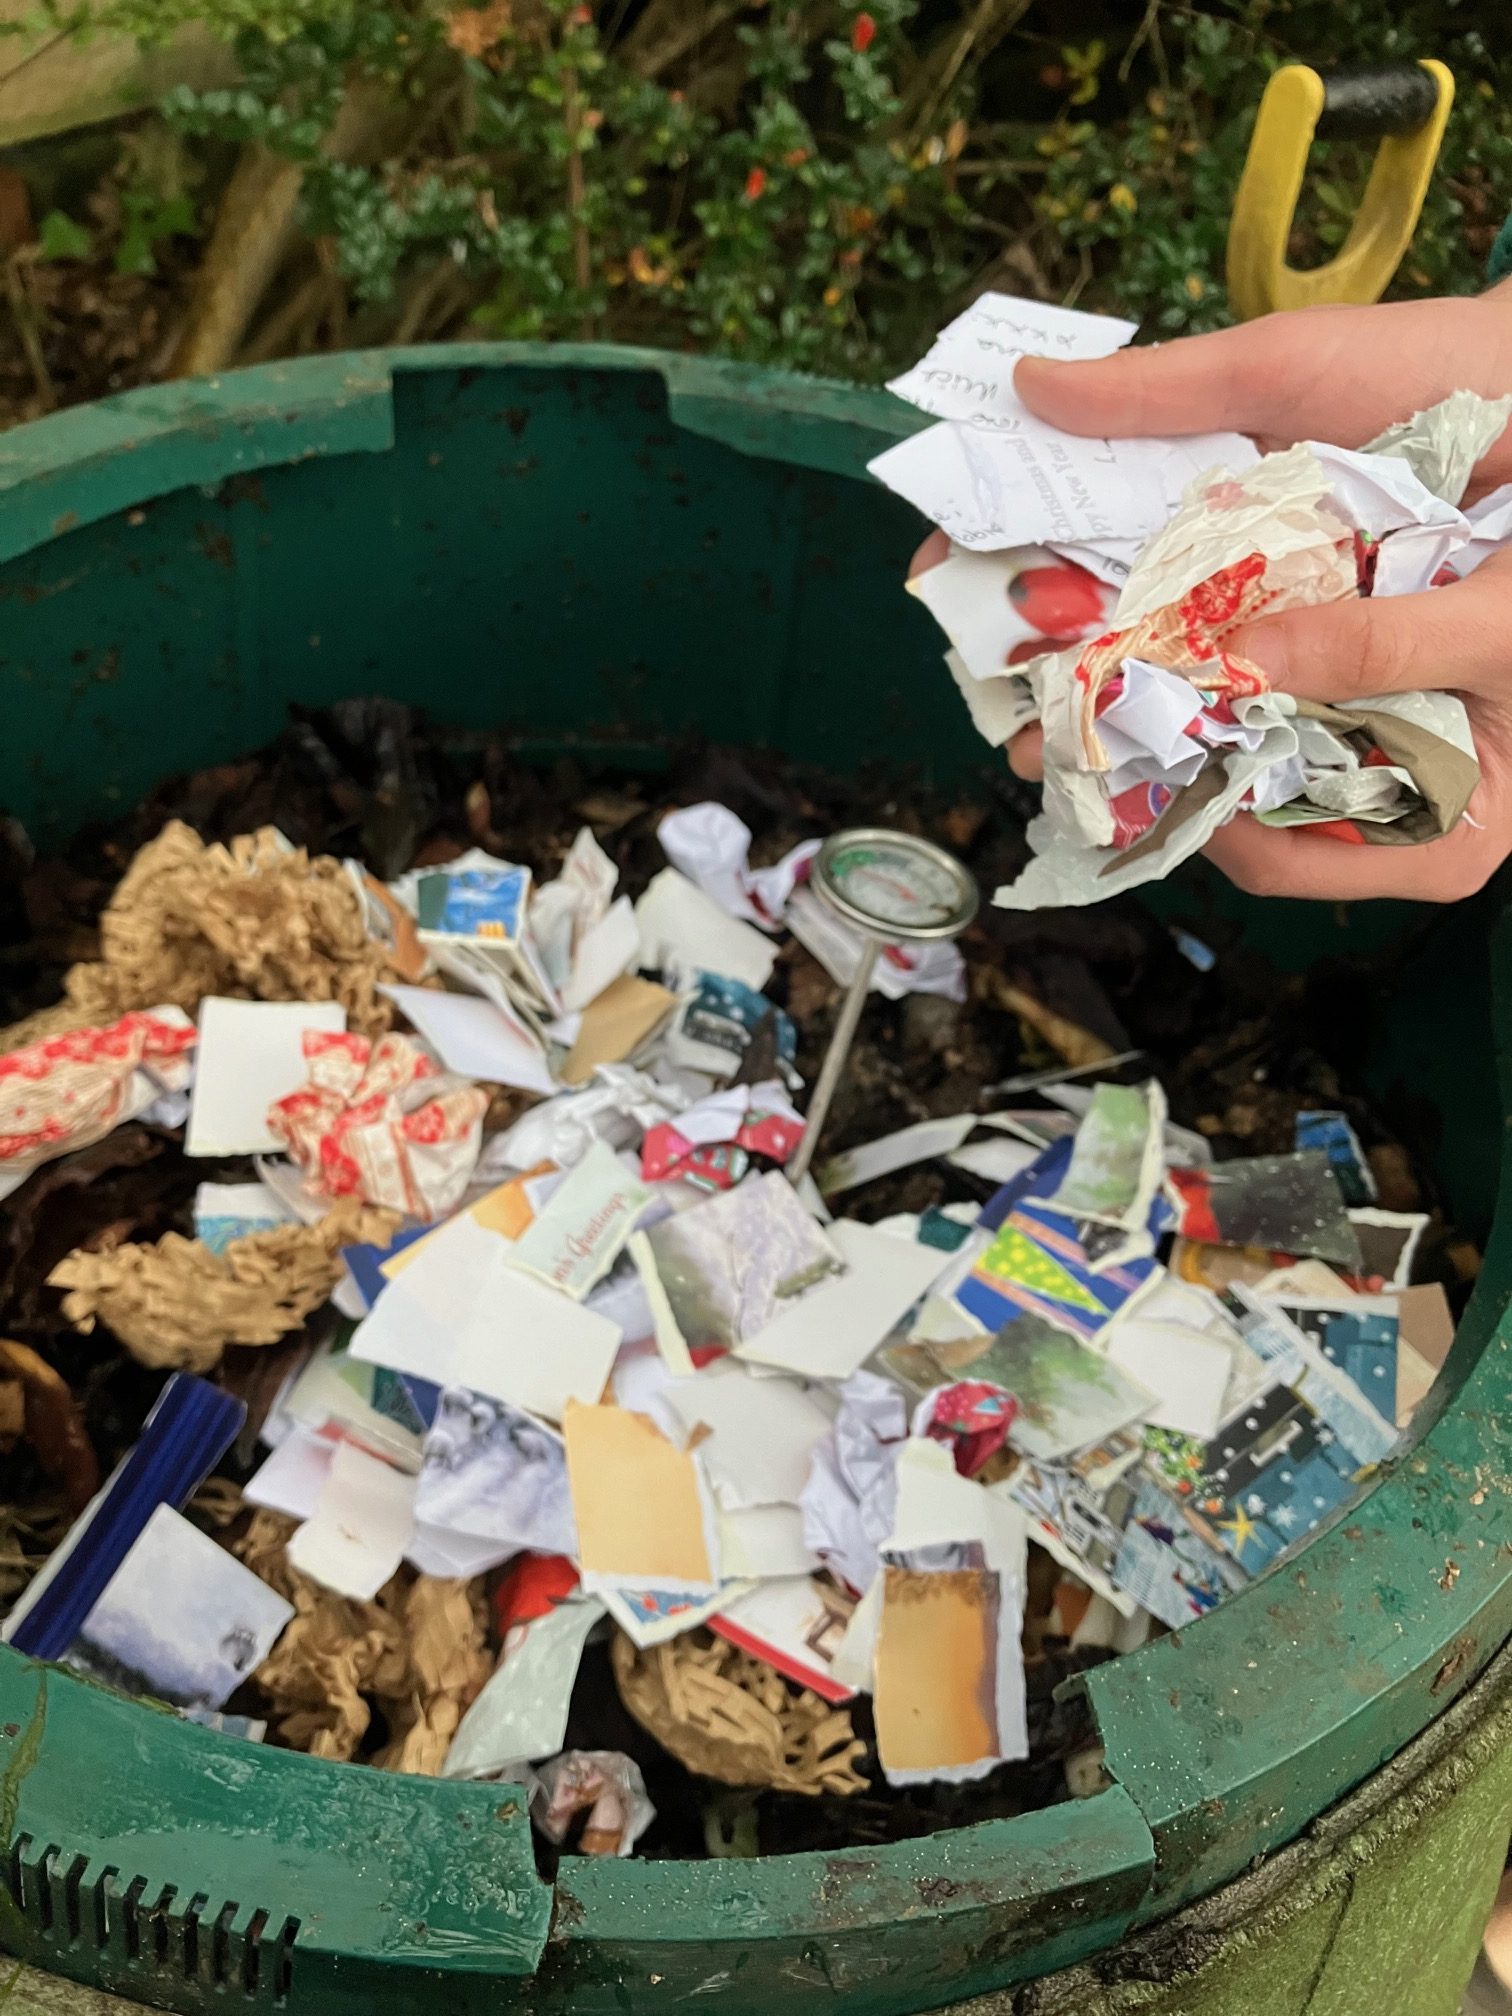
This particular Johanna received all food waste from a family of four, rising to 10 people over the Christmas period. Carbon sources include stored shredded leaves from several trees in the vicinity, as well as Christmas paper waste such as cardboard packaging, compostable wrapping paper and Christmas cards.

The Great Green Systems team tend to keep the jackets on our Green Johannas for most of the year, not just in winter, as we’re based in the chilly north of England.      

Don’t worry that using the jacket will make the Johanna too hot for worms, as one customer suggested. This is not a problem because worms can easily enter and leave the composter through the small holes in the base plate. At temperatures approaching 30 degrees Celsius they will move where it is cooler, usually the bottom of the bin where the compost is maturing, or they can leave the bin entirely.

 The jacket is made from foamed polyethylene – a lightweight, water-resistant material that is tough but flexible and designed to fit snugly to prevent cold air from circulating round the Johanna. It’s made for Great Green Systems by a specialist foam manufacturer in Northamptonshire.

When fitting the jacket, it’s important to ensure that the bottom section doesn’t cover the vents at the sides of the Johanna’s base as these are necessary for airflow.  

The jacket should be installed with the two upper sections pulled down so they overlap the section underneath by about 5 cm. Doing this means the ventilation holes are left clear.

Green Johanna wearing the Insulating Jacket

 Also check throughout autumn and winter that the vents at the bottom of the Johanna are not blocked by leaves or debris or snow. Air is taken in at ground level so keep this area clear so that air can enter freely.

The jacket can easily be removed if the compost gets too hot (above 70 degrees C) in warm weather. Compost thermometers, which have a stem to reach down into the compost, are a useful aid.    

  • TIP: Give the bin’s contents a boost by adding beneficial bacteria in bokashi bran or a layer of soil or mature compost. You can also add coffee grounds or chicken manure to add a hit of nitrogen to your mix.  

Johanna planner for winter:

  • In freezing weather limit ventilation through the Green Johanna lid’s ventilation system – twist the lid towards the minimum setting.
  • Wood chips are a great addition, creating airflow and adding plenty of fungi to the bin.
  • Keep adding to the bin – ideally about three times a week – to maintain the composting process. The Johanna’s generous 330 litre capacity means the compost mass acts as an insulating factor. 
  • Chop items up. Smaller items provide a larger surface area for more microbes to work on. 
  • Aerate regularly – about twice a week – to ensure the aerobic microbes breaking down the waste get enough air.  Without air, the contents will turn anaerobic and start to smell.   
  • Check moisture levels – by doing the squeeze test; grab handfuls of the bin’s contents and squeeze. One or two drops of liquid should appear. The ideal consistency is like a wrung-out bath sponge.

When I got the kids a wormery for Christmas

Last Christmas I thought long and hard before getting presents for my best friend’s grandchildren – Reggie, 6, and Maggie, 2.

You don’t want to waste money or add to the mountain of discarded junk by buying pointless gifts.  

Plus, I always like to get practical, useful things – I’m not bothered about being popular (‘Oh great, another swimming cap/homework bag from Auntie Julie.’)

But this time I upped my game.

Eco gifts are gifts that keep on giving. It would be easy to drive children to despair about the climate crisis, but how much better to show them instead what they can do to help? Yes, tackling the climate emergency is a big job, but it’s one that each and every one of us – no matter how young – can play a part in.

And so I gave Reggie and Maggie a wormery.

Why? Because wormeries (also called worm farms) are a great way to introduce children to small-scale composting and the marvellous way that nature deals with waste. Not only does vermicomposting (from the Latin ‘vermis’ for worm) keep organic waste out of landfill, but it also shows how easily worms can turn our food scraps into a highly nutritious food for plants

Yes, there were quizzical looks from the kids as they opened the box – it was clearly not a fort or a unicorn castle – but they were very keen to set up the Maze Worm Farm and probably very relieved that it wasn’t a pack of thermal vests. As it was the coldest time of year, they set the worm farm up in the greenhouse, which provided warmth and shelter for the winter, and waited excitedly for their worms to arrive. (The worms come separately through the post from a supplier of specially selected composting worms.)

The children’s reaction when the worms arrived was a mixture of ‘Eurgh’ (Maggie) and ‘Ooh’ (Reggie).

Reggie was keen to show how brave he was and gently introduced a worm to his sister, who also became brave but was happy just looking. They made a cosy home for the worms, providing a blanket of newspaper to keep them warm and safe in the dark.   

Reggie and Maggie noticed the worms were not very active for a few weeks, probably because of settling in at such a cold time of year, but then they soon started tucking in (the worms, not the kids).

 Like most young children they were expecting fast results, so were surprised to learn it can take two to three months to get worm casts (poo, since you ask). You can’t rush these things…

Children start a wormery

Maggie and Little Bear waiting for worm casts

But when you do harvest the casts you realise why gardeners call this stuff ‘black gold’. One tablespoon of worm casts provides enough nutrients for a plant to thrive throughout the growing season.

Ten weeks in and Reggie and Maggie were the proud harvesters of some of this black gold.

It was great to see the change in Maggie’s attitude to the worms – she went from being afraid of them to become knowledgeable and confident looking after them.

Harvesting worm casts

Wonderful things about worm farms

  • They make great projects for children as this subject can grow in complexity as the child grows – it can be super simple for pre-schoolers but gradually takes in chemistry, biology, ecology, the food cycle and carbon cycle as well as gardening and growing your own food.  
  • Children will develop respect for these humble but mighty creatures. Through tunnelling, worms aerate and improve the soil, providing nutrients for plants to flourish. Without them the earth would become cold, hard and sterile.
  • Studies have shown that the simple act of introducing worms to degraded soil in poor regions of the world has increased plant yields by 280%.
  • Worms are easy to feed on vegetable and fruit scraps, coffee grounds, tea bags, and crushed eggshells.
  • Convenient to set up indoors or outdoors in a sheltered spot.

Encouraged by how well Reggie and Maggie took to vermicomposting, I decided that when it came to Easter they didn’t need yet another boring Easter egg from Auntie Julie.

Not when there are other fabulous presents to be had, such as membership of the Earthworm Society!

 I like to think they’ll thank me one day.

Julie

What is hot composting?

Hot composting is a way of composting that uses various techniques to achieve higher temperatures than the traditional method of composting. As a result, you can add a wider variety of food waste and compost will be produced faster.    

A compost bin isn’t absolutely necessary for hot composting – you can hot compost in a large pile – but using a container makes the process more manageable and less messy.

Hot composters are designed to nurture heat-generating micro-organisms and to retain the heat they create as they break down organic waste and multiply.

For hot composting, you need the right ingredients in the correct proportions mixed properly.

What are the advantages?

Hot composting takes more effort than traditional composting but most people find it’s worth it for the benefits, such as:

  • A wider range of foods can be composted that are not usually recommended for composting, such as cooked food and meat.
  • Pests are deterred because food scraps break down faster at higher temperatures.   
  • Pieces of natural clothing, such as wool, cotton and linen, can also be added. These usually take a long time to break down in traditional composting (usually called cold composting).
  • Weeds can be killed at high temperatures.
  • Faster compost is produced in around 4-6 months. Cold composting takes between 6- 18 months.

Materials:

The eco system in a compost bin thrives on a balanced diet of nitrogen and carbon. Nitrogen is needed by the micro-organisms for growth and reproduction, while carbon provides them with energy.  

Nitrogen-rich materials are wetter and faster to break down. Carbon-rich materials are dry and slower to break down. In composting terms nitrogen materials are often referred to as Greens and carbon as Browns.

Nitrogen (Greens)

Food waste

Coffee grounds

Fresh green garden waste, such as grass mowings and green leaves

Wilted flowers

Seaweed/kelp

Tealeaves, tea bags (non-plastic)

Natural fabrics

Manure from herbivore animals

Carbon (Browns)

Dead leaves

Paper

 Cardboard

 Woody garden waste, such as twigs, branches and stalks

Wood chips from untreated wood

Sawdust from untreated wood

Pine needles/ cones

Straw

An image of a very full Green Johanna composter

Balance

Ingredients are added in proportions referred to as the Carbon: Nitrogen ratio (C:N ratio). The ideal C:N ratio is considered to be around 30:1 but it would be difficult to calculate this exactly as every item has a different ratio. Most plant materials are a mixture of both, but more carbon than nitrogen as they get older and tougher.  You don’t have to be too precise with this or worry about it too much.  

A good guide is to simply add equal amounts of carbon to nitrogen (followed by a thin covering layer of carbon to prevent smells), then observe the bin’s contents and make adjustments if your compost lets you know something is wrong.

For example, if your bin starts to smell unpleasant, it’s likely that there’s too much nitrogen and not enough air. If breakdown is very slow, there’s probably too much carbon.

Adding waste

Hot composting can be achieved using different methods; our focus here is on active home composting where householders use one or two bins in an ‘add as you go’ system, adding food waste as it occurs every couple of days, mixed with carbon content.

Aeration

Good airflow is essential for hot composting. The micro-organisms that create heat are aerobic so need oxygen to survive. This is achieved by regularly aerating the bin’s contents, stirring and turning the waste materials with an aerator stick.  

An image of a man mixing composter in a green johanna with the aerator stick

In the immediate aftermath of turning there will be a dip in temperature but ultimately it will result in a higher bin temperature for a longer time.

At the outset, covering the bin’s base with a layer of 15-20cms of twigs will help to create airflow through the contents.

Aerating compost:

  • Helps all materials to make their way to the heat in the middle and to decompose at an even rate. 
  • Prolongs the time that the bin stays at higher temperatures.
  • Helps to distribute water and nutrients to all areas. 

Moisture

Moisture is essential for efficient composting. The contents should be moist but not saturated, with a moisture content of roughly 50 per cent.

The consistency of compost should be damp like a wrung-out sponge.  You can check this by doing a squeeze test – take a few handfuls of compost from different parts of the bin and squeeze – only one or two beads of liquid should be visible.

If compost becomes too wet the water will deplete the amount of oxygen in the bin. Then microbes that thrive in anaerobic conditions will take over, causing slow breakdown and an unpleasant smell. In this case, you should add more carbon content and aerate well.

As micro-organisms become more active, they use up water, causing the compost to dry. In dry compost, microbes will not be active or reproduce.

 If you are regularly adding food waste, there will usually be enough water content in the bin. If you do need to add water, ideally use stored rainwater from a water butt added to a small watering can with a fine rose spray.

Chop or shred

For hot composting, it’s best to chop or shred the materials before adding them. This increases the surface area in contact with microbes in the pile. Smaller pieces – ideally 2 to 5 cm – also make turning the pile much easier.

If you have access to a shredder, you can shred Greens and Browns at the same time, blending materials as you shred. This creates a fine-textured mix that heats up quickly.

Alternatively, you can chop materials using a pair of hedge clippers and a board.

Large pieces will still break down but will take longer. You can get away with larger pieces if you also have other ingredients with a much smaller surface area, such as grass or sawdust.

 If items are too small, they can clump together, reducing the ability of air to circulate through the bin.

What happens?

When there’s enough carbon to fuel these billions of micro-organisms, enough nitrogen and water to help them grow, and enough oxygen to let aerobic bacteria thrive, composting magic happens.  

Heat builds in the bin and heat-loving bacteria multiply, breaking down the materials.

As the temperature increases in the bin, different populations of micro-organisms rise and fall, either going dormant, or becoming fodder for the next wave of bacteria that thrive in even hotter temperatures.

When temperatures are between 20-40 degrees Celsius, this is called the mesophilic phase; from 40-70 degrees Celsius is the thermophilic stage when fast, hot composting takes place.  If temperatures go above 72 degrees Celsius this is too hot for the aerobic micro-organisms to survive. This will cause the process to slow down or stall.

The power of observation

Composting depends on a blend of factors: contents, moisture, size of materials, size of bin, the composter’s efforts, climate and soil conditions.  Even neighbouring households will experience different outcomes due to a difference in diet.  

 Ultimately the best guide is your own observations – how your bin looks and smells. With experience you develop a feel for your materials and can tell what’s needed just by looking.

 Most people find the fact that they can influence the quality and speed of their compost a rewarding aspect of hot composting.  

Why a Green Johanna works well for hot composting

  • The Johanna has been designed so that vents take air in at the bottom to send it upwards through the bin. Incoming air goes up past the four ventilation plates on the inside of the base plate, past the maturing compost layer up into the decomposing compost where it provides oxygen for the micro-organisms.
  • Ventilation in the lid helps control airflow depending on conditions. Switch to minimum in cold weather to keep heat in the bin.
  • Use of the Insulating Jacket helps to control temperature.
  • The conical shape encourages compost to fall back into the centre and not stick to the sides.
  • The generous capacity of 330 litres means the mass of materials acts as an insulating factor.
  • The Green Johanna is recommended as a Best Buy by Gardeners’ World magazine and Which? consumer group.

For more information about composting in general we recommend A Gardener’s Guide to Composting Techniques by master composter Rod Weston.

You’ll always be glad you got a water butt

The great thing about having a water butt (or two) is that whatever the weather, you’ll always be glad you got one.

Although the UK is regarded as a wet country, regional variations in rainfall are dramatic, with areas in the south of England receiving less rain than some African countries.

Even in dry districts, an estimated 24,000 litres could be collected from the roof each year with the use of water butts.

 Rainwater can be collected from any roof as long as there is a gutter and downpipe that enters the drain at ground level. Water butts with a rain diverter collect water from the downpipe and still let the overflow enter the drain.

Why water butts are winners:

  • Using rainwater on your garden saves on water bills.
  • Plants prefer rainwater as it has a lower pH. Minerals that are found in mains tap water, especially in hardwater areas, can raise the pH of the root zone, which affects nutrient availability. Chemicals added to mains water that are safe for humans can be harmful for plants.  
  • Plants are most vulnerable to shortages of water when they are first planted and their roots have not yet established into the deeper, moister layers of soil. Knowing that you can always water those fresh plantings that need it most takes avoidable stress out of gardening.  
  • Water butts help to reduce flood risk. Urban areas struggle to cope with heavy rainfall as there are not enough porous surfaces to absorb downpours. Water butts capture water that could contribute to surface runoff – a major cause of flooding.   
  • As well as the house, water butts can also be attached to sheds, garages, greenhouses and outbuildings – useful if you have a large garden that requires a lot of water. If you have a smaller garden and low-maintenance plants, you won’t need as much water so a mini butt would be better; storing more water than you need can lead to stagnation – see below.
  • Rainwater is better than tap water for watering dry compost to maintain the moisture levels necessary for successful composting. Chemicals that are added to tap water can kill some of the beneficial micro-organisms that you want to nurture in your compost bin.
  • A vast amount of energy is used to provide safe water to homes, so using stored rainwater or grey water (domestic wastewater) in your garden lowers your carbon emissions.
  • Never is a water butt more appreciated than in the fickle British summer. Even in a wet summer your garden still needs watering – rainfall will water the soil’s surface but not deeper down. And if there’s a full week of sunshine it won’t be too long before a drought is declared, along with water restrictions and hosepipe bans.
An image of a cute dog on a very dry piece of land

Tips to look after your water butt

  • Over time, water that is left in the butt can stagnate, causing bacteria to breed and creating bad smells.  To avoid this, use the stored water regularly.  Replenishing the stored water with freshly collected rainwater helps to dilute it and keep it clean.
  • Keep gutters clean – debris such as bird droppings, moss and leaves can be washed into butts and rot, creating bad smells.
  • A tight-fitting lid is essential to prevent debris falling in. Check or replace the lid if it doesn’t seal properly – a loose or broken lid can attract bugs and cause bacteria to grow.
  • If the water smells, it is still safe to use on established plants but use a watering can instead of a spray hose to minimise the risk of inhaling any airborne bacteria.   
  • Remember good hand hygiene when using collected water.
  • Sunlight and heat speed up stagnation, leading to the growth of bacteria, so choose a shaded area for your water butt. If you find the water butt is getting hot, give it a deep clean and move to a cooler position.
  • If you use hoses for any source of water, disconnect them when you are not using them so that the water will drain out; bacteria grows in water that is left to warm up in the sun.
  • If multiple water butts are used, rotate the use of each one to keep stores of water fresh. They can be joined together by a water butt connector kit.
  • It’s easier to access the water if the butt has a tap at the base and sits on a stand so a watering can will stand on the ground under the tap.

How to clean your water butt

Clean your water butt once a year, preferably in autumn when you don’t need the water.

  • Open the tap and let any stored water drain out completely.
  • Lay the butt on its side and empty out any sludge or debris.
  • Clean the outside with a hose and brush.
  • Clean the inside with gardening detergent and a long-handled brush.
  • Add freshener if required and let the butt refill.

Ways to keep water fresh:

  • Emptying and cleaning the water butt and gutters is the best way to keep water clean.
  • Be Green water butt freshener is a non-toxic treatment that keeps stored rainwater free from algae, scum and smells.  
An image of a water butt.

A water butt attached to a shed at Garden Organic’s garden at Ryton.

When is my compost ready to use?

This was a question that two new owners of a Green Johanna were asking themselves in their first year of composting. 

Adam and Hayley decided to try composting with a Johanna last year following a few failed attempts with other composters.

They’re both vegans and wanted to produce their own compost to use for growing their own veg, as well as recycling their food and garden waste sustainably.   

  The standard test for when compost is ready for use is that it is dark brown in colour, crumbly in texture and has a pleasant, earthy smell like damp woodland. If you’ve been hot composting, the mature compost will no longer be generating heat. The original materials should not be recognisable. There may be a few items that have not fully broken down, such as sticks, bits of tea bags, corncobs, eggshells, fruit stones, compostable bags – these can be picked out and added back into the next batch of composting material.

 If there are other recognisable waste items and an unpleasant smell, the compost is not ready and should be left to continue breaking down.

Master composter Rod Weston, in his book A Gardener’s Guide to Composting Techniques, suggests a test to check if compost is ready if you are wanting to add it to soil immediately (immature compost added to soil can cause a temporary reduction in the availability of nitrogen and oxygen and create root-inhibiting organic acids).

The test involves putting a handful of compost in a plastic bag and sealing it for three days at room temperature. If when opened the contents have a pleasant earthy smell, composting is complete.

 Rod suggests that during the growing season immature compost is best used as surface mulch. If mostly composted it will finish breaking down in the soil. In autumn and winter it can be dug into garden beds. Some people prefer to leave their compost breaking down over winter to have it ready for the start of a new growing season. 

Horticulturalist and author Charles Dowding encourages a relaxed approach to the final product. In his No-Dig Children’s Gardening Book (also a good read for adults) he says that mature compost can be anything from ‘slightly lumpy and fibrous to quite fine and soft’. It all depends on the materials that went into making it and they will all decompose at different rates.

‘It doesn’t need to look perfect – woody bits in your compost make great food for fungi.’

He cautions against sieving compost as it can damage microbes.

What’s the difference between compost and humus?

The term compost describes materials that are still breaking down whereas humus is what’s left when breakdown is no longer taking place and the usable chemicals in the organic matter have been extracted by the micro-organisms.

It takes years for compost to decompose into a humus state. Even mature compost isn’t really ‘finished’ since bugs and fungi still have material to work on. Some gardeners have a bank of composters and leave the final one to break down completely into humus.  

A bumper crop

Adam and Hayley decided to leave their compost for about a year so they could use it in a compost mix for growing potatoes.

With first-time use of a Green Johanna, it can take 6-8 months for compost to be ready for use. After that, depending on conditions, it’s usually 4-6 months. With regular cold composting it’s usually between 6 months to 2 years.

Great compost accelerator

The couple also used a bokashi bin alongside their Johanna.  The pre-compost that a bokashi bin produces makes an excellent compost accelerator, raising temperature and speeding up decomposition. Fermented bokashi mixture is usually quite wet so needs to be balanced with plenty of carbon-rich materials. The bokashi mixture will then break down in the composter. 

 ‘Bokashi has become a really useful part of our composting process,’ said Adam. ‘We put all our food waste straight into the bin and give it a few sprays of Bokashi spray, then once it’s full and has been left to ferment we transfer it to the Johanna.’

It usually takes them around one to two weeks to fill the Bokashi bin with their kitchen waste, which is usually vegetable scraps along with some beans. They then use their smaller kitchen caddy to take food waste to the Johanna while the Bokashi bin is ‘doing its thing’.

Food waste provides the compost mix with nitrogen-rich content, which must be balanced with shredded carbon-rich materials (dead leaves, twigs, branches, wood chips, paper waste) and regularly aerated to get oxygen into the pile.

The verdict on the Johanna:

With previous composting attempts, the couple had experienced slow breakdown of waste materials with hardly any compost produced.  

 ‘The Johanna is much better built and works faster at breaking down all the waste,’ said Adam.

The couple feel their efforts with the Johanna and Bokashi have paid off – not only are they recycling all their food and garden waste nature’s way, but they also get to make their own delicious home-grown spuds. What’s not to like? 

If you flush away fats – think again!

If you don’t know what a fatberg is, you’ve probably never had sewage flooding your home (apologies to anyone who happens to be eating).  

Fatbergs are giant grease balls that are formed when fat attaches to sewer walls, slowly accumulating other items that should never have been flushed away, such as wet wipes.

These fat balls get bigger and set as hard as concrete, causing huge blockages. This results in flooding and sewage backflow and costs £100 million each year in repairs.  

In 2017 a fatberg in Whitechapel, London, made headlines – it was longer than two Wembley football pitches and weighed the same as 11 double-decker buses.

So if you are among the half of the population that unwittingly contributes to fatbergs by pouring fats down the sink or drain, then please think again.

Can I pour away milk?

Some people think that flushing fats away with hot water and washing up liquid makes them magically disappear. Wrong. Instead, thousands of tonnes of fats, oils and grease flow into our sewers each year – a disaster in the making.  

It’s not a nice subject to talk about but education is vital. Many people are not aware that even small amounts of food substances, such as crumbs, butter, margarine, lard, cooking sauce, should never go down the drain. It’s not always obvious – did you know that milk is fatty enough to contribute to a blockage?

What can we do about it?

We need to spread the word about what a great resource used cooking oil is. Did you know there are facilities at hundreds of household recycling centres across the country for the collection of used cooking oil?

 The collected oil is refined into a biofuel to create green electricity. Check whether your local site has such a facility and if not ask the local councillors responsible for recycling to look into providing one.  

 Our family has been recycling our used cooking oil this way since 2010 when I read in the local press about a collection facility at my nearest recycling site. I’m surprised more people don’t know about this.   

The oil is collected by vehicles converted to run on the same biofuel and taken to purpose-made generators. Once refined, the biofuel has huge potential – one litre generates enough clean electricity to make 240 cups of tea, while one tonne can provide enough to power the average home for a year.

I used to pour the used oil into various bottles and containers but this was quite messy and I just had to hope the filled containers wouldn’t fall over in the car on the way to the recycling site. Life became easier when we got a purpose-built kitchen oil container (pictured) that enables us to safely store the oil until the next trip to the recycling centre. Read more about the container here.

Pouring used cooking oil into the kitchen oil container to store

Carrying oil safely in the car

Adding the oil to the collection facility at the local household recycling centre

What about wet wipes?

There was good news for the environment earlier this year when the Government announced that wet wipes containing plastic are to be banned from sale in the UK.

Wet wipes flushed down toilets cause 93 per cent of sewer blockages and in the UK we use 11 billion of them a year. Most wet wipes contain 90 per cent plastic, which is almost as bad as putting a plastic bag down the loo.

The BBC nature documentary Blue Planet brought the environmental impact of wet wipes to the public’s attention in 2017, creating demand for flushable products.

But many wet wipes labelled as “flushable” contain hidden plastics, and do not actually break down properly in the drain despite advertising claims.

 According to Peter Henley, of the Water Research Centre, international testing measures are needed to avoid cheap, non-verified products that don’t disintegrate well (even if they are technically non-plastic and biodegradable) coming onto the market.

Your best bet is to bin every wipe. The plastic ban should mean that even if wipes do end up going down the drain for whatever reason, any damage caused will be minimised.

Boots and Aldi have already stopped selling wet wipes containing plastic.

Plastics in seas and oceans

But wet wipes aren’t the only nasties containing hidden plastics that get flushed away, and the damage doesn’t end in sewers.

Millions of pieces of plastic end up in rivers and seas every day, causing huge damage to wildlife and the environment.

 These plastics are found in:

Disposable gloves

Nappies

Facemasks

Cotton buds

Contact lenses

Plasters

Bandages

Razor blades

Dental floss

Period products

Condoms

Plastic in the oceans breaks down into microplastics, which poison the ecosystem. When plastic in the water does eventually break down from exposure to the sun, it releases greenhouse gases in the form of methane and ethylene.

If you’re appalled by this situation, you might want to join this month’s Unblocktober campaign. This is an annual month-long drive to inform people how they can help to save the sewers and seas.   

For information, tips and advice see Unblocktober | A month to Save Our Sewers and Seas

Julie

Green Cone still going strong after 25 years

Although a Green Cone is expected to last for at least 10 years, customers often report their Cone has lasted a lot longer than this.

The oldest Cone that we’ve heard of belongs to a lady in Scotland, who got it through her local authority, Argyll and Bute District Council, 25 years ago.

The customer’s daughter contacted us when the Cone’s lid blew off in a storm and Great Green Systems replaced it free of charge.

 She said: ‘The Cone is still going strong, a real asset in a rural area where there is no specific collection of food waste. ‘

Another Cone going strong, and coping with extreme heat, is one that was taken to Spain by its owner, Angela, nearly 20 years ago when she bought an old Spanish farmhouse.   

Angela knew the Cone worked well at home in England so it would be an even greater asset in Spain, with heat, foxes and rodents to contend with. The family took their Cone over to Spain in their car.

‘We love our Cone and it is really, really useful,’ says Angela.  ‘I must say that we have been surprised and delighted that the actual Cone has lasted brilliantly all these years. We wouldn’t want to be without it.’

For several years the family made annual trips to their Spanish house, spending working holidays getting the house and garden ready for their eventual move.

On one visit a big family birthday was celebrated with 10 guests staying for a full week. The Cone’s underground basket (which is where food waste lands) was full after the week, but when the family returned months later they were delighted to find that the basket’s contents had almost completely vanished.

A long reign in Spain – Angela’s Green Cone outside her Spanish farmhouse.

The family relocated to Spain a few years ago and over the years Angela has seen big changes there in attitudes to recycling food waste.

She says: ‘Things have become easier over the past few years as Spain has started to install special organic recycling bins, which have a swing top and drop waste into an underground receptacle that is then cleared very regularly by the council.  

A good ecological cycle

‘So, from nothing less than 20 years ago, we have multiple ways of safe and hygienic organic waste disposal, the most convenient of which is our Cone.

‘To be honest, it is as much of a pleasure to take the bin out to the Cone as it is to go out and pick veggies for supper because it is useful to process things ourselves and know that we are using a good ecological cycle for production and waste.’ 

The couple grow a lot of their own produce and have had to contend with many challenges posed by the climate and mountainous geography. Their Cone has been moved four times, with placement being determined by where there is sufficient depth to site the basket, which needs to be embedded in soil.

‘When there is torrential rain and it floods over the terrace behind our land it can remove soil down to the bedrock, it was quite a shock the first time we saw this and realised just how little soil covering there is in some places,’ Angela says.

‘As a consequence, we have built raised beds for some of our produce and will be looking to make deeper beds for some others as time goes by.’

A 5000-litre tank for rainwater has been an essential investment.

Angela says the Spanish are becoming much more interested in tending gardens.

 ‘People have been quite interested in our approach (raised beds, adding marigolds for insect control and so on). Possibly they will become more interested in composting as well since many areas have banned burning of waste, partly as a fire hazard and partly air pollution, so things are changing gradually.’

How can I reduce food waste?

I cook to live, my husband lives to cook.

We share the cooking. On my days everybody knows what they’ll be getting as I have four signature dishes (by signature dish, I mean ‘thing I can cook without a recipe’). I’m no foodie, I like to get cooking out of the way as quickly as possible so I can get on with living.

My cooking habits are good in terms of waste prevention because I buy the same things every week and everything gets used up.

But my husband is a different animal. On his cooking days we never know what we’ll be getting because it seems to depend on what the food fairies whisper in his ear. I shop online because I hate supermarkets. If I ask him what he wants me to add to the online shop, he gets all stressy, saying ‘I can’t shop like that, I don’t know what I’ll feel like cooking!’ (No, I’m not married to Gordon Ramsay).

So I leave him to do his own shopping in person in the actual supermarket. He likes to see, touch and smell food; it inspires him. I think there must be some French strain somewhere in the Birmingham/Dundee DNA mash-up of his family.

This dual shopping routine is far from ideal, since it means he might buy things I’ve already bought. It’s why we ended up recently with three full jars of ground ginger. Not the end of the world, of course, since it stores well and we like ginger biscuits, but that’s the only over-consumption I’m admitting to since I’d be too ashamed to tell you the whole truth.

Obviously, we compost unavoidable food waste in our Green Johanna, but composting should ideally be the final stage in the food waste hierarchy after meal planning and food storage. The environmental cost involved in the production and transporting of food is so high that prevention is better than composting.

We know we should plan meals in advance based on knowing what we already have. We know that, and yet sometimes the pace of modern life means we fall short. Stuff happens. We forget our list. We stress shop. Our husband fails to check the ground ginger situation.

So, when I read about the Kitche free mobile app I was immediately interested.

Kitche’s premise is that fighting food waste starts at home by buying what you eat and eating what you buy.  If we did this, we would help prevent the staggering 4.5 million tonnes of food waste created in the UK each year – enough to fill eight Wembley stadiums.

It goes without saying that by doing this you will save yourself a chunk of money without even depriving yourself of anything. The average family in the UK throws food worth £730 in the bin every year. When it comes to tightening the belt on household expenditure, such unnecessary waste is low-hanging fruit.

The app enables you to scan food products from major supermarkets receipts with a snap of your camera so you can keep track of food you’ve got at home, even when you’re on the move. In this way you stop robotic consumption and shop smartly, not blindly.

10 easy tips to cut food waste

These tips taken from Nancy Birtwhistle’s best-selling book Green Living Made Easy are easy to incorporate into your everyday routine.

1. Thyme to save herbs

To double the life of shop-bought fresh herbs: dampen a double-thickness sheet of kitchen paper with cold water. Lay on it either parsley, coriander, dill, thyme, rosemary or mint after removing from the packet. Roll loosely so that all the sprigs are surrounded by a cold, damp blanket, then pop in an airtight box and keep in the fridge.

  • 2. Freeze cheese please

To avoid cheese becoming hard and dry: buy a large slab of cheese – cut the block into 100g pieces. Put one block back in the original pack to use this week, then put the remaining pieces in a container in the freezer. Then for the next few weeks you have cheese that can be grated or used once thawed in the fridge for an hour or so.

  • 3. Take stock of veggies

The best way to accumulate sufficient veggie bits for a stock is to keep a large plastic box or bag in the freezer and pop into it the ends of celery, parsley stalks, trimmings from onions, carrots, parsnips, pea pods, leeks and any other tasty veg. Once you have a large box or bagful, place in a large pan and simmer for half an hour or in a slow cooker for several hours. Strain, keep in the fridge for five days or freeze to be used later as a base for casseroles, soups, pie fillings and stews.

  • 4. Piece of cake

Use a roll of reusable baking parchment instead of new greaseproof paper every time you bake. Use the bases of your favourite cake tins as a template, then cut the reusable parchment to size. Wash between uses.

  • 5. Bag-tastic

 The plastic liners in cereal boxes can be used to separate almost anything and make a good alternative to cling film. If you unpeel the seams of the bag this can then be used for pastry rolling. They also make good bread bags and freezer bags, sandwich wraps and for using in lunch boxes and picnics.

  • 6. Don’t shell out on eggs

Many baking recipes call for only egg yolk or egg whites, leaving leftovers of both. Egg whites freeze beautifully (for up to a year) and thaw in a bowl at room temperature in an hour or so.

Egg yolks can be frozen but need a light sprinkle of salt or sugar to prevent them going rubbery. Nancy rarely freezes yolks, instead making a quick lemon curd using the yolks, sugar, butter, lemon juice and zest. Stir on a low heat for several minutes until the mix slowly thickens. Store in a clean jar in the fridge.

  • 7. Scrap happy

Packs of bacon can lead to waste if a couple of rashers are left in the packet to dry up and go off before you know it. Instead, keep a small box of cooked scraps in the freezer. Cook the random rashes until crispy. Break them up into small pieces and pop them in a box to save in the freezer. Use these scraps as a pizza topping, stirred into pasta or sprinkled over salads.

  • 8. Spice of life

Nancy buys ginger or lemongrass only once or twice a year, keeping them in a plastic box in the freezer. She breaks ginger root into chunks and grates both the skin and flesh from frozen, then puts the unused root back into the box for next time.

She also freezes chillies and uses them from frozen. With lemongrass – trim the root ends and leaves, then freeze and slice from frozen to use.

  • 9. The besto pesto

Did you know that nettles have more vitamins and nutrients than many other green veggies? The sting is destroyed by blanching. Wear rubber gloves to handle them. Bring a pan of water to the boil, then add the leaves. Have a bowl of cold water at the ready. Blanch the leaves in boiling water for 30 seconds then use tongs to remove them and plunge into cold water to halt the cooking process. Drain the leaves, dry on a clean cotton towel and squeeze as much water out as you can. Whizz in a blender with parmesan, garlic, nuts, lemon juice, salt, pepper, olive oil. Freeze in an ice cube tray.

It’s a good idea to also freeze leftover shop-bought pesto in an ice cube tray, since it needs to be used within five days of opening.

  • 10. Chit chat

Save egg boxes for potato chitting (encouraging them to sprout). The cardboard moulds keep potatoes upright, the soft material doesn’t damage the shoots and the open design offers plenty of light.

Julie

How to get the most from your Green Cone

Get the basics right and life with a Cone at home is simple and convenient.

The Green Cone’s basic needs are:

  • A sunny spot
  • Well-draining soil (not clay or chalk)
  • Additions of food waste – no garden or paper waste
  • Accelerator powder to boost digestion

Where shall I put my Green Cone?

When thinking about where to place the Cone, as well as finding a sunny spot it’s a good idea to think about how easy it will be to get to in winter months to empty your kitchen caddy.   

More than 90% of the waste added to the Cone will be turned into water, which must be able to drain freely away for the unit to work properly.

Food waste is digested by micro-organisms in the Cone’s underground basket. Food waste should never come higher than the basket into the Cone itself.

How do I know if I have good drainage?

If you’re not sure whether your soil has good drainage or not, you can check by doing the following: dig the hole required for the Cone (about 70cm wide by 54cm deep) and pour a bucket of water into it. If the water remains for more than 15 minutes you have poor drainage and will need to enlarge the hole to 90cm wide by 70cm deep.

Provide extra drainage by mixing soil from the hole with gravel, stones, or small pieces of broken bricks and pots and placing some of this mix in the base of the hole so that when the assembled Green Cone is added the basket sits 3cm below ground level. Then use the gravel/soil mix to backfill gaps around the Cone until the bottom rim of the green outer cone is fully covered.

How do I look after my Green Cone?

Basic maintenance involves ensuring that the Cone’s green rim always remains below ground level.

In the first few weeks after installation check that soil has not settled and left the green rim exposed. This could also happen after heavy rain. If this is the case, make sure to add additional soil and compact it around the Cone to keep the rim securely underground.

How much waste is too much for the Green Cone?

Remember that food waste should only ever be in the underground basket: never allow waste to build up so that it is above ground level inside the Cone itself.

The Cone is expected to cope with the food waste produced by the average family of four, but this can vary greatly. If you find you regularly have more waste than the Cone can cope with you may need another Cone to cope with all your leftovers.

If you find that in autumn and winter the digestion process has started to slow down and the waste in the basket doesn’t appear to be reducing, simply add a little more accelerator powder.

Why the Green Cone is a bear necessity

The Green Cone was designed by an engineer in Canada to solve the problem of bears pushing over rubbish bins to get to food waste. While bear-proofing may not be on your list of requirements, the Cone is sure to deter local foxes.

If vermin are a problem locally, you can add additional deterrents by hardening the area close to the Cone with bricks or rocks and by positioning the Cone away from fences, woodpiles and bushes.

If pet waste is to be added to the Cone, the unit should not be placed in soil where vegetables are grown or close to any water source. Pet waste should only be added  in small amounts and never in bags.

No bags of any kind should ever be added to the Cone as this will hamper the digestion process.

Spare Parts